DIY Injection Molder Built From A Cheap Pneumatic Press

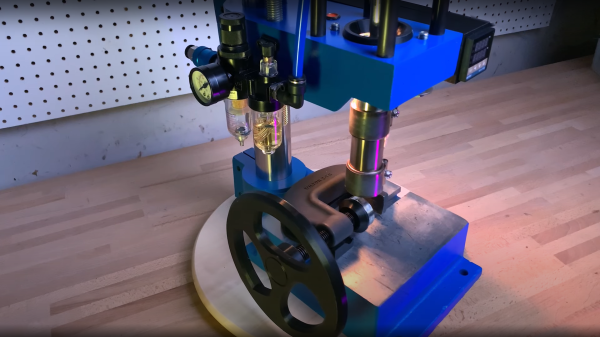
[Kurt Schaefer] was watching YouTube videos of people making molds for injection molding purposes using what he considered to be the toy 3018 CNC machines, and looking at the results, decided he needed a piece of the action. However, once you have molds, the next obvious issue to address is lack of access to an injection molding machine. But these things are expensive. As luck would have it, you can get a nice-looking pneumatic press for less than $350, and with a little more money spent, [Kurt] found he could convert it into a functional injection molding machine (video, embedded below), and get some half-decent results out of it.

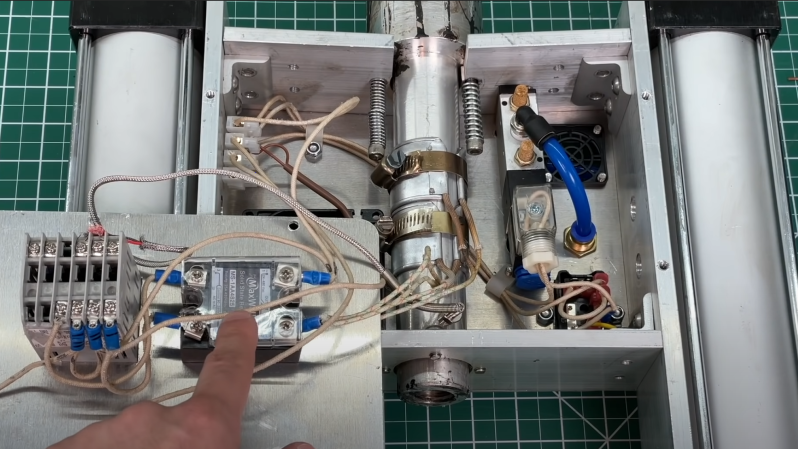
After ordering the press on eBay, what eventually arrived was quite a mess, having clearly been inadequately packed for its weight, and had sustained some damage in transit. Despite this, it seemed the functional bits were fine, so [Kurt] decided to press on with the build. The first obvious change is the requirement of a heated chamber to deal with the feedstock material. Using an off-the-shelf injection molding chamber by buster beagle 3D, only a few standoffs and a support bracket needed machining in order to complete the mechanics. A common PID controller available from the usual suppliers, with some heat bands wrapped around the chamber, dealt with the injection temperature requirements, and some 3D printed enclosures wrapped it all up neatly.

After some initial wobbles, and a couple of hacks to the design, [Kurt] got some pretty good results out of this simple setup, and it appears to be pretty tune-able and repeatable, which will help maintain the quality of those results. In short, a neat hack of easy to get parts, and perhaps a welcome addition to a hackerspace near you?

3D printed parts are available on the Thingiverse page, as well as a Fusion360 CAD model. The shopping list for parts can be found in the video description, if you want to have a go at reproducing this.

We’ve seen a few DIY injection molding attempts over the years, like this slick plastic molding setup. Here’s one with 3D-printed molds, and if you just need something the right shape, you could just injection mold with a hot glue.

Continue reading “DIY Injection Molder Built From A Cheap Pneumatic Press”

injecto doing it's thing

Tiny Homemade Injection Molder

With 3D printing continually gaining ground, some hackers might not see the need for traditional injection molding. After all, you can tweak the code or the model and print dozens of different iterations with fairly minimal lead time. Things get trickier when you need to print hundreds or thousands of the same thing and that ten-hour print time adds up quickly. [Actionbox] built a tiny injection molder they dubbed INJEKTO to speed up their manufacturing.

The design was optimized to be accessible as it is held together with brackets and cheap aluminum flat stock. The hardest part to source is the heating chamber, as it is a piece of turned aluminum. A PID controller keeps the temperature relatively stable and heats the plastic pellets you can dump in the top. Next, you’ll need an external air compressor to power the dual 2″ pneumatic pistons. The pistons push the plastic out of the spring-loaded extruder nozzle. [Actionbox] is already planning on a second version with 4″ pistons that provide significantly more force to extrude larger amounts of plastic as the current version tops out at about 27 grams.

Injection molding still needs a heavy-duty mold to inject into, which can be hard to machine. So until we can 3D print an injection mold, this multi-head 3D printer is something in between a 3D printer and an injection molder, as it can print a dozen of the same thing, speeding up that print time.

Continue reading “Tiny Homemade Injection Molder”

THICC GBA SP Mod Gets Easy Install Ahead Of Release

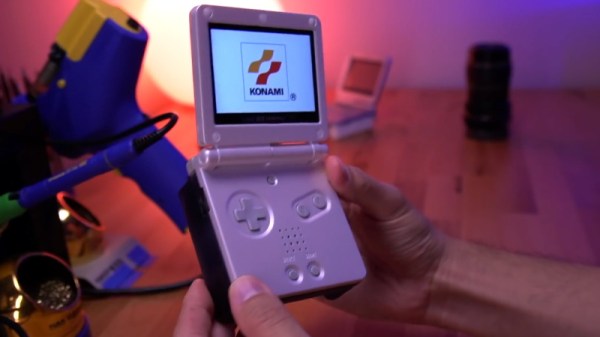
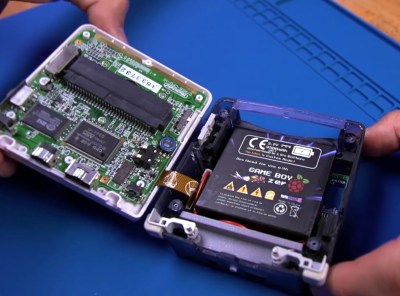
Back in August we covered a unique modification for the Nintendo Game Boy Advance SP which replaced the handheld’s rear panel with an expanded version that had enough internal volume for an upgraded battery, a Bluetooth audio transmitter, and support for both Qi wireless and USB-C charging. The downside was that getting the 10 mm 3D printed “backpack” installed wasn’t exactly the most user-friendly operation.

But today we’re happy to report that the dream team behind the so-called THICC BOI SP have not only made some huge improvements to the mod, but that they intend to release it as a commercial kit in the next few months. The trick to making this considerable upgrade a bit more forgiving is the use of a bespoke flat flex cable that easily allows the user to solder up all the necessary test points and connections, as well as a custom PCB that pulls together all the hardware required.

In the video below, [Tito] of Macho Nacho Productions goes over the latest version of the mod he’s been working on with [Kyle] and [Helder], and provides a complete step-by-step installation tutorial to give viewers an idea of what they’ll be in for once the kit goes on sale. While it’s still a fairly involved modification, the new design is surprisingly approachable. As we’ve seen with previous console modifications, the use of flat flex technology means the installation shouldn’t pose much of a challenge for anyone with soldering experience.

The flat flex cable allows for an exceptionally clean install.

Some may be put off by the fact that the replacement rear panel is even thicker this time around, but hopefully the unprecedented runtime made possible by the monstrous 4,500 mAh LiPo battery pack hiding inside the retrofit unit will help ease any discomfort (physical or otherwise) you may have from carrying around the chunkier case. Even with power-hungry accouterments like an aftermarket IPS display and a flash cart, the new battery can keep your SP running for nearly 20 hours. If you still haven’t beaten Metroid: Zero Mission by then, it’s time to take a break and reflect on your life anyway.

According to [Tito], the logistical challenges and considerable upfront costs involved in getting the new rear panels injection molded in ABS is the major roadblock holding the release of the kit back right now. The current prototypes, which appear to have been 3D printed in resin, simply don’t match the look and feel of the GBA SP’s original case well enough to be a viable option. A crowd funding campaign should get them over that initial hump, and we’ll be keeping an eye out for more updates as things move along towards production.

The previous version of this mod was impressive enough as a one-off project, but we’re excited to see the team taking the next steps towards making this compelling evolution of the GBA more widely available. It’s a fantastic example of what’s possible for small teams, or even individuals, when you leverage all the tools in the modern hardware hacking arsenal.

Continue reading “THICC GBA SP Mod Gets Easy Install Ahead Of Release”

Injection Molding Silicone Parts For Under $50

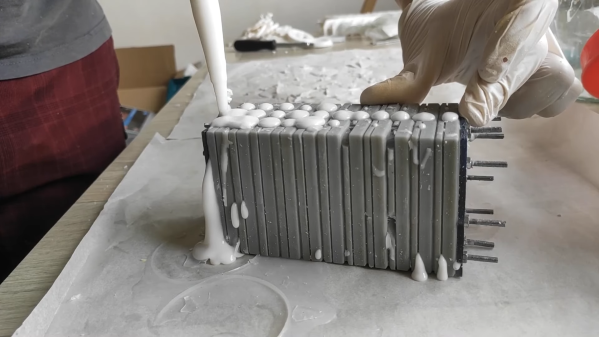
You’ve likely seen many tutorials on making silicone parts using 3D printed molds online. The vast majority of these methods use a simple pour method to fill the mold. This relies on careful degassing and gentle pouring to reduce the presence of bubbles in the final result. [Jan Mrázek] has been working on an alternative method however, that allows for injection molding at low cost in the home shop.

The process relies on the use of printed resin molds. [Jan] notes that this generally necessitates the use of condensation-cure silicones, as additive types don’t cure well in resin molds. The condensation silicone is mixed up, degassed, and poured into a standard cartridge. From there, it’s installed in a silicone delivery air gun, which uses compressed air to force the silicone out of the nozzle and into the waiting mold.

It’s basically using a bunch of home DIY gear to create a cheap injection molding solution for silicone parts. [Jan] notes that there are a few mods needed to mold design to suit the process, and that 400-800 kPa is a good pressure to inject the silicone at.

Having the silicone injected under pressure is great for complex mold designs, as it forces the material into all the little difficult nooks and crannies. Of course, we’ve seen other methods for making silicone parts before, too. Be sure to sound off in the comments with your own favored techniques for producing quality silicone parts. Video after the break.

Continue reading “Injection Molding Silicone Parts For Under $50”

Injection Molds From Your 3D Printer

Last time we checked in with [CrafsMan] he had bought a benchtop injection molding machine. This time, he shows off how to 3D print molds. If you have ever had to spend to make tooling for injection molding, you’ll appreciate being able to make molds relatively inexpensively.

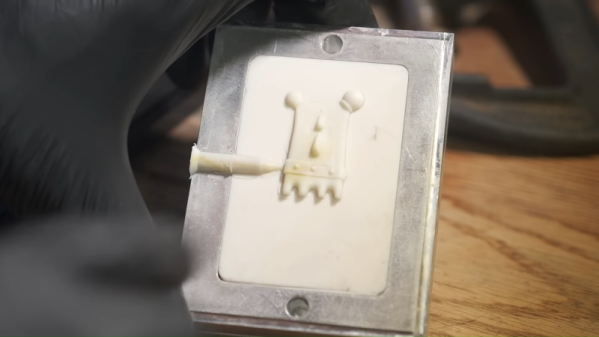
To test his workflow, [CrafsMan] created a little 3D figurine and brought it into TinkerCad. From there he created a mold and used Lychee Slicer to print it using resin.

Continue reading “Injection Molds From Your 3D Printer”

A Plastic Injection Machine You Can Use At Home

3D printing is all well and good if you want one of something, but if you want lots of plastic parts that are all largely identical, you should consider injection molding. You can pay someone to do this for you, or, in true hacker fashion, you can build an entire injection molding setup in your own garage, as [Action BOX] did.

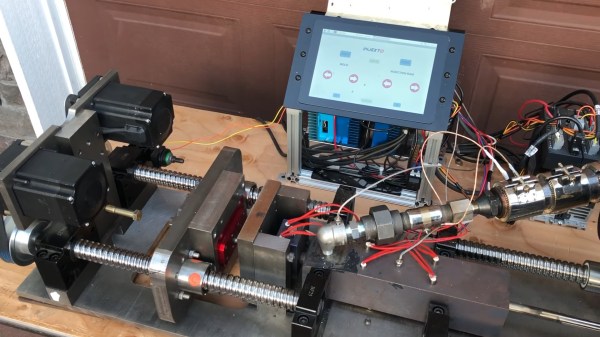
The build relies on a pair of beefy 3hp motors to drive the screw-based injection system. These are responsible for feeding plastic pellets from a hopper and then melting them and filling the injection reservoir, before then forcing the hot plastic into the mold. Further stepper motors handle clamping the mold and then releasing it and ejecting the finished part. A Raspberry Pi handles the operation of the machine, and is configured with a custom Python program that is capable of proper cycle operation. At its peak, the machine can produce up to 4 parts per minute.

It’s an impressive piece of industrial-type hardware. If you want to produce a lot of plastic things in your own facility, a machine like this is very much the way to go. It’s not the first machine of its type we’ve seen, either! Video after the break.  Continue reading “A Plastic Injection Machine You Can Use At Home”

Injection-Molded Glass Breakthrough Shatters Ceiling Of Work Methods

Glass is one of humanity’s oldest materials, and it is still used widely for everything from drinking vessels and packaging to optics and communications. Unfortunately, the methods for working with glass are stuck in the past. Most methods require a lot of high heat in the range of 1500 °C to 2000 °C, and they’re all limited in the complexity of shapes that can be made.

As far as making shapes goes, glass can be blown and molten glass pressed into molds. Glass can also be ground, etched, or cast in a kiln. Glass would be fantastic for many applications if it weren’t for the whole limited geometry thing. Because of the limitations of forming glass, some optic lenses are made with polymers, even though glass has better optical characteristics.

Ideally, glass could be injection molded like plastic. The benefits of this would be twofold: more intricate shapes would be possible, and they would have a much faster manufacturing time. Well, the wait is over. Researchers at Germany’s University of Freiburg have figured out a way to apply injection molding to glass. And it’s not just any glass — they’ve made highly-quality, transparent fused quartz glass, and they did it at lower temperatures than traditional methods. The team used x-ray diffraction to verify that the glass is amorphous and free of crystals, and were able to confirm its optical transparency three ways — light microscopy, UV-visible, and infrared measurements. All it revealed was a tiny bit of dust, which is to be expected outside of a clean room.

Continue reading “Injection-Molded Glass Breakthrough Shatters Ceiling Of Work Methods”