DOTS Uses Paint To Control Raspberry Pi 2

Two tables down from us at SXSW Create the Raspberry Pi foundation had a steady stream of kids playing Minecraft on Raspberry Pi, and picking up paint brushes. The painting activity was driven by a board they spun for the event that used conductive paint to control the Raspberry Pi 2.
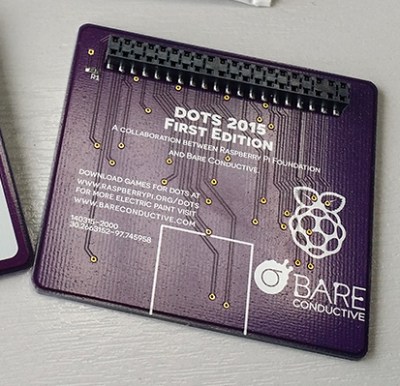
rear-of-the-raspberry-pi-2The board uses the HAT form factor which it a fancy name for a shield (also a clever one as it stands for “Hardware Attached on Top”). You can see the back side of the board in this image. It utilizes an extremely low-profile surface mount pin socket.

The front side exposes several circular pads of copper which build up a “connect-the-dots” game that is played by painting conductive ink on the surface. This results in an airplane being pained on the board, as well as displayed on the computer. There is a set of pads that allow the user to select what color is painted on the monitor.

We like this as a different approach to education. Kids are more than used to tapping on a touchscreen, clicking a mouse, or pounding a keyboard. But conductive ink provides several learning opportunities; the paint simply connects the inner circle with the outer circle; one of these circles is the same on every single dot (ground); anything that connects these two parts of the dot together will result in input for the computer. Great stuff!

The foundation is taking the boards to Maker Faire Bay Area next month so stop by to see these in action. You can read about the production process for the DOTS board on the Raspberry Pi website. They’re giving away a few boards to software developers who want contribute to the project. And our video interview with [Matt Richardson] is found after the break.

Continue reading “DOTS Uses Paint To Control Raspberry Pi 2”

Colorful Clock

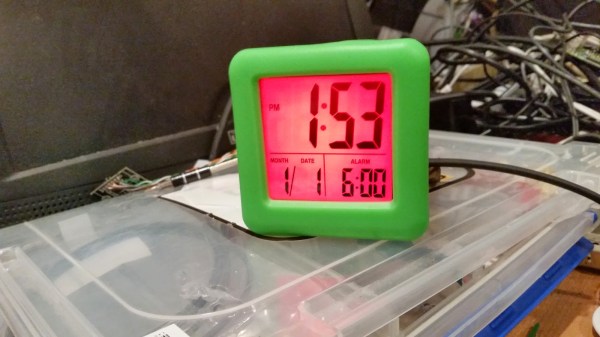
A Colorful Clock For Toddlers

[Don] and his wife were looking for a way to teach their two-year old daughter how to tell time. She understood the difference between day and night, but she wasn’t old enough to really comprehend telling the actual time. [Don’s] solution was to simplify the problem by breaking time down into colored chunks representing different tasks or activities. For example, if the clock is yellow that might indicate that it’s time to play. If it’s purple, then it’s time to clean up your room.

[Don] started with a small, battery operated $10 clock from a local retailer. The simple clock had a digital readout with some spare room inside the case for extra components. It was also heavy enough to stay put on the counter or on a shelf. Don opened up the clock and got to work with his Dremel to free up some extra space. He then added a ShiftBrite module as a back light. The ShiftBrite is a high-brightness LED module that is controllable via Serial. This allows [Don] to set the back light to any color he wants.

[Don] already had a Raspberry Pi running his DIY baby monitor, so he opted to just hijack the same device to control the ShiftBrite. [Don] started out using a Hive13 GitHub repo to control the LED, but he found that it wasn’t suitable for this project. He ended up forking the project and altering it. His alterations allow him to set specific colors and then exit the program by typing a single command into the command line.

The color of the ShiftBrite is changed according to a schedule defined in the system’s crontab. [Don] installed Minicron, which provides a nice web interface to make it more pleasant to alter the cron job’s on the system. Now [Don] can easily adjust his daughter’s schedule via web page as needed.


Tesla Truck

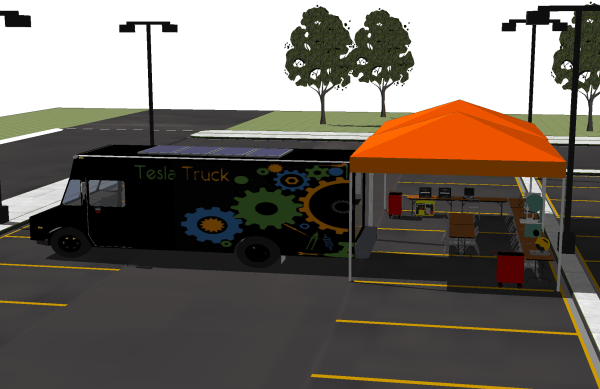
Tesla Truck Wants To Bring The Makerspace To The Children

With so many budget cuts, many public schools find themselves having to cut “unnecessary” programs such as shop, art, and music classes. They simply can’t afford to keep those things running and also teach other important concepts like math, language, and history. The obvious side effect is that kids don’t have a safe place to be creative and learn to make things with their hands.

Luckily, the maker movement has been rapidly growing over the last few years with makerspaces popping up all over the globe. These places are picking up the slack left behind by the budget cuts that hurt our public schools. But while makerspaces are getting more and more common, they still don’t exist everywhere. Even in those places lucky enough to have a makerspace, not everyone is aware that they exist and not everyone can afford to be a full-time member. This is where Tesla Truck comes in.

The Tesla Truck’s mission statement is “to provide a cutting-edge, mobile, hands-on STEM lab, where students, teachers, and makers can teach, learn, collaborate, create, and innovate.” It’s a noble cause for sure, but how do they plan to do this? This group intends to outfit a truck with the kinds of tools every maker dreams of. These would include a 3D printer, laser cutter, CNC plasma cutter, mill and lathe, electronics bench, and more.

Obviously just having a bunch of high-end tools is not going to cut it. Someone is going to have to teach people how to properly use these tools. The group behind the Tesla Truck is made up of educators, engineers, and published researches who have been doing this kind of thing for a while now. This group has been packing up their own personal tools into their hatchbacks and setting up shop in school classrooms around New York City, only to have to break down at the end of the day and bring them all home again. Together with the students, this group has built things like robots, quadcopters, and water purifiers. The Tesla Truck will give them the ability to reach more people much more easily.

The Tesla Truck is looking to raise a total of $62,804.01 to make their dream a reality. They have raised more than half of that outside of crowd funding. They’ve now turned to Indiegogo to raise the last $24,300. They have ten days left and they are almost halfway to their goal. You can watch their campaign video below to get a better feel for what they are all about. Continue reading “Tesla Truck Wants To Bring The Makerspace To The Children”

A Homemade Bubble Robot For The Kids

bubbles-machine

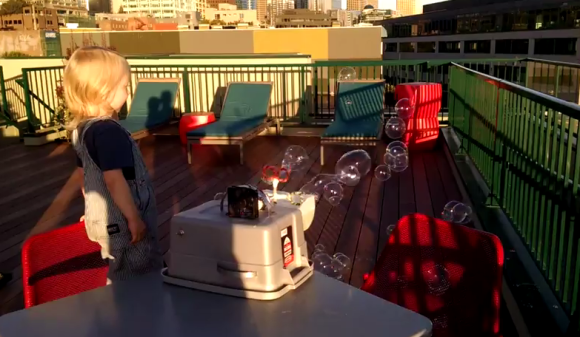
Kids generally can be amused pretty easily, but when jangling keys stop holding their interest you might want to take a look at [drenehtsral]’s new project. He’s created an automatic bubble robot (YouTube link) that keeps the kids endlessly entertained!

The project started as an idea at a festival where one of [drenehtsral]’s kids took great interest at a bubble machine. [drenehtsral] had never heard of a bubble machine before, but it turns out that it’s pretty simple in practice. All that’s required is a tank of soapy water, a motor to turn the bubble wands, and a fan to form the bubbles and make them waft gently through the air.

[drenehtsral] also used a 12V battery for power, some other hardware to hold it all together, and a 5V regulator and some other control electronics for the fan and the motor. He notes that he could have bought a bubble machine but in true hacker style found it fun to build himself. The next step in this project could be something to vary the size of the bubbles, or perhaps a set of wheels for the robot so it can entertain the kids on the move!

Continue reading “A Homemade Bubble Robot For The Kids”

The Lightgame Project: A Multiplayer Arduino Game

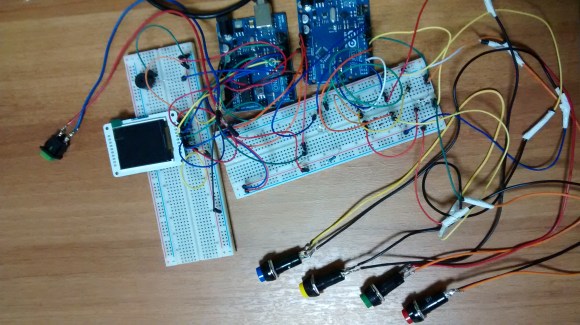
lightgame_3Summer is upon us. The Lightgame Project is a multiplayer reaction time based game built around the Arduino. It’s a perfect rainy day project for those restless kids (and adults!). Designed by two undergraduate students [Efstathios] and [Thodoris] for a semester long project, all the hard work has already been done for you.

There are tons of reasons we love games that you can build yourself. For one, it’s an amazing way to get children interested in hobby electronics, making, and hacking. Especially when they can play the game with (and show off to) their friends. Another reason is that it is a perfect way to share your project with friends and family, showcasing what you have been learning. The game is based on your reaction time and whether or not you press your button when another players color is shown. The project is built around two Arduinos connected via I2C. The master handles the mechanics of the game, while the slave handles the TFT LCD and playing music through a buzzer.

I2C is a great communication protocol to be familiar with and this is a great project to give it a try. [Efstathios] and [Thodoris] did a great job writing up their post, plus they included all the code and schematics needed to build your own. It would be great to see more university professors foster open source hardware and software with their students. A special thanks goes out to [Dr. Dasygenis] for submitting his student’s work to us!

Continue reading “The Lightgame Project: A Multiplayer Arduino Game”

Educational Circuit Box For Young Aspiring Hackers

image4

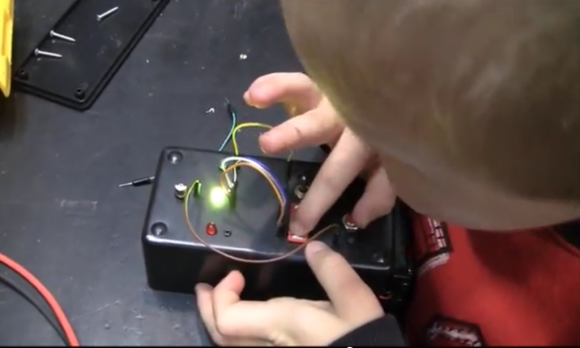
Here’s a great idea: an Educational Circuit Box you can make to get kids interested in electronics! What looks like a boring project box with wires sticking out might just become a box of wonder and curiosity for young ones.

[Fileark] built this for his son, and has happily shared it on his blog for others to recreate. As you can probably guess from the picture, it makes use of a project box, LEDs, buttons, switches, and female header pins. Using the included breadboard jumpers picked up off of eBay, it allows your kid to learn about circuits by plugging in different components and seeing what happens.

The majority of the parts he used were salvaged from scrap electronics he had laying about. It’s a great way to turn e-waste into something fun and educational for kids! For more information about the project, stick around after the break to see [Fileark] explain (and his son demonstrate!) it in a video.

Continue reading “Educational Circuit Box For Young Aspiring Hackers”

Glowing Easter Eggs More Fun Than A Dye Job

glowing-easter-eggs

This is a project to keep in mind for the kids next Easter. It uses electronics to light up your eggs instead of dying them (translated).

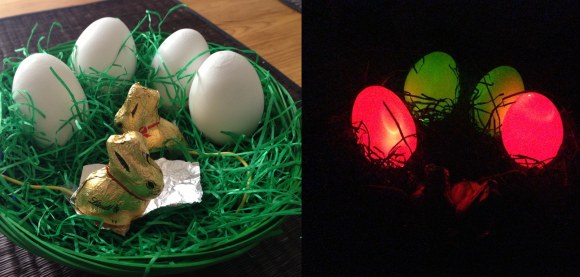
The project still has one foot in the old tradition as it starts by blowing out the eggs. The larger hole on the bottom, which was used to evacuate the yoke an albumen, ends up being just the right size to insert an LED. You could simply hook these up to a battery and resistor, but [Rene] decided to add some functionality by hiding an Arduino board in the fake grass of the Easter basket. This way the way the RGB LEDs can glow, blink, and rotate through different colors. And the foil covered chocolate bunnies aren’t just for show. He wired them up to the I/O pins of the Arduino to use as a switch. When they’re both placed on the same piece of foil it completes the circuit and starts the light show. See for yourself in the clip after the jump.

Of course for the older kids you’re going to need something more complicated to keep their attention.

Continue reading “Glowing Easter Eggs More Fun Than A Dye Job”