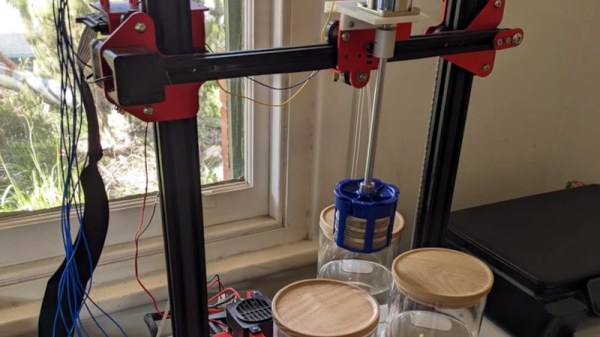
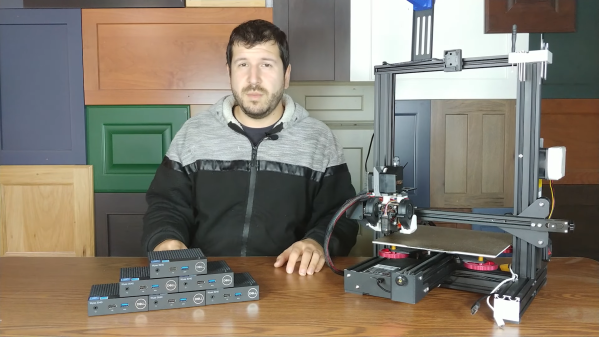
Art of 3D printer in the middle of printing a Hackaday Jolly Wrencher logo

3D Printering: Switch And Klip(per)

Last time I tried to convince you that, if you haven’t already, you should try running your 3D printer with Klipper. There are several ways to actually make it work.

The first thing you need is something to run the Klipper host. Most people use a Raspberry Pi and if you already have one that runs OctoPrint, for example, you might well use it. Just tuck your SD card away in case you give up and install a fresh Linux system on a new card.

The Creality Sonic Pad has issues, but it does work.

However, a Pi isn’t your only option. You should be able to make it work on nearly anything that runs Linux. We’ve even seen it running on Windows under WSL. If you have an old laptop that can run Linux, that would work, too. We’ve even heard it works on a Chromebook.

The other option is to get a “pad.” Several vendors make touchscreens with some Linux single-board computer bundled together with Klipper preinstalled. For example, there is the Creality Sonic Pad, along with similar devices from other 3D printing companies.

If you decide to go that route, you might want to make sure it is easy to install your own software easily. Some pads, like the Creality unit, are notorious for having so much customization that they don’t lend themselves to upgrades unless they come from the manufacturer. In some cases, you can wipe out the stock firmware and install a normal operating system, but at that point, you could probably just buy a Pi and a touchscreen, right?

Continue reading “3D Printering: Switch And Klip(per)”

Art of 3D printer in the middle of printing a Hackaday Jolly Wrencher logo

3D Printering: Klipper, The Free 3D Printer Upgrade

I have several 3D printers, and I’ve always been satisfied with using either Repetier or Marlin on all of them. There are a few other firmware versions that could run on my hardware, but those two have been all I’ve needed. Sure, it was painful for a while having to juggle features to fit the firmware image onto the smaller microcontroller boards. Now that Marlin supports big 32-bit boards however, that hasn’t been a problem. But recently, I’ve been on a program to switch everything to Klipper.

In this post, I’ll tell you why I did it and give you some data about why you might consider it, too.

The Landscape

Marlin is written in C and burned into a 3D printer’s flash memory. It does a lot. It receives G-code commands, interprets them, and translates them to meaningful actions on the hardware. Modern versions handle automatic transformations to account for lumpy beds, input shaping to reduce shaking, and linear advance to produce better prints.

It might seem simple to control a 3D printer, but there are lots of little details to take into account. For example, if you are moving the head between two XY coordinates and you expect a certain flow rate, then you have to figure out how fast to turn the steppers to get the right amount of plastic out over that time. You also may have to retract before you start a move, make sure temperatures are stable, and transform the actual coordinates based on bed leveling data. There’s a lot going on.

Klipper does the exact same job, but it does it differently. On the 3D printer board is a tiny piece of software that does very little. It’s a bit like a device driver for the printer. All by itself, it does nothing. But it can handle very basic commands that describe how to move the machine.

All the rest of the processing you expect to happen now runs on some Linux computer. That is very often a Raspberry Pi, but it could be a spare laptop, your desktop computer, or anything that will run a reasonable Linux install. Several vendors even sell single-board computers with touchscreens made specifically for running this part of Klipper.

However, even though a screen is nice, you don’t really need it. I’ll talk about that more later.

Continue reading “3D Printering: Klipper, The Free 3D Printer Upgrade”

Art of 3D printer in the middle of printing a Hackaday Jolly Wrencher logo

3D Printering: Adaptive Bed Leveling

Have you ever read about something and thought, “Gee whiz! Why did I never think about that?” That was my reaction to reading about a feature commonly associated with Klipper called adaptive bed leveling or adaptive mesh leveling. Too bad I don’t typically use Klipper, but it all worked out, and I’ll show you how it might work for you.

What Is It?

Time to tram your bed!

Once a luxury, most 3D printers now come with some kind of bed level sensor. The idea is that the printer can probe the bed to determine the shape of the build plate and then adjust the build plate accordingly. So if a particular spot on the bed is 0.5 mm too high, the nozzle can rise 0.5 mm when it is in that area. There are several techniques Marlin firmware uses, including what I usually use: UBL. Some people scan the bed once and hope it won’t change much. Others will do a time-consuming scan before each print.

However, adaptive bed leveling is a bit different. The idea is that the printer only probes the area where the part is going to print. If your print bed is 235 mm x 235 mm but your part is 50 mm square, you could just probe the points under the 50 mm square.

This does several things. For a given number of points, there is less motion, so it should be faster. Also, for the same number of points, you will have a much denser mesh and, thus, a better idea of what the bed is at any given point. You could even reduce the number of points based on the size of the part you are printing.

When you think about it, it is a dead simple idea. What’s not to love? For most print jobs, you’ll have less work for the printer, faster prints, and a denser mesh. But how do you do it?

Continue reading “3D Printering: Adaptive Bed Leveling”

Art of 3D printer in the middle of printing a Hackaday Jolly Wrencher logo

3D Printering: Speed Is So Hot Right Now

Speed in 3D printing hasn’t been super important to everyone. Certainly, users value speed. But some value quality even more highly, and if gaining quality means giving up speed, then so be it. That’s more or less how things stood for a while, but all things change.

The landscape of filament-based 3D printing over the past year or so has made one thing clear: the market’s gotten a taste of speed, and what was once the domain of enthusiasts installing and configuring custom firmware is now a baseline people will increasingly expect. After all, who doesn’t want faster prints if one doesn’t have to sacrifice quality in the process?

Speed vs. Quality: No Longer a Tradeoff

Historically, any meaningful increase in printing speed risked compromising quality. Increasing print speed can introduce artifacts like ringing or ghosting, as well as other issues. Printing faster can also highlight mechanical limitations or shortcomings that may not have been a problem at lower speeds. These issues can’t all be resolved by tightening some screws or following a calibration process.

The usual way to get into higher speed printing has been to install something like Klipper, and put the necessary work into configuring and calibrating for best results. Not everyone who prints wishes to go this route. In 3D printing there are always those more interested in the end result than in pushing the limits of the machine itself. For those folks, the benefits of speedy printing have generally come at too high a cost.

That’s no longer the case. One can now buy a printer that effectively self-calibrates, offers noticeably increased printing speeds over any earlier style machines, and does it at a reasonable price.

Continue reading “3D Printering: Speed Is So Hot Right Now”

An Automated Watch Cleaner From An Older 3D Printer

The many delicate parts in a mechanical wristwatch present a tricky cleaning problem, one that for professionals there is a variety of machines to tackle. As you might expect, such specialty equipment doesn’t come cheap, so [daveburkeaus] came up with his own solution, automated using an older 3D printer.

The premise is straightforward enough: it’s a machine with a succession of stations for cleaning, rinsing, and drying, through which the watch is moved on a set cycle. The hot end and extruder is replaced with a motor and shaft, on the end of which is a basket in which the watch sits. The basket is a commercial part for simplicity of construction, though one could certainly fabricate their own if need be. The printer gets a controller upgrade and of course a motor controller, and with a software stack built upwards from the Klipper firmware seems ready to go. There is the small matter of the heater used for drying not keeping the firmware happy as a substitute for the heated bed it thinks it’s driving, but that is fixed by controlling it directly.

We’ve remarked before that superseded 3D printers are present in large numbers in our community, and particularly now a few years since that article was written we’re reaching the point at which many very capable machines are sitting idle. It’s thus particularly good to see a project that brings one of them out of retirement for a useful purpose.

Thin Client And Smartphone Step In For 3D Printer’s Raspberry Pi And Touchscreen

It’s no secret that Raspberry Pi’s are a little hard to come by these days. Unless you had the foresight to stock up before the supply dried up — and if you did, we want to talk to you — chances are good that you’ve got a fair number of projects that use the ubiquitous SBC on indefinite hold. And maybe that’s got you thinking about alternatives to the Pi.

That’s apparently what was on [Crimson Repair]’s mind lately, the result being the discovery that an old thin client PC makes a dandy stand-in for a Raspberry Pi, at least in some cases. The video below is on the long side, true, But it’s chock full of command-by-command instructions for getting a Dell Wyse 3040, a thin client that can be found on the secondary market for $25 or so, up and running as a Klipper alternative for a 3D printer. These machines, which usually see use in point-of-sale applications and the like, sport a 1.4-GHz Intel Atom processor and a couple of gigs of RAM, and the form factor is just right for tucking into the base of an Ender 3.

Getting one up and running is a matter of getting a Debian image onto a USB key and configuring the thin client to boot from USB. After that it’s a simple matter of installing Klipper and wiring up a buck converter to power the machine. It’s not exactly rocket surgery, but why muddle through the process when someone has already been down the path ahead of you? And if you want to take it further, the second video below walks you through all the steps needed to add a touchscreen using an old Android phone. With a 3D printed bracket, the whole thing is a nicely complete printer control solution.

Continue reading “Thin Client And Smartphone Step In For 3D Printer’s Raspberry Pi And Touchscreen”

DIY SLS 3D Printer Getting Ready To Print

Ten years ago the concept of having on our desks an affordable 3D printer knocking out high quality reproducible prints, with sub-mm accuracy, in a wide range of colours and material properties would be the would be just a dream. But now, it is reality. The machines that are now so ubiquitous for us hackers, are largely operating with the FDM principle of shooting molten plastic out of a moving nozzle, but they’re not the only game in town. A technique that has also being around for donkeys’ years is SLS or Selective Laser Sintering, but machines of this type are big, heavy and expensive. However, getting one of those in your own ‘shop now is looking a little less like a dream and more of a reality, with the SLS4All project by [Tomas Starek] over on hackaday.io.

[Tomas] has been busy over the past year, working on the design of his machine and is now almost done with the building and testing of the hardware side. SLS printing works by using a roller to transfer a layer of powdered material over the print surface, and then steering a medium-power laser beam over the surface in order to heat and bond the powder grains into a solid mass. Then, the bed is lowered a little, and the process repeats. Heating of the bed, powder and surrounding air is critical, as is moisture control, plus keeping that laser beam shape consistent over the full bed area is a bit tricky as well. These are all hurdles [Tomas] has to overcome, but the test machine is completed and is in a good place to start this process control optimisation fun. Continue reading “DIY SLS 3D Printer Getting Ready To Print”