Rebuilding A $700k Refrigerator

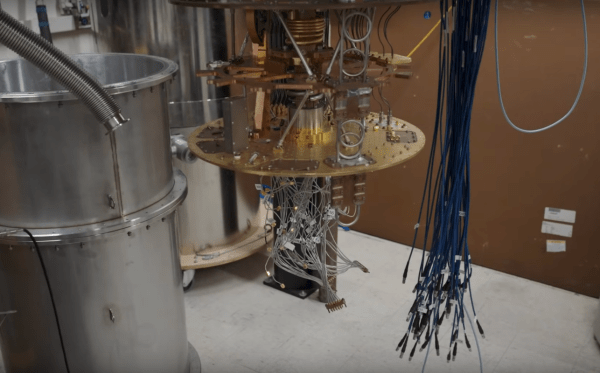
When cleaning out basements, garages, or storage units we often come across things long forgotten. Old clothes, toys, maybe a piece of exercise equipment, or even an old piece of furniture. [Ben] and [Hugh] were in a similar situation cleaning out an unused lab at the University of California Santa Barbara and happened upon an old refrigerator. This wasn’t just a mini fridge left over from a college dorm, though. This is a dilution refrigerator which is capable of cooling things down to near absolute zero, and these scientists are trying to get it to its former working state.

The pair are hoping to restore the equipment to perform dark matter experiments, but the refrigerator hasn’t been in use since about 2016 (and doesn’t have an instruction manual), which is a long time for a piece of specialty scientific equipment to be collecting dust. The first step is to remove wiring and clean it of all the grime it’s accumulated in the last decade. After that, the pair work to reassemble the layers of insulation around the main cooling plate and then hook up a vacuum pump to the device which also needed some repair work.

The critical step at this point is to evacuate the refrigerant lines so they can be filled with expensive Helium-3 and Helium-4. The problem is that there’s still some of this valuable gas in the lines that needs to be recovered, but the risk is that if any air gets into the cold section of the refrigerator it will freeze and clog the whole system. After chasing some other electrical and vacuum gremlins and discovering a manual from a similar refrigerator, they eventually get it up and running and ready for new scientific experiments. While most of us won’t discover a fridge like this cleaning out our attics, this refrigerator powered by rubber bands is a little more accessible to the rest of us.

Continue reading “Rebuilding A $700k Refrigerator”

High School Student Builds Inexpensive Centrifuge

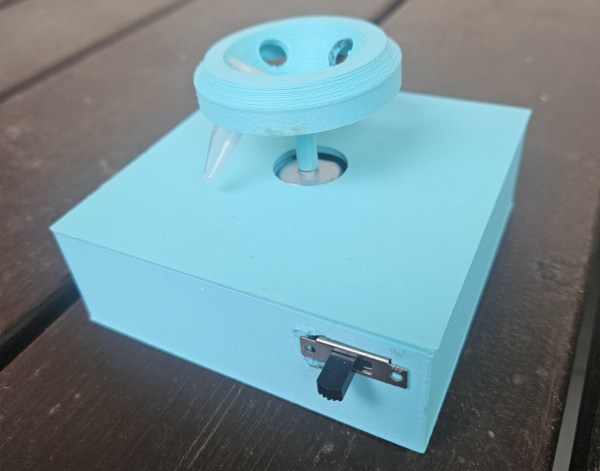
Having a chemistry lab fully stocked with all necessary equipment is the dream of students, teachers, and professors alike, but a lot of that equipment can be prohibitively expensive. Even in universities, labs are often left using old or worn-out equipment due to cost. So one could imagine that in high schools this is even a more pronounced problem. High school student [Aidan Miller] has solved this problem with at least one piece of lab equipment, bringing the cost for a centrifuge down to around $10 USD.

Part of the savings is due to the fact that [Aidan] has put together a smaller sized centrifuge, known as a micro-centrifuge. The function is still the same though, spinning samples to separate them out the constituents by weight. The 3D printed base of the centrifuge houses a switch and 9 V battery and also holds a small motor which spins the rotor. The rotor itself is also 3D printed, and needed to be a very specific shape to ensure that it could hold the samples properly at high RPM and maintain reasonable balance while spinning.

As a project it’s fairly simple and straightforward to build, but the more impressive thing here is how much it brings down the cost of lab equipment especially for high school labs that might otherwise struggle for funding. Of course it requires the use of a 3D printer but the costs of those have been coming down significantly as well, especially for things like this portable 3D printer which was also built by a high school student.

Continue reading “High School Student Builds Inexpensive Centrifuge”

Stirring Up 3D-Printed Lab Equipment

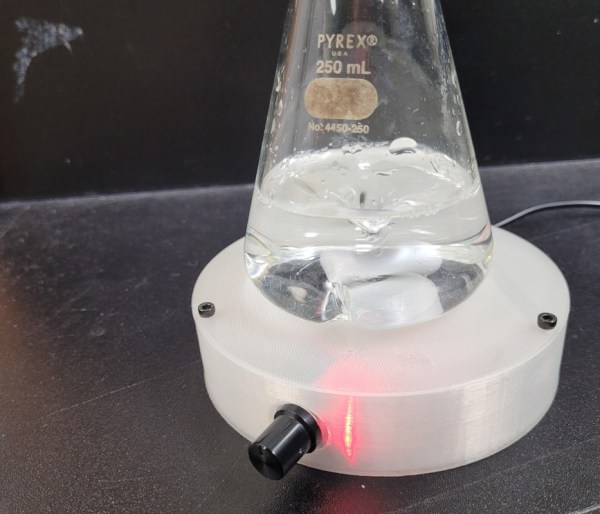
Magnetic stirrers are a core part of many chemistry labs. They offer many advantages for ensuring the effective mixing of solutions compared to other methods of stirring, including consistency, precise control, operation within closed systems, and of course, hands-free automatic operation. With so many reasons for employing a magnetic stirrer, it’s not too surprising that [Joey] would want one. He built his using 3D-printed parts rather than purchasing it.

The magnetic stirrer uses a 3D-printed enclosure for the base. Inside is a PWM controller which sends power to a small DC motor. A 3D-printed arm is attached to the motor, which hosts a pair of magnets. As the arm spins inside the enclosure, the magnetic fields from the magnet couple with the stir bar inside the mixture, allowing it to spin without any mechanical link to the stirring device and without any input from the user. [Joey] has also made all the 3D-printed parts for this build available on Printables.

While magnetic stirrers aren’t the most complicated of devices (or the most expensive), building tools like this anyway often has other advantages, such as using parts already on hand, the ability to add in features and customizations that commercial offerings don’t have, or acting as a teaching aid during construction and use. It’s also a great way to put the 3D printer to work, along with this other piece of 3D-printed lab equipment designed for agitating cell cultures instead.

3D Printed Gadgets Make Lab Work Easier

If you’ve worked in a bio or chem lab, you’ve probably found yourself handling all manner of plastic. Test tubes, fixtures, clamps — there’s a cavalcade of this stuff that fattens up the order books of lab suppliers every quarter. Sometimes, though, the commercial solutions aren’t quite what you need. For [AtomicVirology], the solution was to 3D print custom lab accessories to make work easier.

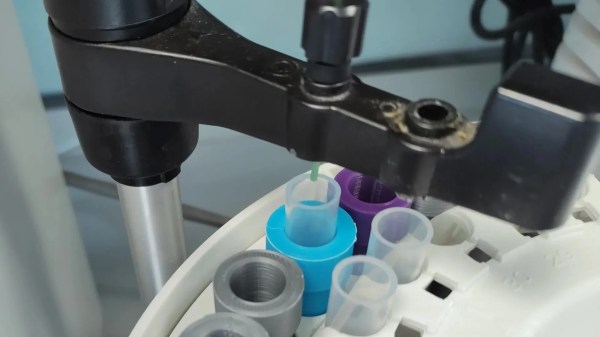
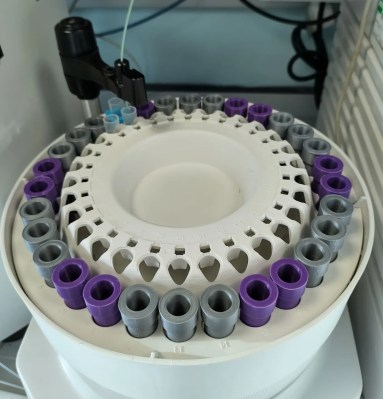
The tube adapter allows the collection of 60 small samples without having to unload the fraction collector halfway through. That’s a big quality-of-life improvement for staffers using the equipment.

Some of the devices are straightforward, like simple holders for upright storage of centrifuge tubes. Others are fun twists on the theme, like the Millennium Falcon tube holder or one shaped like the Imperial Star Destroyer. Meanwhile, a resuable plastic tube cover serves as a way to protect tubes from light without the fuss of covering them in aluminium foil. It’s less wasteful, too!

Our favorite, though, is a simple adapter for holding fraction tubes in a AKTA fraction collection device. Stock, the AKTA device will hold 30 small tubes in the inside ring, and 30 larger tubes in the outside ring. Thanks to a simple printed part, though, it can be modified to hold 60 tubes of the smaller size. This allows the collection of 60 small fractions in a shorter period of time simply by moving the delivery head from the inner to the outer ring, without having to swap out 30 tubes halfway through a chromatography column, for example.

It goes to show that a 3D printer is good for more than just churning out Pikachus. It’s a Swiss Army knife for solving fiddly little problems without having to rely on some company to injection-mold you 10,000 examples of whatever it is you want. Of course, if you do want to injection mold something, we’ve covered how to do that before, as well.

Helium Recovery System Saves Costs

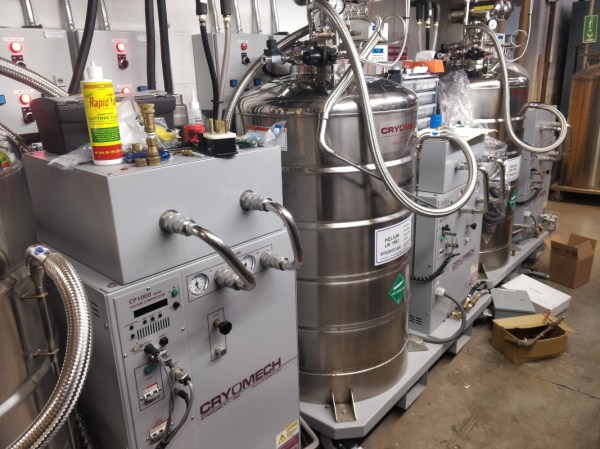
Helium is the most common element in the universe besides hydrogen, but despite this universal abundance it is surprisingly difficult to come across on Earth. Part of the problem is that it is non-renewable, so unless it is specifically captured during mining its low density means that it simply escapes the atmosphere. For that reason [Meow] maintains a helium recovery system for a lab which is detailed in this build.

The purpose of the system is to supply a refrigerant to other projects in the lab. Liquid helium is around 4 Kelvin and is useful across a wide variety of lab tests, but it is extremely expensive to come across. [Meow]’s recovery system is given gaseous helium recovered from these tests, and the equipment turns it back into extremely cold liquid helium in a closed-cycle process. The post outlines the system as a whole plus goes over some troubleshooting that they recently had to do, and shows off a lot of the specialized tools needed as well.

Low-weight gasses like these can be particularly difficult to deal with as well because their small atomic size means they can escape fittings, plumbing, and equipment quite easily compared to other gasses. As a result, this equipment is very specialized and worth a look. For a less lab-based helium project, though, head on over to this helium-filled guitar instead.

Reproduction 1960s Computer Trainer Really Pushes Our Buttons

If you were selling computers in the early 1960s you faced a few problems, chief among them was convincing people to buy the fantastically expensive machines. But you also needed to develop an engineering force to build and maintain said machines. And in a world where most of the electrical engineers had cut their teeth on analog circuits built with vacuum tubes, that was no easy feat.

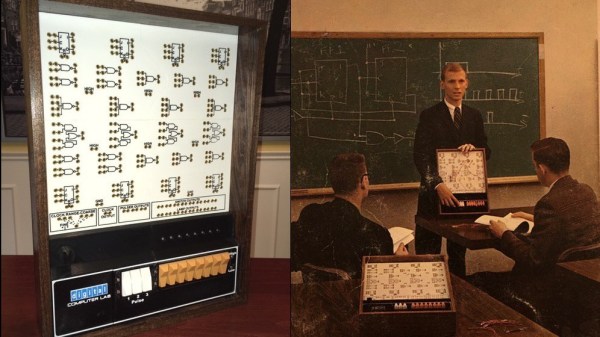
To ease the transition and develop some talent, Digital Equipment Corporation went all out with devices like the DEC H-500 Computer Lab, which retrocomputing wizard [Michael Gardi] is currently building a reproduction of. DEC’s idea was to provide a selection of logic gates, flip flops, and other elements of digital electronics that could be hooked together into more complicated circuits. We can practically see the young engineers in their white short-sleeve shirts and skinny ties laboring over the H-500 in a lab somewhere.

[Mike] is fortunate enough to have have access to an original H-500, but he wants anyone to be able to build one. His project page and the Instructables post go into great detail on how he made everything from the front panel to the banana plug jacks; almost everything in the build aside from the wood frame is custom 3D printed to mimic the original as much as possible. But the pièce de résistance is those delicious, butterscotch-colored DEC rocker switches. Taking some cues from custom switches he had previously built, he used reed switches and magnets to outfit the 3D printed rockers and make them look and feel like the originals. We can’t wait for the full PDP build.

Hats off to [Mike] for another stunning reproduction from the early years of the computer age. Be sure to check out his MiniVac 601 trainer, the Digi-Comp 1 mechanical computer, and the paperclip computer. If you’d like to pick [Mike’s] brain about this or any of his other incredible projects, he’ll be joining us for a Hack Chat in August.

Thanks to [Granzeier] for the tip!

Robot Vs. Superbug

Working in a university or research laboratory on interesting, complicated problems in the sciences has a romanticized, glorified position in our culture. While the end results are certainly worth celebrating, often the process of new scientific discovery is underwhelming, if not outright tedious. That’s especially true in biology and chemistry, where scaling up sample sizes isn’t easy without a lot of human labor. A research group from Reading University was able to modify a 3D printer to take some of that labor out of the equation, though.

This 3D printer was used essentially as a base, with the printing head removed and replaced with a Raspberry Pi camera. The printer X/Y axes move the camera around to all of the different sample stored in the print bed, which allows the computer attached to the printer to do most of the work that a normal human would have had to do. This allows them to scale up massively and cheaply, presumably with less tedious inputs from a large number of graduate students.

While the group hopes that this method will have wide applicability for any research group handling large samples, their specific area of interest involves researching “superbugs” or microbes which have developed antibiotic resistance. Their recently-published paper states that any field which involves bacterial motility, colony growth, microtitre plates or microfluidic devices could benefit from this 3D printer modification.