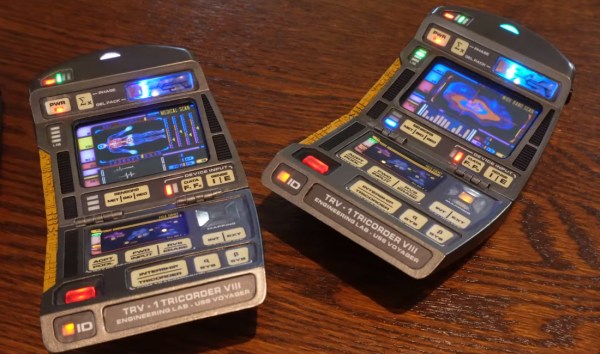
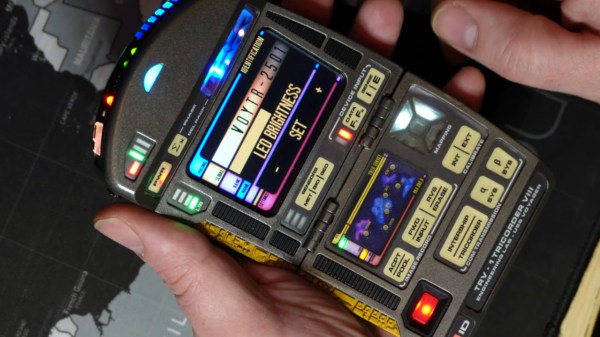
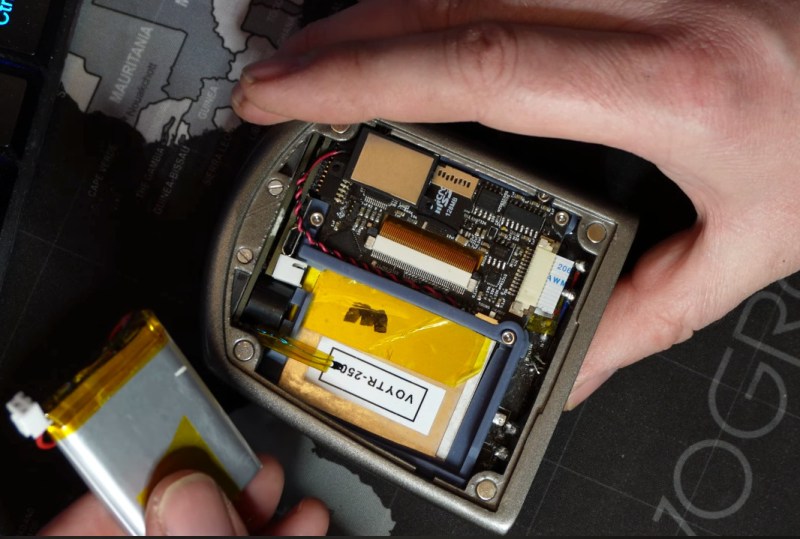
For the last few years, [Mangy_Dog] has been working on what is easily the most technically and aesthetically impressive Star Trek tricorder prop the world has ever seen. With each new version of the hardware we’ve gotten the occasional peek under the hood or source code walk-through, but these limited presentations have made it somewhat difficult to really appreciate the scale of this undertaking.
But now thanks to this epic hour-long tour of the hardware and software that makes up version 2.5 of his Voyager tricorder, we can finally see just how incredible the engineering that’s gone into this project really is. Every detail has been meticulously considered to deliver a final product that’s not only as visually accurate as possible, but reliable enough to actually carry around. Continue reading “A Guide To Field Stripping Your Voyager Tricorder”→
Feral cats live a rough life, and programs like Trap, Neuter, Release (TNR) attempt to keep their populations from exploding in a humane way. Researchers in Massachusetts have found a non-surgical way to spay cats that will help these efforts.
A single dose of anti-Müllerian hormone (AMH) gene therapy suppresses ovarian follicle formation, essentially turning off the ovulation cycle. After following the test cats for two years, none had kittens, unlike the cats in the control group. Other major hormones like estrogen were unaffected in the cats and they didn’t exhibit any negative side effects. The researchers said it will be some time before the treatment can be widely deployed, but it offers hope for helping our internet overlords and the environs they terrorize inhabit.
For those of you doing TNR work, you might want to try this trap alert system to let you know you’ve caught a cat for spaying or neutering. If you’d rather use a cat treat dispenser to motivate your code monkeys, then check out this hack.
For many of us, the most difficult aspect of a project comes when it’s time to document the thing. Did you take enough pictures? Did you remember all the little details that it took to put it together? Should you explain those handful of oddball quirks, even though you’re probably the only person in the world that knows how to trigger them?
Well, we can’t speak to how difficult it was for [Mangy_Dog] to put together this training video for his incredible Star Trek: Voyager tricorder replica, but we certainly approve of the final product. Presented with a faux-VHS intro that makes it feel like something that would have been shown to cast members during the legendary run the franchise had in the 1990s, the video covers the use and operation of this phenomenal prop in exquisite detail.
Now to be fair, [Mangy_Dog] has sold a few of his replicas to other Trek aficionados, and we’re willing to bet they went for a pretty penny. As such, maybe it’s not a huge surprise he’d need to put together a comprehensive guide on how to operate the device’s varied functions. Had this been a personal project there wouldn’t have been the need to record such a detailed walk-through of how it all works — so in that regard, we’re fortunate.
One of the most interesting things demonstrated in this video is how well [Mangy_Dog] managed to implement mundane features such as brightness and volume control without compromising the look of the prop itself. Rather than adding some incongruous switches or sliders, holding down various touch-sensitive buttons on the device brings up hidden menus that let you adjust system parameters. The project was impressive enough from the existing images and videos, but seeing just how deep the attention to detail goes is really a treat.
Previously we took a look at some of the work that [Mangy_Dog] has put into these gorgeous props, which (unsurprisingly) have taken years to develop. While they might not be able to contact an orbiting starship or diagnose somebody’s illness from across the room, it’s probably fair to say these are the most realistic tricorders ever produced — officially or otherwise.
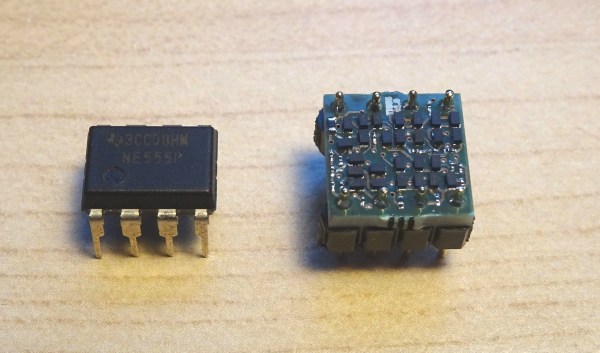
Over at Tiny Transistor labs, [Robo] took it upon himself to reproduce the classic 555 timer in discrete transistor form. For bonus points, he also managed to put it in a package that’s the same basic size, pin compatible with, and a plug-in replacement for the original. The first task was deciding which 555 circuit to implement. He examined a handful of different implementations — and by examined, we mean dissected them and studied the die circuitry under a microscope. In the end, he went with Hans Camenzind’s original circuit, both as a tribute and because it used the fewest transistors — a point which helped manage the final size, which is only a little bit bigger than the IC!
Speaking of sizes, have you ever soldered an EIA 01005 resistor? We agree with [mbedded.ninja] who wrote on a post about standard chip resistor sizes, the 01005 is a “ridiculously small chip package that can barely be seen by the naked eye.” It is 16 thou x 8 thou (0.4 mm x 0.2 mm) in size, and despite its name and placement in the Imperial series, it is not half the size of an 0201. The transistors are your standard 2N3904 / 2N3906, but purchased in a not-so-standard DFN (Dual Flat Pack, No Leads). We might think a 1.0 x 0.6 mm component as small, but compared to its neighboring resistors in this circuit, it’s huge.
[Robo] has done this kind of project before, most recently making a discrete recreation of of the classic 741 op-amp. We covered a similar, but larger, discrete 555 timer project back in 2011. If you want to go really big-scale with your own reproduction project, check out the MOnSter 6502 from five years ago for further inspiration. Thanks to [Lucas] for the tip.
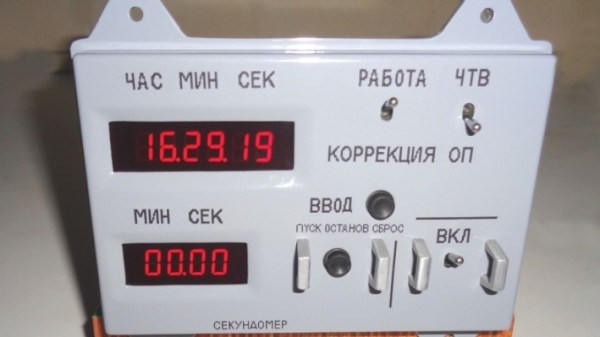
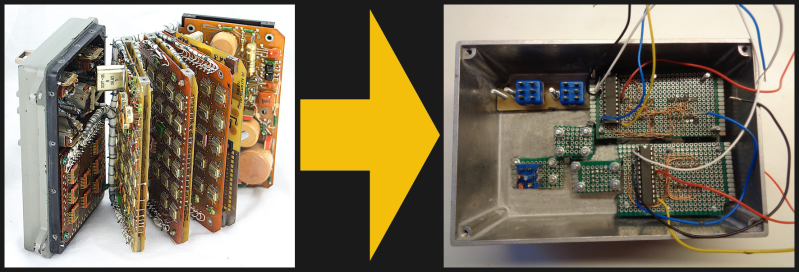
If you like the retro look of old Soviet space hardware, then this replica of the model 774H Soyuz digital clock by [David Whitty] might be the perfect accessory for your desk. Forgoing the original stack of ten jam-packed circuit boards, [David] used an Arduino, a GPS receiver, and a handful of other common parts to create a convincing reproduction.
He also made some functional changes to make it better suited as an ordinary clock for us earthbound folk. If you want to take on this project yourself, be prepared for some real metalwork. No 3D printing filament was harmed in building this project. It’s based on a pair of heavily modified Hammond cast aluminum enclosures, with over 1 kg of lead ballast added to give it the appropriate heft of the original. The GPS patch antenna is cleverly hidden on the rear interface connector, but a discrete hole for a USB connector gives away the secret that this isn’t an original. The software (free for non-commercial use) and build notes are available on his GitHub repository.
We covered [Ken Shirriff]’s fascinating dive into the guts of a real Soyuz digital clock back in January. If old space hardware is your thing, you should definitely check out this teardown by [CuriousMarc] of the 653B, the 1960s-era electro-mechanical predecessor to the 774H. Thanks to [CuriousMarc] for bringing this project to our attention.
If you were selling computers in the early 1960s you faced a few problems, chief among them was convincing people to buy the fantastically expensive machines. But you also needed to develop an engineering force to build and maintain said machines. And in a world where most of the electrical engineers had cut their teeth on analog circuits built with vacuum tubes, that was no easy feat.
To ease the transition and develop some talent, Digital Equipment Corporation went all out with devices like the DEC H-500 Computer Lab, which retrocomputing wizard [Michael Gardi] is currently building a reproduction of. DEC’s idea was to provide a selection of logic gates, flip flops, and other elements of digital electronics that could be hooked together into more complicated circuits. We can practically see the young engineers in their white short-sleeve shirts and skinny ties laboring over the H-500 in a lab somewhere.
[Mike] is fortunate enough to have have access to an original H-500, but he wants anyone to be able to build one. His project page and the Instructables post go into great detail on how he made everything from the front panel to the banana plug jacks; almost everything in the build aside from the wood frame is custom 3D printed to mimic the original as much as possible. But the pièce de résistance is those delicious, butterscotch-colored DEC rocker switches. Taking some cues from custom switches he had previously built, he used reed switches and magnets to outfit the 3D printed rockers and make them look and feel like the originals. We can’t wait for the full PDP build.
Hats off to [Mike] for another stunning reproduction from the early years of the computer age. Be sure to check out his MiniVac 601 trainer, the Digi-Comp 1 mechanical computer, and the paperclip computer. If you’d like to pick [Mike’s] brain about this or any of his other incredible projects, he’ll be joining us for a Hack Chat in August.
If we write about sound reproduction, there is a good chance we found a home-made amplifier or an upcycled speaker system. In this case, you don’t use your ears to appreciate the sound; you use your hands or eyes. [ElatisEagles] converted an amplitude sound graph into a wearable bead. Even without much background it should be immediately recognizable for what it is. Presumably, they converted a sound wave to vectors, then used the “Revolve” function in Rhino, their software of choice. Sometimes this is called a “lathe” function. Resin printers should be able to build these without supports and with incredible fidelity.
Some tattoos put a sound wave on the skin, and use an app to play it back, but if you want to wear a sound bite from your favorite show and not get branded as the “Pickle Rick” gal/guy at the office, maybe swap out the color and sound wave before it goes stale. We would wear a bead that says, “drop a link in our tip line,” but you can probably think of something more clever.