They always told you not to mix water and electricity. And while yes, that is good general advice regarding the two, you won’t rip a hole in the fabric of space-time should you go about it responsibly. Water will conduct electricity, so why not use it to switch on a lamp?
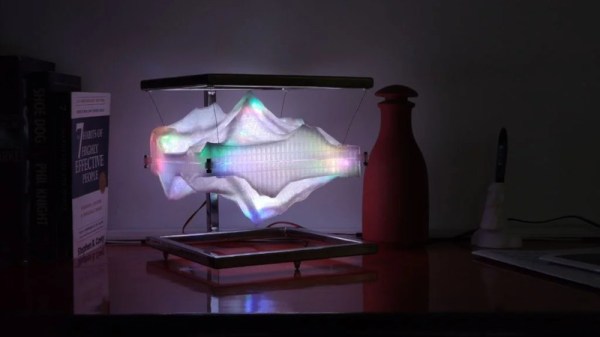
[Manvith Subraya]’s Hydro Lamp is, among other things, a reminder not to let Big Switch dim your idea of what’s possible with simple components. Switches don’t have to be complex, and some of the most reliable switches are pretty simple — the reed switch and the mercury tilt switch are good examples. By salinating the water at a ratio of 1:1, [Manvith] ensures power will flow through the acrylic tank, completing the circuit and lighting the 20W LEDs in both ends.
The brief demo video after the break sheds light on an interesting aspect of using water as a tilt switch — it’s not instantaneous. As he slowly moves the lamp from vertical to horizontal and back again, the light brightens and dims with the tide of electrons. We think it would be interesting to build a motorized frame that takes advantage of this for mood lighting purposes, especially if there were a few LEDs positioned behind the water.
Water is often used to explain the basic principle of current flow and the relationship dynamics of voltage, current, and resistance. As we saw in this water computer, the concept flows all the way into logic gates.
Continue reading “Water Switch Lamp Illuminates Current Flow”