This Is The Raspberry Pi Mini Laptop That We Want

In the seven years since the Raspberry Pi was first launched to an expectant audience we have seen many laptops featuring the fruit-themed single board computers. Some of them have been pretty jaw-dropping in their quality, so for a new one to make us stop and gape it needs to be something really special. On cue, here comes [Igor Brkić] with one of the neatest efforts we’ve seen, a high quality Pi laptop that’s smaller in frontal area than many smartphones.

At its heart is a Pimoroni Hyperpixel touchscreen HAT, and a Pi sitting behind it that has been stripped of all bulky connectors to reduce its height. The keyboard is a mini Bluetooth affair, and power comes courtesy of a deconstructed USB power bank with a lithium-ion pouch cell. The whole is contained within a neatly designed 3D-printed clamshell enclosure, making for a tiny and very neat laptop. We want one, and now you probably do too. (We wouldn’t say “no” to some level shifters and a GPIO port…)

If we had to pick another high-quality Pi laptop to compare this one with, it would have to be this one with a Psion-inspired hinge.

An HDMI Input For A Laptop Screen, Minus Laptop

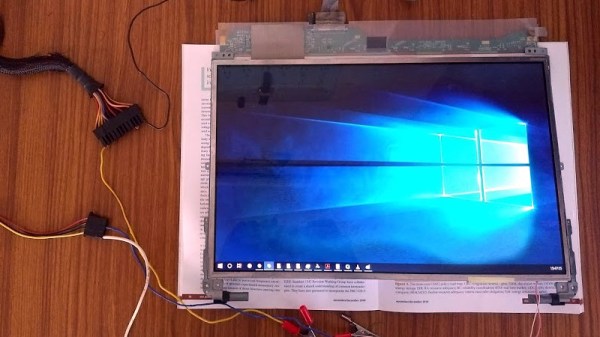
The lack of HDMI inputs on almost all laptops is a huge drawback for anyone who wants to easily play a video game on the road, for example. As to why no manufacturers offer this piece of convenience when we all have easy access to a working screen of this size, perhaps no one can say. On the other hand, if you want to ditch the rest of the computer, you can make use of the laptop screen for whatever you want.

This project from [Avner] comes to us in a few parts. In the first section, the teardown of the laptop begins and a datasheet for the screen is discovered, which allows [Avner] to prepare an FPGA to drive the screen. The second part involves building an HDMI sink, which is a device which decodes the signal from an HDMI source into its constituent parts so it can be sent to the FPGA. The final section of the project involves actually sending a video to this impressive collection of hardware in order to get a video to appear on the old laptop screen.

This build is worth checking out if you’ve ever dealt with anything involving digital video. It goes into great depth on a lot of the technical details involving HDMI, video devices, and hardware timing issues. This is a great build and, even though we’ve seen similar projects, definitely worth diving into if you have some time on your hands and a spare laptop screen.

From A Dead Laptop To A Portable KVM And PiTop

An essential tool of many sysadmins is a portable terminal ready to plug into an ailing rack-mounted server to administer first aid. At their simplest, they are simply a monitor and keyboard on a trolley, but more often they will be a laptop pre-loaded with tools for the purpose. Sysadmins will hang on tenaciously to now-ancient laptops for this application because they possess a hardware serial port.

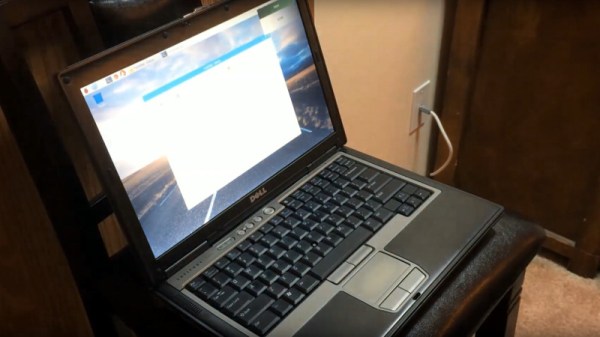
[Frank Adams] has taken a different route with his emergency server crash cart, because while he’s used an old laptop he hasn’t hung onto it for its original hardware. Instead, he’s used a Teensy and an LVDS driver board to replace the motherboards of two old Dell Latitude laptops, one of which is a simple KVM device and the other of which is a laptop in its own right featuring a Raspberry Pi 3. He’s produced a video as well, which we’ve placed below the break.

There was a time when laptop display panels were seen as unhackable, but the advent of cheap driver boards has meant that conversions such as this one have become a relatively well-worn path. The job he’s done here is a particularly well-executed one though, making good use of the generous amount of space to be found in an older business-class laptop. There isn’t a battery because this application doesn’t demand one, however, with the battery compartment intact it does not seem impossible that a suitable charger/monitor board could be included along with a boost converter to provide his 12V supply.

This isn’t the first Pi laptop in a re-used commercial machine’s case we’ve seen, there was also this Sony Vaio.

Continue reading “From A Dead Laptop To A Portable KVM And PiTop”

Our Right To Repair Depends On A Minimally Viable Laptop

It’s never been harder to repair your electronics. When the keyboard in your shiny new MacBook dies, you’ll have to send it to a Genius. When the battery in your iPhone dies, you’ll have to break out the pentalobe screwdrivers. Your technology does not respect your freedom, and this is true all the way down to the source code: the Library of Congress is thankfully chipping away at the DMCA in an effort that serves the Right to Repair movement, but still problems remain.

The ability — or rather, right — to repair will inevitably mean using electronics longer, and keeping them out of the garbage. That’s less e-waste, but it’s also older, potentially slower and less powerful portable workstations. This is the question: how long should you keep your electronics running? When do you start getting into the false economy of repairing something just because you can? What is the minimally viable laptop?

Continue reading “Our Right To Repair Depends On A Minimally Viable Laptop”

A Raspberry Pi Grimoire For The Command Line Wizard

Who says there’s no such thing as magic? Not anyone who knows what a Unix pipe is, that’s for sure. If you do some of your best incantations at a blinking cursor, this scratch-built Raspberry Pi Zero “Spellbook” laptop created by [Calvin] might be just what the apothecary ordered. Lucky for us, he was kind enough to document the design and construction of this penguin-powered tome for anyone else who wishes to dabble in the GNU Dark Arts.

In the series of videos after the break, viewers have the opportunity to watch a project go from idea to final product. The first video was uploaded nearly a month before the project was completed, and goes over some of the design elements of the project as well as different ideas [Calvin] had in terms of things like component placement. Throughout the video, he illustrates his ideas in TinkerCAD, which might not have been our first choice for a project this complex, but it does go to show what’s possible in the free web-based CAD package.

By the second video, [Calvin] has printed some parts and now has the hardware coming together. The general idea is that the outside panels of the “book” are made out of steel cut from the side panel of an old computer, with the 3D printed components taking the form of spacers between the electronic components. These plastic “pages” are not only easier and faster to print than a complete case, but help sell the appearance of the book when viewed from the sides.

[Calvin] has shared his TinkerCAD design so that others can print out the necessary components for the book, though you’ll have to source your own steel plates. He also breaks down all the principle components he used and gives links to where you can buy them, from the display and keyboard down to the screws and standoffs. He went with the Pi Zero and sticks to mainly console work, but if you want something with enough power to throw around a graphical environment, he says there’s room in the case for a Pi 3.

Hackers seem to enjoy hiding hardware inside of books, PLA or otherwise. We’ve recently seen an iPad nestled snugly into a notebook, and of course no house would be complete without a book doubling as a hidden switch.

Continue reading “A Raspberry Pi Grimoire For The Command Line Wizard”

Xbox One X Gets Aluminum Laptop Makeover

While many a gamer was willing to brave hand-to-hand combat this Black Friday just to get a few bucks off of Microsoft’s premium-tier game console, [jomega] was already cutting his to pieces from the comfort of his own home. Not dissuaded by the system’s fairly high sticker price or relatively limited modding scene, he decided to transplant his Xbox One X into an incredibly slick laptop-style aluminum enclosure.

Turning a game console into a “laptop” is hardly new, Ben Heck has been doing it for over a decade now, but in general they tend to look pretty clunky. With a few exceptions, the builder’s goal is not so much to make the final result look sleek and professional, but simply to take their favorite games on the go. But from the start [jomega] wanted something that would not only allow him to take long walks in the park with Master Chief, but look gorgeous doing it.

One of his goals was to make the final device thinner than the original system, so the first step was to assemble virtual representations of the Xbox’s principal components in CAD to find the most efficient placement for everything. Long before the first pieces of aluminum were cut, [jomega] already knew where each part and screw was going to end up. The time he invested in planning out the build in CAD more than made up for itself when it came time to assemble the final product, and also means this design is highly reproducible should he decide to build another one on commission.

Even though the final system seems impossibly thin, no hardware or functionality had to be left out. Even the optical drive, which on the stock console is something of an afterthought to begin with in an era of digital downloads (rumor has it the next Xbox will drop optical discs entirely), has been retained. Special consideration did need to be given to cooling the 4K powerhouse though, and [jomega] warns that running the system with the case open or the fans off can have dangerous consequences.

Thanks to the Xbox One’s wireless capabilities (for both Internet connection and controllers), there’s a notable lack of ports on the case. This made the design a bit easier, as [jomega] really only needed to have a connector for the AC power cord in the back and a couple of holes for the system’s power, eject, and controller sync buttons. He did add in a USB port for convenience, but even that could be skipped to make things easier.

In the past we’ve seen some rather husky Xbox 360 laptop builds, and at least one attempt to build a more slimline version, but this latest entry in the long line of portable-ized Xboxen has set the bar very high.

Continue reading “Xbox One X Gets Aluminum Laptop Makeover”

Gorgeous Bartop Arcade Build Is A Cut Above

At this point we’ve seen a good number of desktop-sized arcade cabinets, and while they’ve naturally all been impressive in their own ways, they do tend to follow a pretty familiar formula. Cut the side panels out of MDF (or just buy a frame kit), stick a Raspberry Pi and an old LCD monitor in there, and then figure out how to control the thing. Maybe a couple strategically placed stickers and blinking LEDs to add a few extra horsepower, but nothing too surprising.

[Andy Riley] had seen plenty of builds like that, and he wasn’t having any of it. With the heart of an old laptop and bones made of IKEA cutting boards, his build is proof positive that there’s always more than one way to approach a problem that most would consider “solved” already. From the start, he set out to design and build a miniature arcade cabinet that didn’t look and feel like all the other ones he’d seen floating around online, and we think you’ll agree he delivered in a big way.

Powering the arcade with an old laptop is really a brilliant idea, especially since you can pick up older models for a song now that they’re considered nearly disposable by many users. As long as it doesn’t have a cracked display, you’ll get a nice sized LCD panel and potentially a rather powerful computer to drive it. Certainly the graphical capabilities of even the crustiest of used laptops will run circles around the Raspberry Pi, and of course it opens the possibility of playing contemporary PC games. As [Andy] shows in his detailed write-up, using a laptop does take more custom work than settling for the Pi, but we think the advantages make a compelling case for putting in the effort.

Of course, that’s only half the equation. Arguably the most impressive aspect of this build is the cabinet itself, which is made out of a couple IKEA bamboo cutting boards. [Andy] used his not inconsiderable woodworking skills, in addition to some pretty serious power tools, to turn the affordable kitchen accessories into a furniture-grade piece that really stands out from the norm. Even if you aren’t normally too keen on working with dead trees, his step-by-step explanations and pictures are a fascinating look at true craftsman at work.

If you’re more concerned with playing Galaga than the finer points of varnish application, you can always just turbocharge the old iCade and be done with it. But we think there’s something to be said for an arcade cabinet that could legitimately pass as a family heirloom.