An Open-Source Antikythera Mechanism

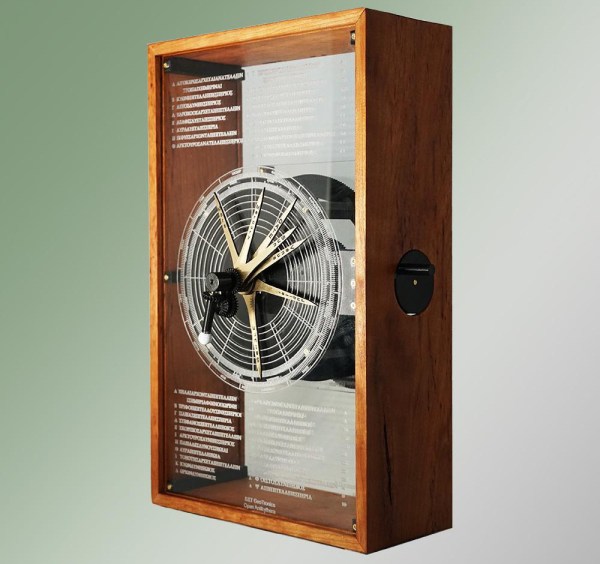
When the Antikythera Mechanism was first discovered, it wasn’t viewed as the wonder that we know it today. Originally the divers who found the device and the first scientists to look at it wrote it off as an astrolabe or other some other common type of clock. It wasn’t until decades later when another set of scientists x-rayed the device and surveyed more of the shipwreck where it was found that it began to become one of the more important archaeological discoveries in history. There have been plenty of attempts to recreate this device, and this replica recreates the mechanisms of the original but is altered so it can be built in a modern workshop.

The build, which took the creators several years of research and development to complete, started off with the known gear schemes found on the original device. However, the group wanted to make it with modern technology including 3D printers and laser cutters, so although they worked from an understanding of the original 2000-year-old device there are some upgrades and changes to accommodate those who want to build this in a modern workshop. Gears made from plastic instead of brass have more friction, which needed to be reduced by building custom bearings machined out of brass. And to complete the machine a number of enclosures of various styles are available to use as well.

Additionally, all of the designs and schematics for this build are open source for anyone to build or modify as they would like, although the group putting this together does plan to sell various parts for this as well. There will be some issues with use, as they point out, since the ancient Greeks didn’t have a full enough understanding of cosmology to get a machine like this to stay accurate for two thousand years, but it’s a fascinating build nonetheless. Reasearchers are still discovering new things about this device too, including the recent find of an earliest possible start date for the machine.

Getting A Rise With Laser Cutting

Your first 3D print probably seemed pretty amazing. But if you revisit it after a few years, you’ll likely notice it wasn’t nearly as good as you thought. We improve our printers and our processes and the new better results become normal. If you have a laser cutter, you may go through the same iteration. At first, you are happy just to get scorch marks on the workpiece. But when you move to cutting, you want cleaner cuts. You put tape over the work, add air assist, and invest in a honeycomb bed. Each step gets you better results, but you can always improve.

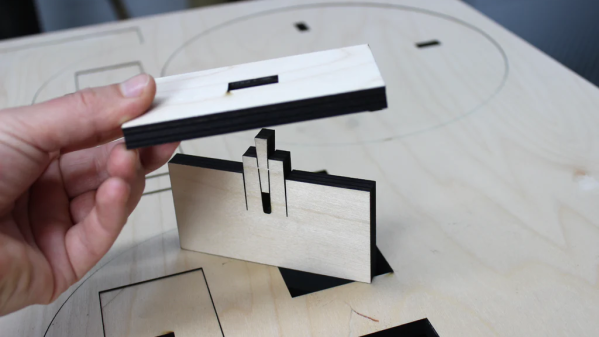
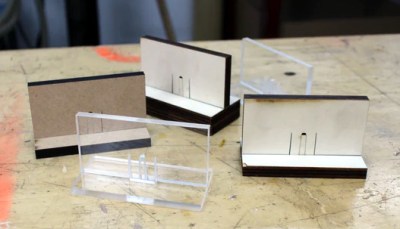
[The Louisiana Hobby Guy] (also known as [Rich]) knows a lot about the practical side of lasers. He suggests using standoff pins to not just secure the part to the honeycomb bed but lift it up a little, allowing air to flow under the part and lets the laser easily cut all the way through. You can see them in action in the video below.

This is a cheap upgrade to prevent flashback when cutting. [Rich] explains how to size them properly and even how to make your own if you don’t want to buy them off the shelf. You can laser cut hold-down pins from plans [Rich] provides, although he prefers to 3D print them, and you can do that, too. Most beds look similar, but if yours is an oddball, you might have to modify them slightly. He has regular dog clamps and the antiflashback standoffs, so you can make some of each. You can also buy them online. Most do not have the antiflashback feature, but at least one vendor that [Rich] points out does have them

If you don’t like the ones [Rich] shows, you can find 3D models for similar pins in the usual places. You can also design them yourself if you want them exactly how you want.

A good thing to add to your laser cutting workflow. [Rich’s] channel is full of great stuff. If you want to know more about air assist, we’ve added it to our cutters. If you are serious about precision cuts, know your kerf, too.

Continue reading “Getting A Rise With Laser Cutting”

Modern CO2 Laser Reviewed

If you’ve got a laser cutter, it is highly probable that it uses a laser diode. But more expensive machines use a carbon dioxide laser tube along with mirrors. There was a time when these lasers came in two flavors: very expensive and amazing or moderately expensive and cheaply made. However, we are seeing that even the moderately expensive machines are now becoming quite advanced. [Chad] reviews a 55-watt xTool P2. At around $5,000, it is still a little spendy for a home shop, but it does have pretty amazing features. We can only hope some less expensive diode lasers will adopt some of these features.

[Chad’s] video that you can see below attempts to recreate some of the amazing things xTool did on their product introduction live stream. He was able to recreate most, but not all of the results. In some cases, he was also able to do better.

Continue reading “Modern CO2 Laser Reviewed”

Tiny Orrery Keeps The Planets In Their Places

[Frans] claims to have made the world’s smallest wooden orrery. We won’t take a position on that — such things are best left up to the good folks at Guinness. But given that the whole thing is seriously in danger of being dwarfed by a USB-C connector, we’d say he’s got a pretty good shot at that record.

The key to keeping this planetarium so petite while making it largely out of wood is to eschew the complex gear trains that usually bring the Music of the Spheres to life in such devices. The layered base of the orrery, with pieces cut from a sheet of basswood using a laser cutter, contains a single tiny stepper motor and just two gears. A zodiac disc sits atop the base and is the only driven element in the orrery; every other celestial body moves thanks to a pin set into the zodiac disc. An ESP32 C3 contacts a NASA feed once a day to get the relative positions of the planets and uses the zodiac disk to arrange everything nicely for the day. The video below shows the “Planet Spinner” in action.

We love the look of this project; the burnt edges and lightly smoked surface of the laser-cut wooden parts look fantastic, and the contrast with the brass wires is striking. We’ve seen an orrery or two around here, executed in everything from solid brass to Lego, but this one really tickled our fancy. Continue reading “Tiny Orrery Keeps The Planets In Their Places”

Kerfmeter Measures Laser Cutter Kerf Allowances On The Fly

Nothing beats a laser cutter and a sheet of Baltic birch plywood or MDF when it comes to making quick, attractive enclosures. Burning out all the pieces and fitting them together with finger joints is super satisfying — right up until you realize that you didn’t quite get the kerf allowance right, and your pieces don’t fit together very nicely. If only there was a way to automate kerf measurement.

There is, in the form of Kerfmeter. It comes to us by way of the lab of [Patrick Baudisch] at the University of Potsdam, where they’ve come up with a clever way to measure the kerf of a laser cutter right during the cutting session. With the Kerfmeter mounted directly to the laser cutter head, a small test artifact based on an Archimedean spiral is cut into a corner of the workpiece. Pins on a small motor engage with the object and turn it until it jams in its hole; the wider the kerf, the greater the angle. Once the kerf is calculated, the rest of the design can be dilated by the proper amount to achieve a perfect fit. The video below shows it better than words can explain it.

What we like about this is its simplicity — all it involves is a motor and a microcontroller, plus a little software. It seems much faster than using a traditional kerf gauge, not to mention more precise. And while it does use up a little bit of material, the test pattern is really pretty small, all things considered. Seems like a reasonable trade-off to us. Still, if you want to figure out your kerfs the old-fashioned way, we’ve got you covered.

Continue reading “Kerfmeter Measures Laser Cutter Kerf Allowances On The Fly”

New Tool Helps Create Laser-Cut Doom Maps

Doom has a larger cultural footprint than the vast majority of video games ever made. That inspired [Theor] to see if it was possible to laser-cut some of the game’s maps to create a real-world model of those famous original levels.

Level data was extracted from the game’s original WAD data files using code written in Rust. Maps are described by multiple “lumps” within the WAD file format, each containing information on vertexes, walls, and floors. This data was scraped and converted into SVG files suitable for laser cutting. [Theor] then built a visualizer that could display what a stacked-up laser cut map would look like in 3D, to verify everything worked correctly. With that done, the map could be laser cut without worries that it would come out a jumbled, janky mess.

[Theor] kept the finished product simple, creating the map as a stack of blue acrylic pieces. We can imagine this tool being perfect for creating a high-quality diorama though, with some work done to paint the map to match what the player sees in game. If you happen to take that approach, don’t hesitate to notify the tipsline!

A closeup picture showing the jagged edge of the cut

Debugging Laser Cut Wobble, The Scientific Way

[PWalsh] was using his lasercutter to cut acrylic, expecting the cuts to have a pleasantly smooth edge. Alas, the edges turned out to be wobbly and sandpaper-like, not smooth in the slightnest. Bummer! Internet suggested a stepper motor swap, but not much in the way of insights – and that would’ve been a royal pain for sure. How would you approach debugging such a problem? Well, [PWalsh] didn’t want to swap crucial components willy-nilly, going the scientific way instead, and breaks it down for us.

Having compiled an extensive list of possible places to look for a fault in, he started going through fundamental assumptions. Do other lasercutters experience this issue? No, even the cheap ones can cut things properly. Is it water level causing intermittent cooling? Nope, not that. Is it the stepping settings? Tweaked, not that. Laser pulsing frequency? No dice. Continue reading “Debugging Laser Cut Wobble, The Scientific Way”