Laser Tripwire Alarm System Uses Mirrors To Increase Coverage

laser_tripwire_alarm

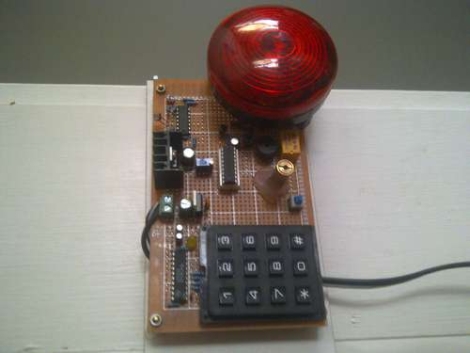
Instructables user [EngineeringShock] has been hard at work building a laser trip wire security system, complete with a combination lock. The security system works just like you see in the movies, employing an array of mirrors to bounce the laser across an opening several times in order to secure the space.

A PIC18F1220 micro controller sits at the center of the alarm and handles the majority of its functions. It takes input from the laser detection circuit, triggers the buzzer, as well as arms and disarms the entire alarm system. An LS7222 digital lock handles the passcode verification side of things, taking input from a 16-button matrix keypad, and telling the PIC when the proper code has been entered.

As you can see in the video below, the alarm system works and the buzzer is quite loud. There is one small problem however – the alarm only arms itself after the proper code has been entered and the lights have been turned off. The light sensing circuit he uses is too sensitive and can only operate in darkness, though he discusses the ability to add a more accurate sensing solution.

If you are interested in reading more about laser tripwire security systems, check out this similar passcode-based system, this alarm system built into a toy, and this Arduino-based alarm system.

Continue reading “Laser Tripwire Alarm System Uses Mirrors To Increase Coverage”

Laser Camera Sees Around Corners

After reading over the proceedings of the 2005 SIGGRAPH, [Dan] realized he could reproduce one of the projects with $50 worth of equipment and some extreme cleverness.

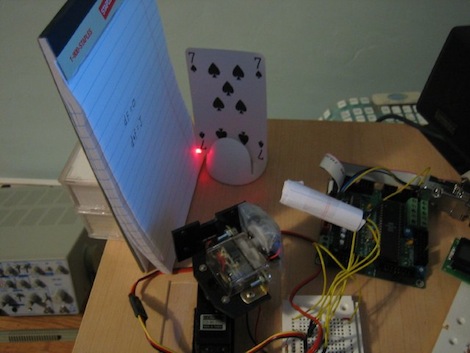
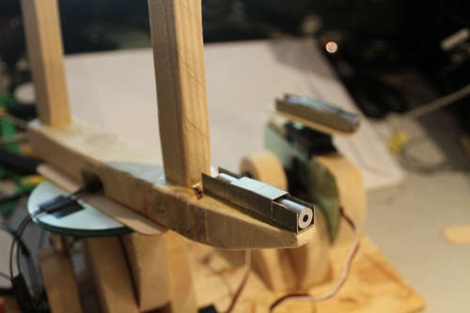
[Dan]’s dual scanning laser camera operates by scanning a laser across an object. The light reflected from the object illuminates a flat surface, and this light is measured by a photocell. After measuring the resistance of the photocell, an image can be reconstructed from the light reflected off the flat surface. The result is quite ingenious, and we’re very grateful [Dan] gave us a great walkthrough with the code and theory of operation.

The project was covered in this Slashdot story a from a few years ago, and we’re surprise no one has bothered to cobble this project together. It’s a very simple build – two servos to control the x and y axes of the laser scanner, a photocell, and an ATMega board. Dan says the microcontroller isn’t even necessary, and this ‘remote imaging’ could be done with an ADC hooked up to a parallel port.

[Dan] was kind enough to to give us a video of his contraption in action. A very nice build from a very accomplished guy.

Save Boatloads Of Cash By Building Your Own Laser Cutter

diy_laser_build

Have a bunch of time on your hands, and about $2,500 sitting around? Why not settle in and build yourself a laser cutter?

That’s exactly what Buildlog forum member [r691175002] did, and he told us about it in our comments just a few moments ago. Laser cutters can be pretty cost prohibitive depending on what you are thinking of picking up. The cheapest Epilog laser we could find costs $8,000, and you know what can happen when you try buying a cheap laser online.

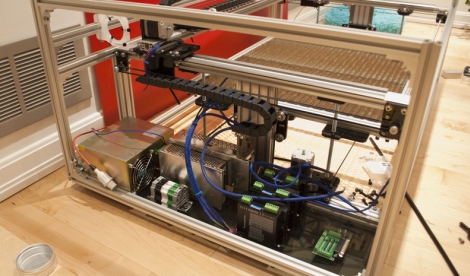
Instead of going for a ready-made cutter, he purchased an open-source kit from Buildlog, documenting the highlights of the build process online. The build log walks through a good portion of the construction starting with the frame and motor mounts, continuing through wiring up the electronics as well as some of the finishing touches. If you happen to head over to take a look around, you will find that there are plenty of pictures from various stages of the construction process to keep you busy for awhile.

With everything said and done, [Ryan] is quite happy with his laser. After going through the build process, he offers up some useful construction advice, as well as tips on sourcing cheaper hardware. He estimates that if he built the laser today, he could probably cut the costs nearly in half.

There’s no doubt about it – a $1300 laser cutter sounds pretty darn good to us.

Blu-ray Laser Plotter Writes On Glow-in-the-dark Screen

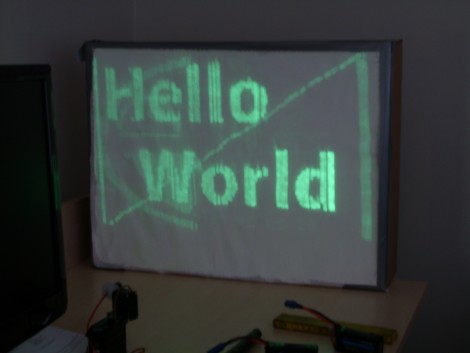
This laser display is persistent thanks to a glow-in-the-dark screen. [Daniel] built it using a Blu-ray laser diode. As the laser dot traverses the screen, it charges the phosphors in the glow material, which stay charged long enough to show a full image.

The laser head is simple enough, two servo motors allow for X and Y axis control. A Micro Maestro 6-channel USB servo controller from Pololu drives the motors, and switches the diode on and off. This board offers .NET control, which [Daniel] uses to feed the graphics data to the unit. Check out the video demonstration below the fold to see a few different images being plotted. It’s shot using a night-vision camera so that you can really see where the laser dot is on the display. It takes time to charge the glow material so speeding up the plotting process could actually reduce the persistent image quality.

This is yet another project that makes you use those geometry and trigonometry skills.

Continue reading “Blu-ray Laser Plotter Writes On Glow-in-the-dark Screen”

Laser Light Show Features Full XY Control Via Homemade Galvanometers

[Rich] over at NothingLabs has put together a really cool laser light show that you really must see in an effort to win a laser cutter from Instructables.

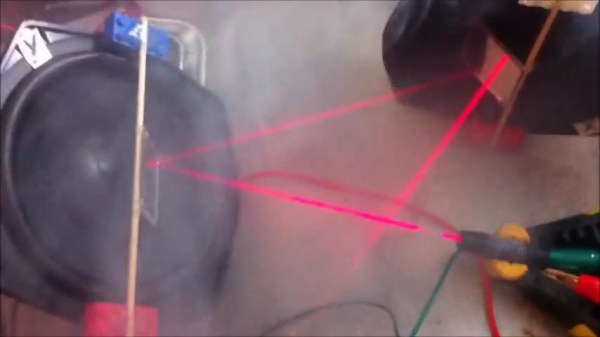
His walkthrough discusses the mechanics of laser light shows – specifically how galvanometers are typically used to precisely aim mirrors in order to draw images and write text. Commercial galvanometers tend to be pretty expensive, so he opted to build his own, using relatively cheap and easy to find parts.

The galvanometers were constructed using a pair of old speaker woofers, a few Lego bricks, and some acrylic mirror squares. The mirrors were mounted on the speakers, which were then wired to an Arduino. He removed the batteries from a cheap red laser pointer and permanently wired it to the Arduino, which it now uses as a pulsed power source. Once he had everything built, he positioned the laser using a fog machine for guidance.

As you can see in the video below, the laser show is quite impressive. His homemade galvos provide a somewhat rough quality to the final projected image, and we like that a lot. It looks almost as if all of the text and images were hand drawn, which is a pretty cool effect.

Just as [Rich] mentions, we hope to see some cool hacks based off his work in the future.

If you are interested in some of our previous laser features, check these out.

Continue reading “Laser Light Show Features Full XY Control Via Homemade Galvanometers”

DIY Laser Light Show Is Sure To Please

cigarbox_laserlightshow

[Pete] had some spare time on his hands over his spring break, and he was itching to build something. He settled on a laser light show since, after all it was spring break, and what says “Party” better than a laser light show?

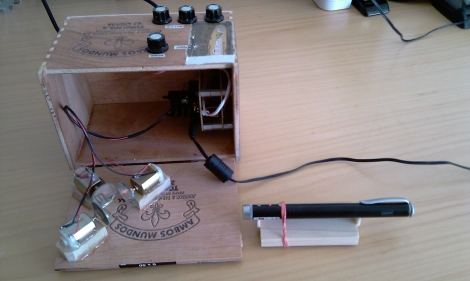
He glued three hobby mirrors to three small motors, mounting the motor assemblies on the lid of a wooden cigar box he bought for next to nothing. When the laser is pointed at the mirrors, they reflect the beam off one another, and finally against a projection surface, creating interesting shapes and motion. He programmed an Atmega328 to control the laser light show when in automatic mode, and added 4 pots to control the mirrors’ spin rate when set in manual mode.

The visuals are pretty cool, as you can see in the videos below. We love the laser light show concept, and [Pete] definitely gets extra points for his cigar-box casing as well.

Continue reading “DIY Laser Light Show Is Sure To Please”

Passcode Protected Laser Tripwire Alarm System

laser_tripwire

Sometimes security doesn’t need to be overly complex to be effective. Instructables user [1234itouch] recently built a simple laser tripwire alarm that can be mounted virtually anywhere, complete with a keypad for disarming the device.

He mounted a photo cell in a project box, along with an Arduino and a 12-button key pad. A laser pointer is aimed at the photo cell from across a gap, which results in a steady voltage being read by the Arduino. When the laser beam is broken, a drop in voltage is detected, and the alarm sounds until you enter the proper pre-configured passcode. Entering the passcode triggers a 15 second grace period during which the the alarm cannot be tripped again.

It might not be built with triple-thick steel doors and thermo-sensors, but it’s a simple device for simple needs. In its current form it could be pretty useful, and with a little reworking, there are a wide range of things it could be used for.

Continue reading to see a demo video of the tripwire alarm, and be sure to check out these other tripwire-based security systems.

Continue reading “Passcode Protected Laser Tripwire Alarm System”