A Self-Expanding PWM Driver

For smaller microcontrollers, having enough outputs for the job is sometimes a challenge. A common solution is to do some sort of multiplexing with the available outputs or perhaps something more advanced such as Charlieplexing, but another good option is to use a specialized driver board. What’s even better is if you can daisy chain driver boards to get even more outputs.

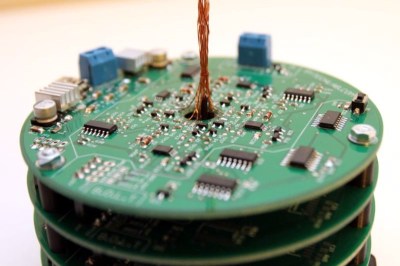
[Eric] has been working on a 16 channel LED project but first wanted to build a driver board with 8 channels. Before building a full 16 channel version he realized that he could take the same 8 channel board, make a mirror image of it, and attach it underneath the first board with headers in order to double the number of channels available. Without having to build a separate 16-channel board, this shortcut saved [Eric] some time and a great deal of effort.

This is a great example of working smarter, not harder. Each of the 8 or 16 channels has full PWM support as well to support PWM dimming, and a similar board could be built for motor control as well. It’s a good illustration of how good design can end up working for you as well. And if you need even more outputs, Charlieplexing is one way to get them.

Continue reading “A Self-Expanding PWM Driver”

Tindie Seller Reviews A Knock-Off Of His Own Product

If imitation is the sincerest form of flattery, online creators are being sincerely flattered at an alarming rate these days. We Hackaday scribes see it all the time, as straight copy-pastes of our articles turn up on other websites under different bylines. It’s annoying, but given prevailing attitudes toward intellectual property rights, there’s very little point in getting upset about it anymore. But what if it’s hardware that’s being infringed upon?

Hacker and Tindie store proprietor [Brian Lough] recently ran into this problem with one of his products, but rather than get upset, he did a remarkably fair and thoughtful review of the knock-off. The board in question, a D1 Mini Matrix Shield, makes it a snap to use LED matrix panels in projects like his Tetris-themed YouTube sub counter. The knock-off came via Ali Express, with the most “flattering” aspect being the copy and the images on the Ali Express listing, some of which are pulled straight from [Brian]’s Tindie store. While the board’s layout is different, it’s pretty clear that it was strongly inspired by the original. And the changes they did make – like terminal choices and undersizing some traces – only serve to lower the quality of the knock-off. Surely this was a cost-cutting move, so they could undercut sales of the original, right? Apparently not – the knock off is more expensive. Yes, [Brian]’s board is a kit and the imitator is fully assembled, but it still begs the question of why?

Hats off to [Brian] for not only making a useful product, but for taking the time to engineer it properly and having the ambition to put it on the market. It’s a pity that someone felt the need to steal his work, but it seems to be a rite of passage these days.

Continue reading “Tindie Seller Reviews A Knock-Off Of His Own Product”

Ambitious LED Cube Provides Endless Video Game Scrolling; Plays Castlevania

LED cubes are all the rage right now, and rightly so given the amount of work that goes into them and the interesting things people find to do with them. Not content to make yet another position-sensitive display or an abstract design, though, [Greig Stewart] opted for something a bit more ambitious: an LED cube with a playable game of Castlevania.

As ambitious projects often do, this one required leveraging the previous art, some of which we’ve featured before. [Greig] pulled inspiration and information from cube builders like [polyfloyd], [Greg Davill], and [kbob] to put the six 64-LED matrix panels to work. Getting the structural elements figured out was an early stumbling block, but [Greig] pulled it off with 3D-printed brackets and a hinge that’s a work of art in itself; the whole thing looks like something the Borg would have built. The Raspberry Pi inside made a Gameboy emulator possible, and his first stab at it was to have six different games running at once, one on each panel. He settled on just one game, the classic side-scroller Castlevania, played on just four of the panels. Some wizardry was required to de-scroll the game so that the character walks around the cube rather than having the background scroll; you can check out the results in the clip below.

Currently, the cube sits on a lazy susan with a small motor controlling the swiveling in response to a foot control. [Greig] wants to put the motor under control of the game so that physical scrolling is synced with gameplay; we heartily endorse that plan and look forward to the results.

Continue reading “Ambitious LED Cube Provides Endless Video Game Scrolling; Plays Castlevania”

The Basics Of Persistence Of Vision Projects

Persistence of Vision (POV) is a curious part of the human visual system. It’s the effect by which the perception of an image lingers after light has stopped entering the eye. It’s why a spinning propeller appears as a disc, and why a burning sparkler appears to leave a trail in the air. It’s also commonly used as a display technology, where a series of flashing LEDs can be used to create messages that appear to float in the air. POV displays are a popular microcontroller project, and today, we’ll explore the basic techniques and skills required in such builds.

Continue reading “The Basics Of Persistence Of Vision Projects”

Light Emitting Logic Gates Built From Scratch

What’s the weirdest computer you can think of? This one’s weirder.

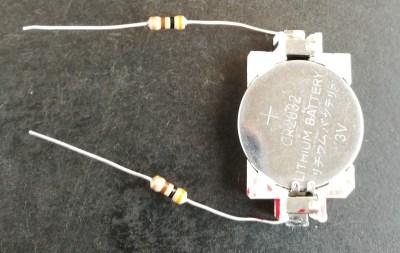
[Dr. Cockroach] figured out a way to create an inverting NOT gate from just one LED and two resistors (one being a photo-resistor). The Dr. has since built AND, NAND, OR, NOR, XOR and XNOR gates, as well as a buffer, incorporating light into every logic gate.

Traditional inverters – NOT gates – are already made with diodes (typically not light-emitting), resistors (typically not light-dependent), and bipolar transistors. The challenge was to reduce the number of transistors. The schematic from the very first test shows the slight modifications [Dr. Cockroach] made to incorporate light into the logic gate using a 910 Ohm, output LED, and an LED and LDR in parallel.

The output is initially 4.5V for logic 1 and 1.5V for logic 0. Adding two 1N914 diodes and an AND gate ahead of the inverter create a two-input NAND gate. With the two diodes reversed and a 910 Ohm resistor removed, a NOR gate is created.

The next step was to build a S-R latch using the NAND gates and inverters, which holds some basic memory. From there, with some size reductions, a Master-Slave J-K Flip Flop, similarly using NAND gates and inverters, can be built. The current state of the project is a working sequencer and counter. You can even see a smooth sine wave propagating through the LED chaser, which is typically built with ICs or transistors but in this case is built simply with LEDs, LDRs, resistors, and capacitors.

The upcoming plan is to use the gates to build a processor that only uses diodes, resistors, and capacitors. While it’s probably not going to be nearly as fast as any processors we have today, it should be interesting (and educational!) to be able to visually track the flow of data from one logic gate over to the next. Continue reading “Light Emitting Logic Gates Built From Scratch”

LED Skirt Is Stealth By Day, Party By Night

Versatility is always a boon in any outfit. [Mikaela Holmes] wanted to create a skirt that could be unassuming by day, but be the life of the party when the lights go down. Her Day-To-Night Light Skirt achieves just that!

The build is one that should be achievable by anyone with basic dressmaking skills. White and lavender tutus are combined to form the base of the skirt, with a lace outer layer sewn on to create an attractive silhouette for the lights. A USB battery pack is hidden in a pocket in the back to power the show. A WS2812B LED strip is then attached to the skirt, and hidden behind an additional layer of white faux-fur to help diffuse the light.

A pre-programmed LED controller from Cool Neon is used to run the strip, meaning no microcontroller code is required. It also allows the skirt’s lighting effects to be controlled by remote. Such controllers can make getting a glowable project up and running more quickly, particularly for those with less experience in the microcontroller space. Plus, the project can always be upgraded with a fancier controller later. For the most part, the vast majority of glowable projects use similar flashing and fading animations anyway; there’s really no need to reinvent the wheel every time.

[Mikaela] does a great job of showing the necessary steps to produce a skirt that is both attractive and functional. We’ve seen other great projects in this space before, too – like this awesome fibre optic piece. If you’re sewing up your own impressive glowable fashions, be sure to let us know! Video after the break.

Continue reading “LED Skirt Is Stealth By Day, Party By Night”

Daisy Chained Seven Segment Art Display


This seven segment art display makes use of a 81 seven segment red common cathode LED displays. The LEDs are arranged onto 100x100mm boards that each contain an Arduino Nano and 9 seven segment displays, daisy chained through three-pin headers located on the sides of the boards. The pins (power, ground, and serial) provide the signals necessary for propagating a program across each of the connected boards.

The first board – with two Arduino Nanos – sends instructions for which digits to light and drives the display, sending the instructions over to the next board on the chain.

In a multiplexed arrangement, a single Arduino Nano is able to drive up to 12 seven segment displays, but only 9 needed to be driven for the program, keeping D13’s built in LED and the serial pins free. Since no resistors are featured on the boards, current limiting is done through software. This was inspired by the Bubble LED displays on the Sinclair Scientific Calculator, and was done in order to achieve a greater brightness by controlling the current through the duty cycle.

The time between digits lighting up is 2ms, giving them some time to cool down. The animations in the demos featured falling and incrementing digits, as well as a random number generator using a linear feedback shift register.

Continue reading “Daisy Chained Seven Segment Art Display”