It’s more than a little too late for Valentine’s Day this year, but if you start now, you’re sure to be looking good next February. Print something that truly conveys how you feel, through the magic of wireless communication and RGB LEDs (Youtube, French).
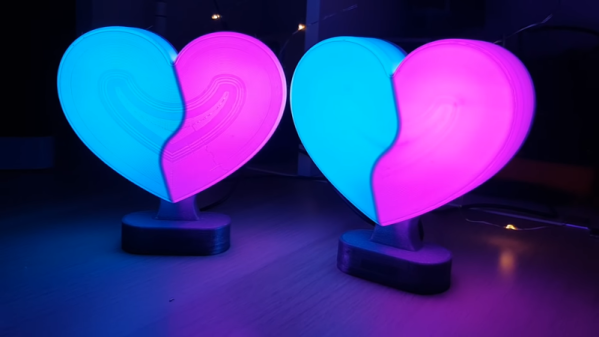
Yes, [Heliox] has built a Valentine’s day project, and the presentation is top notch as always. A heart is 3D printed in white filament, with two chambers separated by a thick wall. Each chamber features five NeoPixel LEDs, controlled by an ESP8266 in the base. The color of each chamber can be controlled through the Blynk smartphone app, allowing you to choose the exact colors that best represent your relationship.
The 3D printed heart does a good job of diffusing the LEDs, with the device showing a rich and consistent glow without any unattractive hotspots. It’s a fun holiday build, and if you’re quick, you might just have time to print one yourself if you start right away.
[Heliox] has good form when it comes to LED projects – her infinity cube is particularly impressive. Video after the break.