HeartBeat Boombox Creates Bio Beats

sophi1

If you happened to be wandering the hall of science during MakerFaire NY, you may have noticed a woman walking around with a rather odd boombox strapped around her neck. That was [Sophi Kravitz] with her HeartBeat Boombox. Thankfully [Sophi] lives within driving distance of Makerfaire, and didn’t attempt to get through airport security with her hardware. She started with three medical grade pulse oximeters. These oximeters output a “beep” for every beat of your heart. [Sophi] rolled her own AVR board running Arduino firmware to capture pulses on their way to the oximeter audio transducer. The AVR uses a sound board to convert the pulses into various percussion sounds. The pulse indicators also activate one of three LED strips.

[Sophi’s] biggest frustrations with the hack were the JST connectors on the LIPO batteries powering the entire system. She found that they fell apart rather easily. We’ve used JST connectors in the past with no problem, so we’re guessing she ended up with one of the many knock off connectors out there. [Sophi] tied the entire system together with a custom milled acrylic plate mounted to the front of the boombox.

The final result was very slick. With three people connected to the finger inputs of the pulse oximeters, some complex beats could be formed. We thought we were listening to dubstep when she first walked by. One feature we would like to see implemented would be the ability to record and play back some of the beats created by the boombox.

Monitor GitHub Activity With An RGB LED Matrix

tim-display

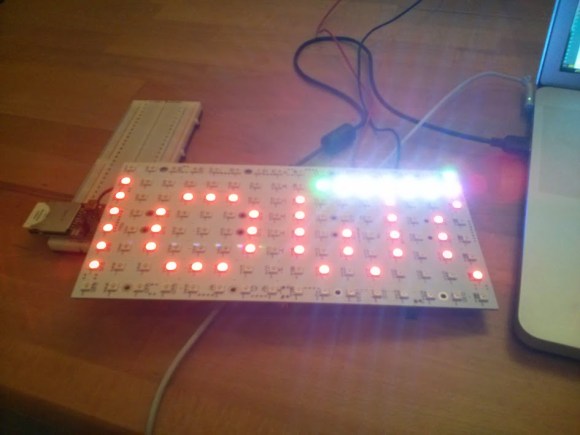
Ever wonder who is forking your code? [Jack] did, so he built a real time GitHub activity display for his company’s repositories. The display is based a Wyolum The Intelligent Matrix (TiM) board. The TiM is an 8 x 16 matrix of the ubiquitous WS2811/Smart Pixel/NeoPixel RGB LEDs with built-in controller. We’re seeing more and more of these serial LEDs as they drop in price. Solder jumpers allow the TiM to be used as 8 parallel rows of LEDs (for higher refresh rates), or connected into one long serial chain.

[Jack] wasn’t worried about speed, so he configured his board into a single serial string of LEDs. An Arduino drives the entire matrix with a single pin. Rather than reinvent the wheel, [Jack] used Adafruit’s NeoMatrix library to drive his display. Since the TiM uses the same LEDs as the Adafruit NeoPixel Matrix, the library will work. Chalk up another victory for open source hardware and software!

An Electric Imp retrieves Github data via WiFi and passes it on to the Arduino. This is a good use of a microcontroller such as the AVR on the Arduino. [Jack’s] display has a scrolling username. Every step in the scroll animation requires all the pixel data be clocked out to the TiM board. The Arduino can handle this while the IMP takes care of higher level duties.

Continue reading “Monitor GitHub Activity With An RGB LED Matrix”

LED Blinds Turn Windows Into Displays

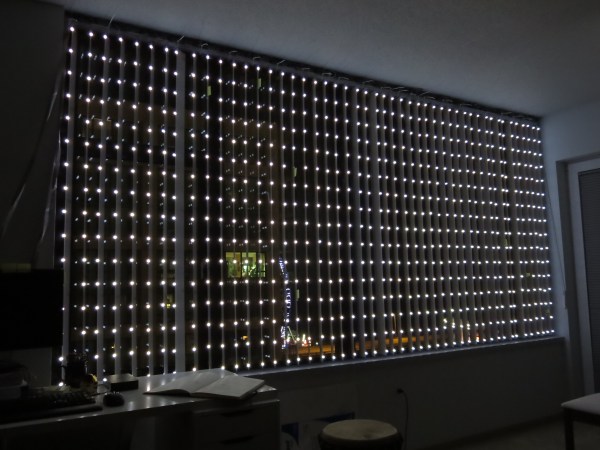
[Dinofizz] is almost done with his vertical LED blinds. The build makes use of 768 diffused white LEDs (10mm size), at a resolution of 48×16, and it only requires one 16-channel LED driver (a MBI5026), which makes use of 3x 4-to-16 demultiplexers. Did we mention it has 16 shades of grayscale too?

At the heart of the many piles of painstakingly soldered wires is an ATmega644A microcontroller which takes care of interpreting the data for the display. He didn’t write the firmware himself though, that credit goes to [Jay Clegg] who does some pretty cool work with Evil Mad Science’s Peggy 2.0 LED driver.

What we really have to admire is the amount of effort he put into this project. He used custom PCBs to daisy chain the blinds together, 300 feet of 16-way ribbon cable, and approximately 4000 individual solder joints! You’d think there would have been an easier way!

Making use of his high rise windows, he now has the ability to broadcast messages for the world to see. After the break check out the video of them in action!

Continue reading “LED Blinds Turn Windows Into Displays”

LEDs Turn The Heat Up On Flameless Pumpkin Lights

led-peter

When tea lights just won’t do, why not move up to a 5 channel LED candle simulator?

Halloween is fast approaching. Peter’s local hackerspace, The Rabbit Hole had a meeting to carve pumpkins and talk Halloween hacks. After seeing how poorly a tea light illuminated a medium size pumpkin, this hack was born. We’ve seen LED jack-o’-lantern hacks before, but this one was worth a second look.

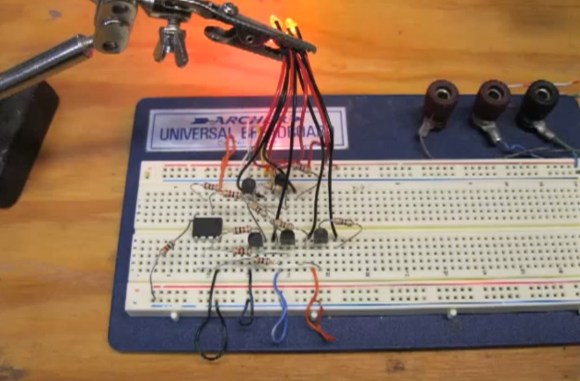
In true hackerspace style, [Peter] used what was available to him. A PIC12F508 is the heart of the project. The 12X508/9 series has been around for at many years, and is still a great chip to work with. We remember using the ‘C’ version of this chip to bypass region locks on original PlayStation systems. [Peter] created a simple circuit with two basic modes. In “value mode” the 508 drives LED’s directly from its I/O pins. This limits the total output to 60mA. In “premium mode”, some 2N3904 NPN transistors are brought in to handle the current.  This allows the PIC to drive up to 5 LEDs.

Candles can be tricky to simulate with LEDs. [Peter] used 5 independent 16 bit linear feedback shift registers to generate pseudo random bit streams. The effect is quite impressive. A “wind simulation” completes the illusion of a real flame. Continue reading “LEDs Turn The Heat Up On Flameless Pumpkin Lights”

Octoscroller Takes The Hexascroller To The Next Level

octosc2

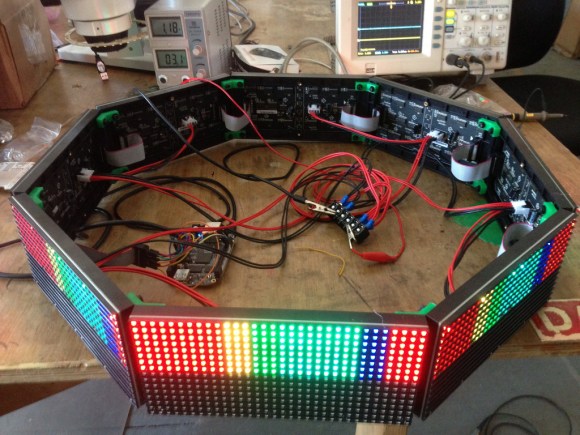
The folks at NYCResistor have a new toy in the Octoscroller. For a couple of years now the NYCResistor crew has used the HexaScroller as a clock and general alert system. Now that RGB LED panels are cheaply available, the group decided to upgrade both the number of sides and the number of colors.

Octoscroller uses eight 16×32 RGB LED panels. These panels are relatively easy to interface to, but require constant refresh even to display a static image. This makes them both memory and CPU intensive for smaller microcontrollers. Brightness control via PWM only increases the difficulty.

On the plus side, the panels are structurally strong. This allows the Octoscroller to avoid the plywood ring which made up the frame of the Hexascroller. 3D printed brackets and hardware were all that was needed to complete the Octoscroller frame.

The brain of the this beast is a BeagleBone Black running LEDscape along with some custom software. Imagery comes from the Disorient Pyramid.

If you’re in the New York area, NYCResistor plans to offer classes on building your own Octoscroller.  You can also see the Octoscroller in person at MakerFaire NYC this weekend.

Make Your Own OLEDS

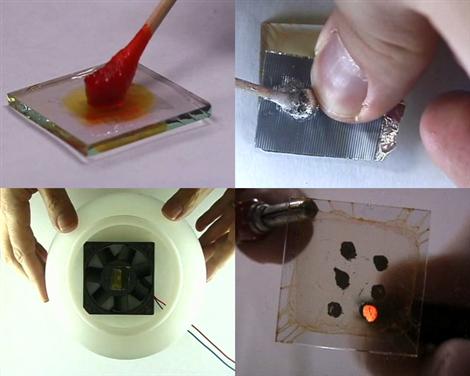
The University of Wisconsin is hosting a tutorial on how to make your own Organic Light Emitting Diodes. This is so amazingly awesome. We want you guys to make some. Someone make your own matrix and display some patterns on it and submit it. Please. Though we’ve seen lots of uses for OLED screens, we never really delved into the process of creating them. It looks much less complicated than we would have imagined.

[via MakeZine]

LED POV Hard Drive Clock

[Ian Smith] sent us this POV display made from an old hard drive. It works by flashing some LEDs under the platter, which has a line cut in it. Since the platter spins at roughly 90 rotations per second, we perceive a solid image. He was inspired by [Alan Parekh]’s project, but did several things differently. Mounting the LEDs was much simpler in this project as he had a strip of RGB LEDs that came with adhesive tape on the back. He also used a small magnet and a hall effect sensor to measure full rotations instead of an IR beam sensor. Check the video after the break.

Continue reading “LED POV Hard Drive Clock”