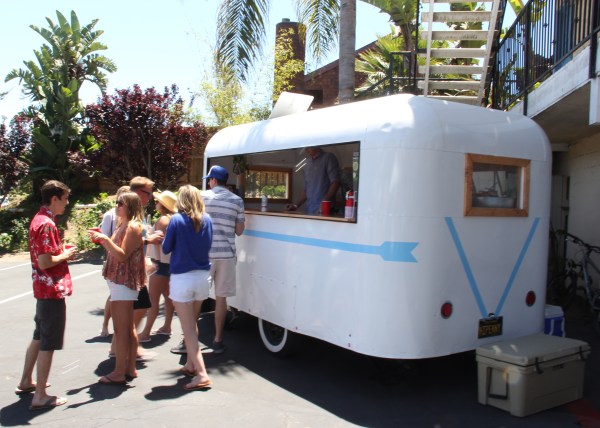
Ok, there are some worthy laws in place regulating the sale and distribution of alcohol — and for good reason. For many a bootlegger, however, the dream of renovating an old trailer from 1946 into a mobile bar is a dream that must– wait, what? That already exists?
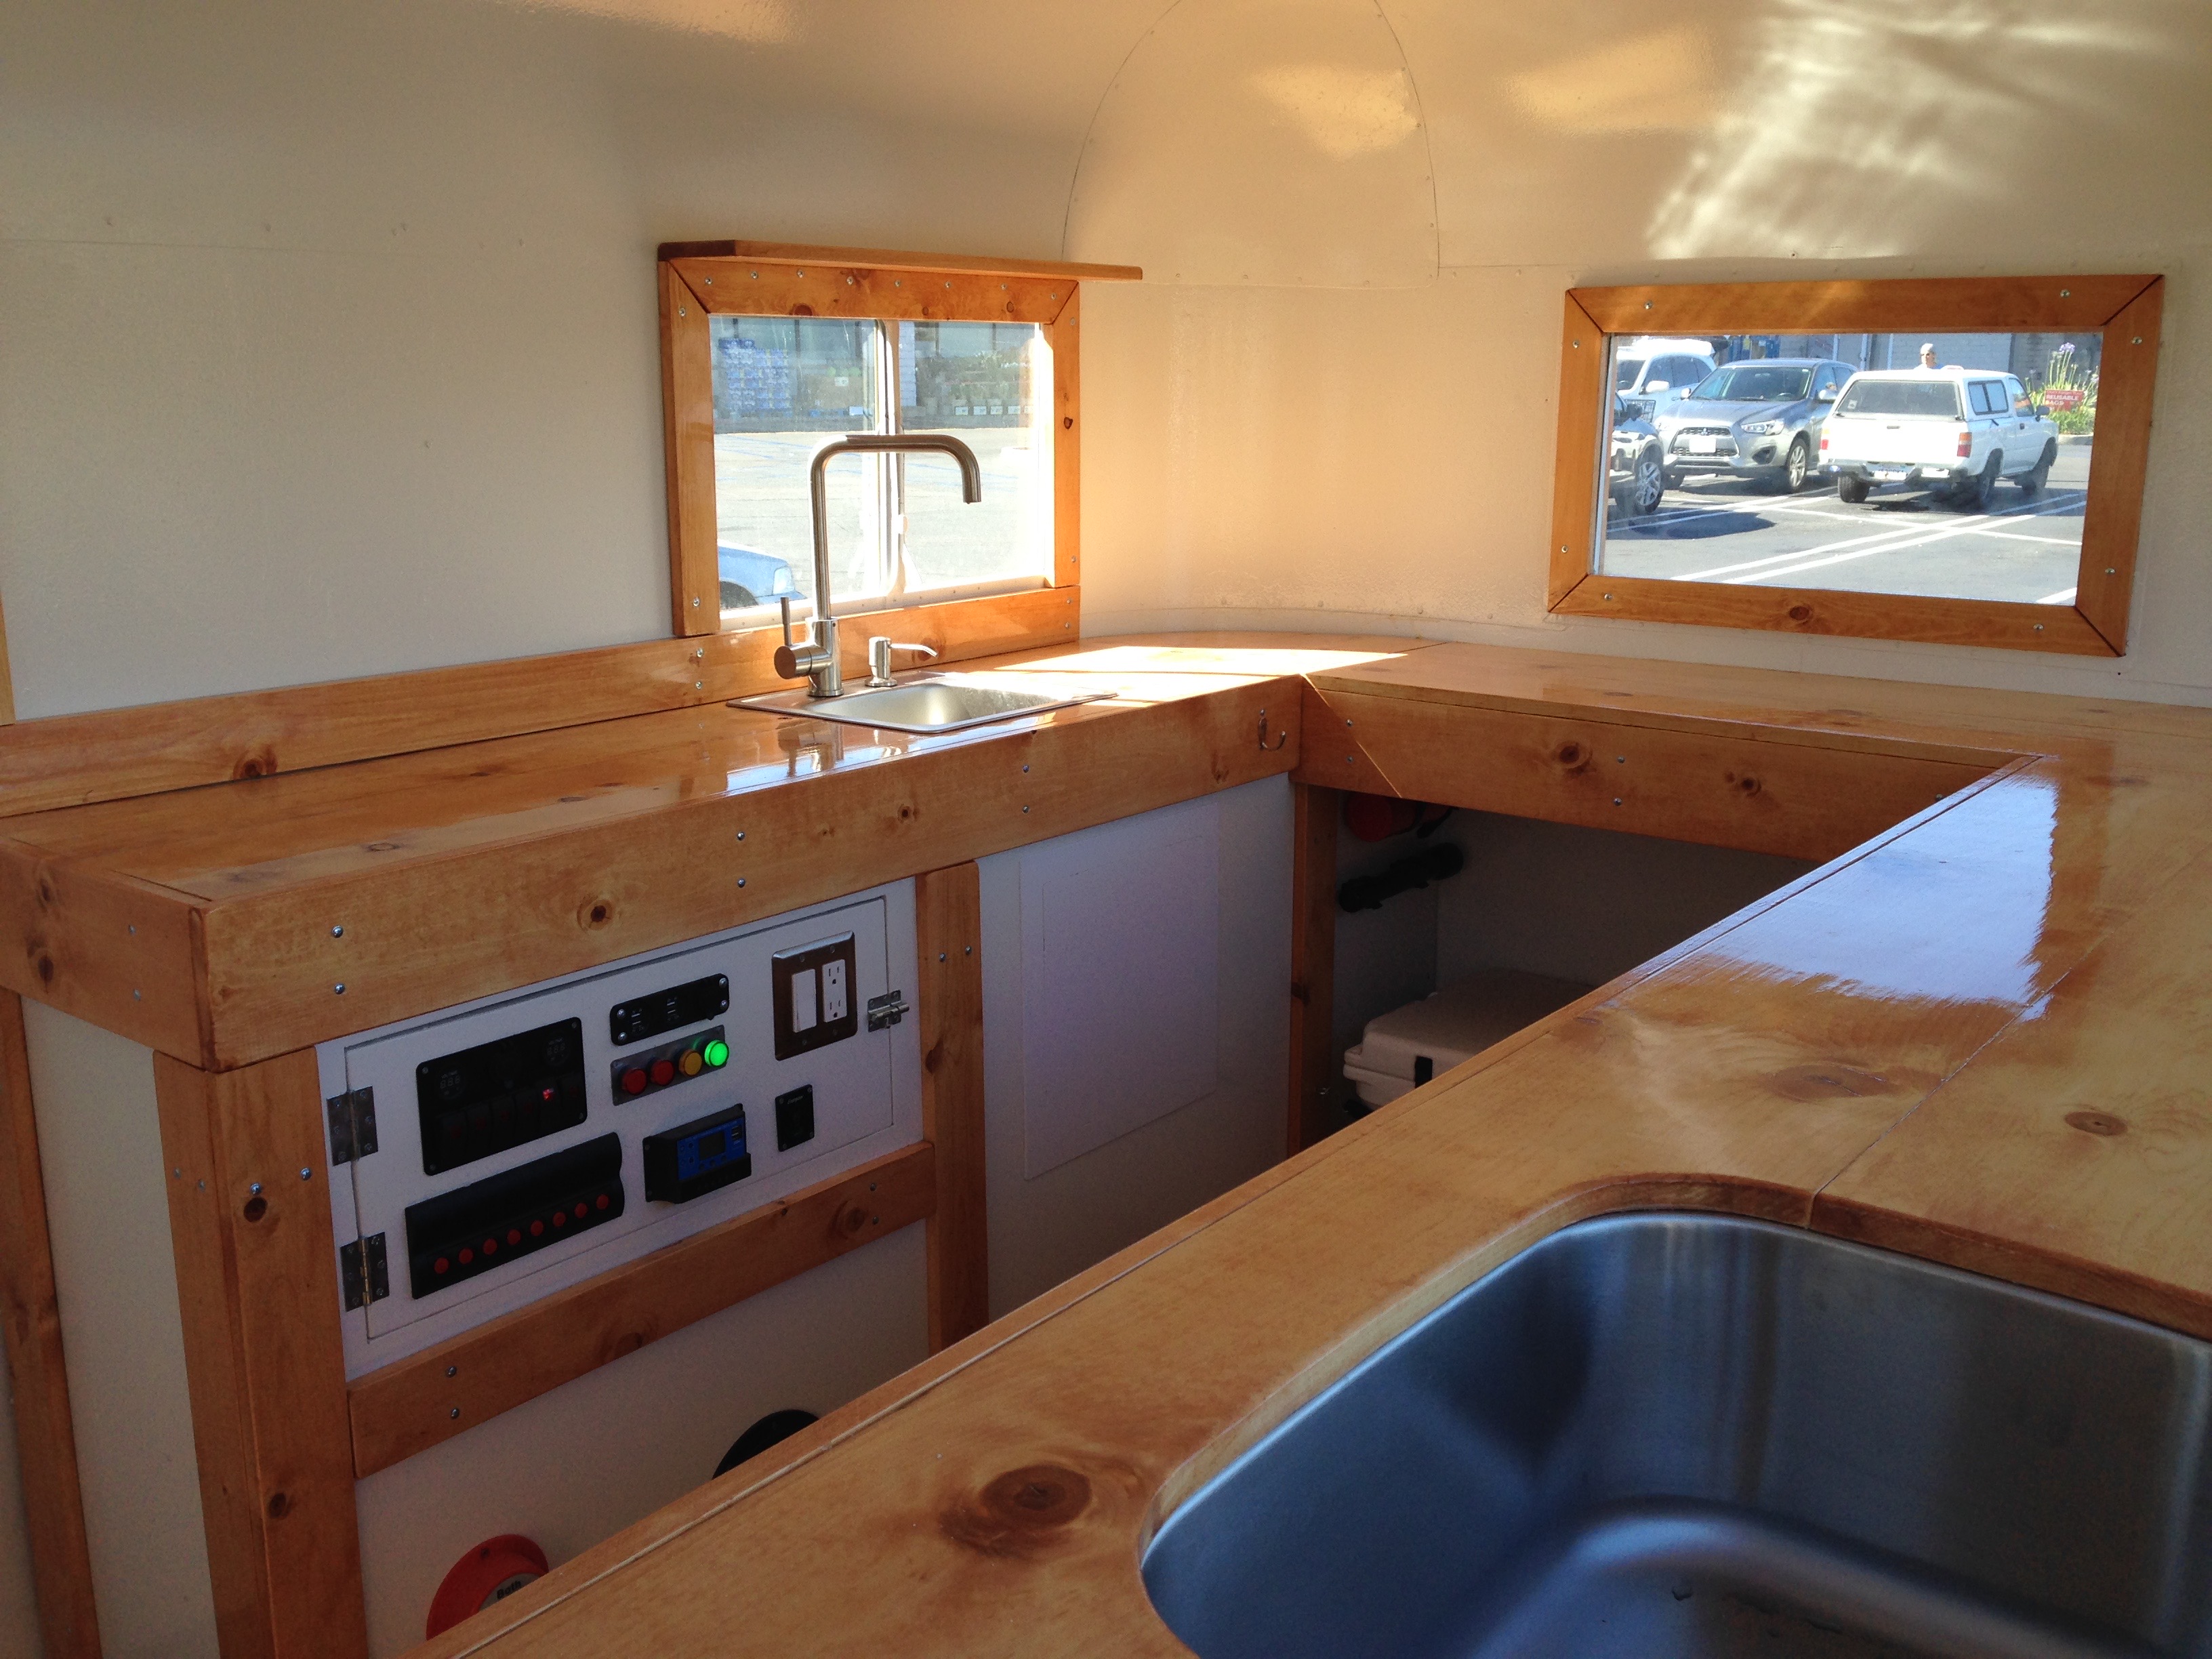 It’s no mobile workshop, but the bar was initially built to accommodate guests at their wedding. [HelloPennyBar] has shared the reconstruction process with the world. Inside, there’s everything you’d need to serve beverages, including a (double) kitchen sink. In addition to a water tank, a pair of car batteries serve as the central power with electrical work installed for interior lights, a small fan to keep the bartenders cool, exterior lights, a water pump, the trailer lights, and more exterior lights so the patrons can party the night away.
Before you say anything, [HelloPennyBar] says they would need a license to sell alcohol, but alleges that for serving alcohol at private events in their state it suffices to have an off-site responsible serving license. Furthermore, a few helpful redditors have chimed in regarding battery safety and cable-mounts, to which [HelloPennyBar] was amenable. Safety and legality noted, the mobile bar must make for a novel evening of fun.
[via /r/DIY]