Hacklet 27 – Holiday Hacks

It’s beginning to look a lot like the holidays around here. That means it’s time for holiday hacks here on The Hacklet! This week we’re looking at the coolest festive hacks created by YOU on Hackaday.io!

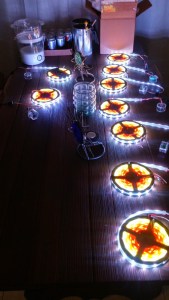
xmashdrWe start with [charliex] and Cypress PSOC 4 + ESP8266 WS2812 RGB XMAS Lights. The name might be a mouthful, but the goal of the project is a simple one: Awesome Christmas lights! [Charliex] has created WiFi controllable Christmas lights. To do this, he’s utilized ARM core based PSOC4 chips from Cypress. WiFi duty is handled by the popular ESP8266 module, and the lights themselves are WS2812 addressable strips.

[charliex] really outdid himself this time, creating a complete solution from the ground up. He started with a Cypress dev board, but quickly moved to a board of his own design. The PCBs  first were milled at home, then sent out for manufacturing.
Control of the strip is via UDP through a WiFi network. [Charliex] found the strips have plenty of WiFi range to place outside his home.  The last part of the puzzle was control – which [charliex] handled in style by creating his own GUI to handle synchronizing several strips to music played on a central computer.

snowflakeNext up is [nsted] with another LED hack, Glowing Xmas Snowflake Sculpture. [Nsted] was contracted to add some extra LED bling to a sculpture. The problem was that these LEDs would be filling in gaps left in the primary interactive lighting system which ran the entire sculpture. Any time you have to meld two systems, things can get crazy. [Nsted] found this out as he added WS2812B Adafruit NeoPixel strips to the Sensacell modules already designed into the sculpture. Communications happen via RS485, with Arduino Due and Megas handling the processing. Power was a concern with this sculpture, as it was pulling over 100 amps at low voltage. Like many art installations, this was a “work down to the wire” event. Everything came together at the last-minute though, and the project was a success!

musicNext up is [Jeremy Weatherford] with Christmas Orchestra.  [Jeremy] has taken on the task of making the most epic retro electronics orchestra ever created. He’s playing Trans-Siberian Orchestra’s Wizards in Winter on four floppies, three scanners, and an ancient inkjet printer. LED strips on the moving elements add lights to the sound. An Arduino Mega with a RAMPS board controls the show. [Jeremy] had his orchestra professionally recorded both on audio and in video. We’re anxiously awaiting the final video upload so we can rock out to some old hardware!

xmaslightsFinally, we’ve got [crenn6977] with his Solar powered Christmas Light Controller. This was [crenn6977’s] entry in the The Hackaday Prize. While it didn’t take him to space, we’re sure it will bring Santa to his door. Rather than run lots of tiny solar cells for his Sun powered Christmas lights, [crenn6977] is going for a single large panel and wireless control. The nRF24L01+ is handling the wireless connectivity, while a STM32F042 ARM cortex M0 processor is the brains of the operation. Solar power demands efficient design, so [crenn6977] is digging deep into op-amp circuits to keep those LEDs running through the night, and the batteries charging through the day.

It’s just about time for us to settle our brains for a long winter’s nap, so we’ll close this edition of The Hacklet here.  As always, see you next week. Same hack time, same hack channel, bringing you the best of Hackaday.io!

jackolantern

Simple LED Project To Spice Up Your Halloween Party

[Paul’s] project is a great example of how you can take a simple project and turn it into something more interesting. He built himself a jack-o-lantern with an Internet controlled RGB LED embedded inside.

[Paul] first wired up an RGB LED to a Raspberry Pi. He was sure to wire up each color using a 100ohm resistor to prevent the LED from burning out. The web interface was written in Python. The interface is pretty simple. It consists of three text fields. The user enters a value between 0 and 255 for each of the three LED colors. The program then lights up the LED accordingly.

[Paul] realized he would need a diffuser for the LED in order to really see the blended colors properly. Instead of using a common solution like a ping-pong ball, he opted to get festive and use a plastic jack-o-lantern. [Paul] removed the original incandescent bulb from the lantern and mounted the LED inside instead. The inside of the pumpkin is painted white, so it easily diffuses the light. The result is a jack-o-lantern that glows different colors as defined by his party guests. Be sure to check out the demonstration video below.

Strobe Remote

Reverse Engineering A Wireless Studio Lighting Remote

If you want to take a photograph with a professional look, proper lighting is going to be critical. [Richard] has been using a commercial lighting solution in his studio. His Lencarta UltraPro 300 studio strobes provide adequate lighting and also have the ability to have various settings adjusted remotely. A single remote can control different lights setting each to its own parameters. [Richard] likes to automate as much as possible in his studio, so he thought that maybe he would be able to reverse engineer the remote control so he can more easily control his lighting.

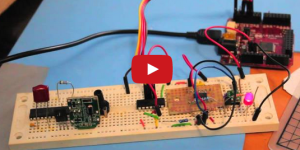
[Richard] started by opening up the remote and taking a look at the radio circuitry. He discovered the circuit uses a nRF24L01+ chip. He had previously picked up a couple of these on eBay, so his first thought was to just promiscuously snoop on the communications over the air. Unfortunately the chips can only listen in on up to six addresses at a time, and with a 40-bit address, this approach may have taken a while.

Not one to give up easily, [Richard] chose a new method of attack. First, he knew that the radio chip communicates to a master microcontroller via SPI. Second, he knew that the radio chip had no built-in memory. Therefore, the microcontroller must save the address in its own memory and then send it to the radio chip via the SPI bus. [Richard] figured if he could snoop on the SPI bus, he could find the address of the remote. With that information, he would be able to build another radio circuit to listen in over the air.

Using an Open Logic Sniffer, [Richard] was able to capture some of the SPI communications. Then, using the datasheet as a reference, he was able to isolate the communications that stored information int the radio chip’s address register. This same technique was used to decipher the radio channel. There was a bit more trial and error involved, as [Richard] later discovered that there were a few other important registers. He also discovered that the remote changed the address when actually transmitting data, so he had to update his receiver code to reflect this.

The receiver was built using another nRF24L01+ chip and an Arduino. Once the address and other registers were configured properly, [Richard’s] custom radio was able to pick up the radio commands being sent from the lighting remote. All [Richard] had to do at this point was press each button and record the communications data which resulted. The Arduino code for the receiver is available on the project page.

[Richard] took it an extra step and wrote his own library to talk to the flashes. He has made his library available on github for anyone who is interested.

City Lights Telling Stories

If you’re walking around town and you see a light suddenly start to switch on and off seemingly at random, don’t discount it as a loose wire so quickly. [René] has been hard at work on a project to use city lights of all shapes and sizes for Morse messages, and a way for anyone to easily decode these messages if they happen upon one while out and about.

The lights can tell any story that is programmed into them. The code on the site is written for an Arduino-style microcontroller but it could be easily exported to any device that can switch power to turn a light on and off. Any light can work, there’s even video of a single headlight on a van blinking out some dots and dashes.

The other part of this project is a smartphone app that can decode the messages using the camera, although any Morse code interpreter can translate the messages, or if you’re a ham radio enthusiast you might recognize the messages without any tools whatsoever!

The great thing about this project is that it uses everyday objects to hide messages in plain sight, but where only some will be able to find them. This is indeed true hacker fashion! If you’re interested in making your own Morse code light, the code is available on the project site.

A Motion Activated AC Switching Circuit Using Mostly Discrete Components

AC motion switch

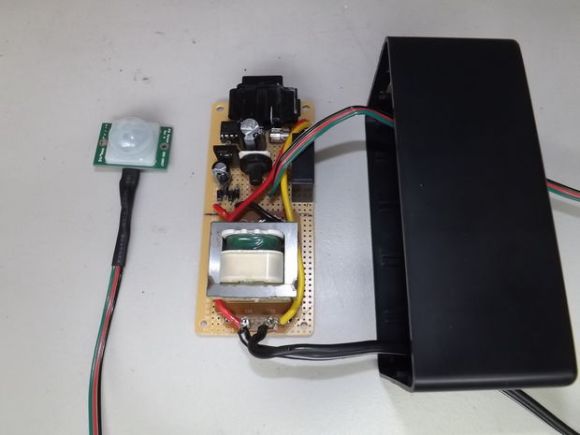
If you’ve ever dealt with a brightly lit Christmas tree, you might understand the frustration of having to crawl underneath the tree to turn the lights on and off. [brmarcum] feel’s your pain. He’s developed his own motion activated AC switching circuit to turn the lights on and off automatically. A motion sensor ensures that the lights are only on when there are people around to actually see the lights. The circuit also has an adjustable timer so [brmarcum] can change the length of time that the lights stay on.

The project is split into several different pieces. This makes the building and debugging of the circuit easier. The mains power is first run through a transformer to lower the voltage by a factor of 10. What remains is then filtered and regulated to 9VDC. [brmarcum] is using a Parallax PIR sensor which requires 4.5V. Therefore, the 9V signal is then lowered once more using a voltage divider circuit.

When the PIR sensor is triggered, it activates the timer circuit. The timer circuit is driven by a 555 timer. The circuit itself was originally borrowed from a classic Forrest Mims book, though it was slightly modified to accommodate the PIR sensor. The original push-button trigger was removed and replaced with the signal from the PIR sensor. The only problem is that the circuit was expecting a low signal as the trigger and the PIR sensor outputs a high signal. [brmarcum] resolved this problem with an NPN BJT to invert the signal. Once the timer is triggered, it flips on a relay that allows the mains electricity to flow through to the lights.

[brmarcum] soldered the entire circuit onto a piece of protoboard. The final product was then mounted securely inside of an insulated plastic case. This allows him to mount the circuit safely underneath the Christmas tree skirt. The PIR sensor is kept external to the enclosure and wired up into the tree itself. This allows the sensor to still detect motion in the room while the rest of the circuit is hidden away.

[via Reddit]

Cheap Under-Cabinet Lights Reimagined As Photography Lighting

diy photography lights

Professional photography lighting can be expensive. Sometimes the professional photographer may not want (or need) to spend the big bucks on lighting. [Alex] is one of those folks. He needed a specialized light source and instead of going out and buying some, he made exactly what he needed out of components unlikely to be found in a photography studio.

The project started off with some off the shelf $12 Home Depot under-cabinet lights. Foam core board was attached to the sides of each light to adjust the beam’s width. Opening and closing these foam flaps allow the light beam to be adjusted to ensure the perfect shot.  The entire assembly was then taped to long, thin pieces of wood. The wood’s sole purpose is to facilitate mounting of the light.

Continue reading “Cheap Under-Cabinet Lights Reimagined As Photography Lighting”

Remote Servo-controlled Lightswitch

remoteServoLightSwitch

We frequently get home automation tips, many of which have simple circuit-based on/off control for lights. [Paulo Borges] has created something quite different, however, with his in-the-wall servo-controlled light switch. This build forgoes the need of any relay to switch mains power, and because it’s physically flipping your switch, provides a distinct advantage over other builds that require a phone or tablet interface: you can use your switches as you normally would.

[Paulo] picked up a rocker-type switch at the local hardware store and carefully pried off the large, flat switch plate to notch out a small hole at its fulcrum. He then carefully shaped a piece of 12 gauge wire to provide a pivot point for the servo. His choice to use wire here seems to be entirely to provide a sturdy yet bendable component that functions mechanically rather than electrically. A small 9G servo fits to the back of the switch’s housing, and the servo’s arm connects up to the previously attached 12 gauge wire. He pieced together the remote control feature with an RF link kit with an inexpensive 433mhz Code duplicator from eBay.

[Paulo] explains that his Instructable is simply an overview rather than a step-by-step guide, so if you’re eager to reproduce this hack you’ll have to work out the code and the remote control portion yourself. He also acknowledges the biggest remaining hurdle: finding space in the wall to shove all the microcontroller guts. Check out a couple of videos of the switch after the break, and remember, there’s always the option of doing away with all light switches.

Continue reading “Remote Servo-controlled Lightswitch”