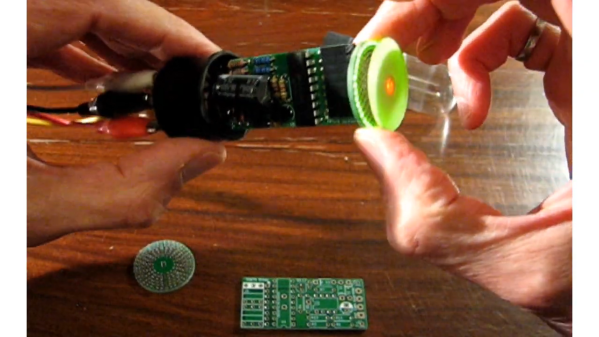
The classic “Magic Eye” tuning indicator was a fantastic piece of vacuum tube technology that graced all kinds of electronic gear for a fair fraction of the 20th century. But despite its prevalence, finding a new-old-stock Magic Eye tube is a tall order these days, especially for the rare versions like the 6T5. No worries, though, since direct plug-in solid-state replacements for the 6T5 are now a thing, thanks to [Gord Rabjohn]. Continue reading “The Eyes Have It With This Solid State Magic Eye”
lm39145 Articles
Custom Circuit Makes For Better Battery Level Display
Isn’t it always the way? There’s a circuit right out of the textbooks, or even a chip designed to do exactly what you want — almost exactly. It’s 80% perfect for your application, and rather than accept that 20%, you decide to start from scratch and design your own solution.
That’s the position [Great Scott!] found himself in with this custom LED battery level indicator. As the video below unfolds we learn that he didn’t start exactly from scratch, though. His first pass was the entirely sensible use of the LM3914 10-LED bar graph driver chip, a device that’s been running VU meters and the like for the better part of four decades. With an internal ladder of comparators and 1-kilohm resistors, the chip lights up the 10 LEDs according to an input voltage relative to an upper and lower limit set by external resistors. Unfortunately, the fixed internal resistors make that a linear scale, which does not match the discharge curve of the battery pack he’s monitoring. So, taking design elements from the LM3914 datasheet, [Great Scott!] rolled his own six-LED display from LM324 quad-op amps. Rather than a fixed resistance for each stage, trimmers let him tweak the curve to match the battery, and now he knows the remaining battery life with greater confidence.
Perhaps the 18650 battery pack [Great Scott!] is building is for the e-bike he has been working on lately. If it is, we’re glad to see that he spot-welded the terminals, unlike a recent e-bike battery pack build that may have some problems down the road.
Continue reading “Custom Circuit Makes For Better Battery Level Display”
Upgrading An Old Camera With A New Light Meter
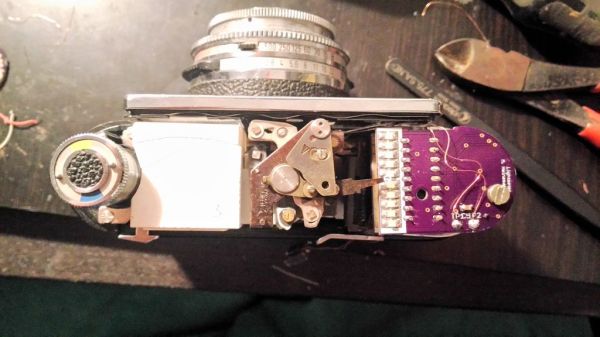
[Marc] has an old Voigtländer Vito CLR film camera. The camera originally came with an analog light meter built-in. The meter consisted of a type of solar panel hooked up to a coil and a needle. As more light reached the solar panel, the coil became energized more and more, which moved the needle farther and farther. It was a simple way of doing things, but it has a down side. The photo panels stop working over time. That’s why [Marc] decided to build a custom light meter using newer technology.
[Marc] had to work within the confines of the tiny space inside of the camera. He chose to use a LM3914 bar display driver IC as the primary component. This chip can sense an input voltage against a reference voltage and then display the result by illuminating a single LED from a row of ten LEDs.
[Marc] used a photo cell from an old calculator to detect the ambient light. This acts as a current source, but he needed a voltage source. He designed a transimpedence amplifier into his circuit to convert the current into a voltage. The circuit is powered with two 3V coil cell batteries, regulated to 5V. The 5V acts as his reference voltage for the display driver. With that in mind, [Marc] had to amplify this signal further.
It didn’t end there, though. [Marc] discovered that when sampling natural light, the system worked as intended. When he sampled light from incandescent light bulbs, he did not get the expected output. This turned out to be caused by the fact that incandescent lights flicker at a rate of 50/60 Hz. His sensor was picking this up and the sinusoidal output was causing problems in his circuit. He remedied this by adding two filtering capacitors.
The whole circuit fits on a tiny PCB that slides right into position where the original light meter used to be. It’s impressive how perfectly it fits considering everything that is happening in this circuit.
[Thanks Mojay]
Party Ready Mini LED Volume Tower
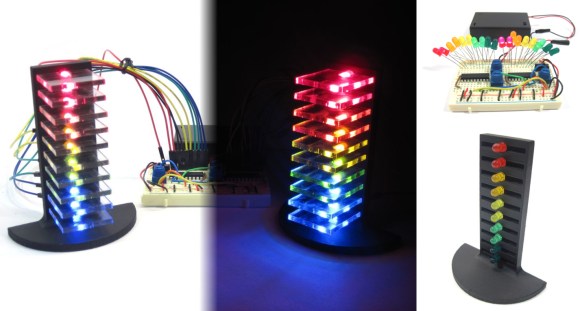
There are many very cool visual effects for music, but the best are the kind you build yourself. [Ben’s] mini LED volume towers adds some nice bling to your music.
[Ben] was inspired to created this project when he saw a variety of awesome stereo LED towers on YouTube (also referred to as VU meters). We have even featured a few VU meters, one very recently. [Ben] goes over every detail, including how to test your circuit (a very important part of any project). The schematic is deceptively simple. It is based on the LM3914 display driver IC, a simple chained comparator circuit is used to control the volume bar display. All you really need is a 3D printer to make the base, and you can build this awesome tower.
See the completed towers in action after the break. What next? It would be cool to see a larger tower that displays frequency magnitude!
Swapping Speedometer Needle For LEDs
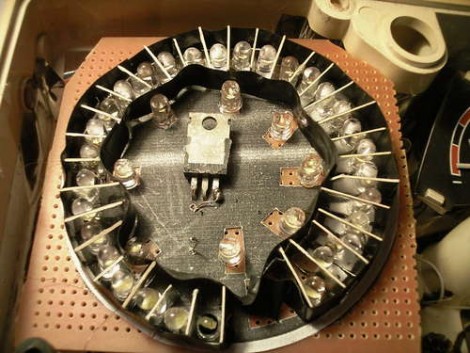
[Ah2002] didn’t like the shaky needle in his car’s speedometer so he replaced it with a ring of LEDs. The old speedometer had a cable which rotated along with the gearbox for mechanical speed measurement. By connecting the stepper motor from a printer instead of this cable, a voltage is generated that fluctuates with the speed of the car. The fluctuation is linear so a given voltage measurement can be directly associated with one particular speed. By using a trimpot to calibrate the input voltage, [Ah2002] connected the signal to an LM3914 dot/bar display driver. These can be chained together, lighting a string of outputs based on the single voltage input. The result is the board seen above, which was covered with a printed paper graph in the final assembly.
Judging from the video after the break, we’d bet there was some distracted driving during the calibration process. The driver appears to be holding the video recorder, and since a cellphone GPS was used during calibration we wonder if [Ah2002] was adjusting the trimpot, looking at the GPS, and driving all at once. It’s a fairly awesome hack, but do be careful when you’re working on something like this.