[hhtat] wanted to build an arcade cabinet since his days in high-school. Only recently have the tech planets aligned. Looking into the night sky he saw a laser cutter, the Raspberry Pi, and lowering prices on key components and thought, “this is the year.”
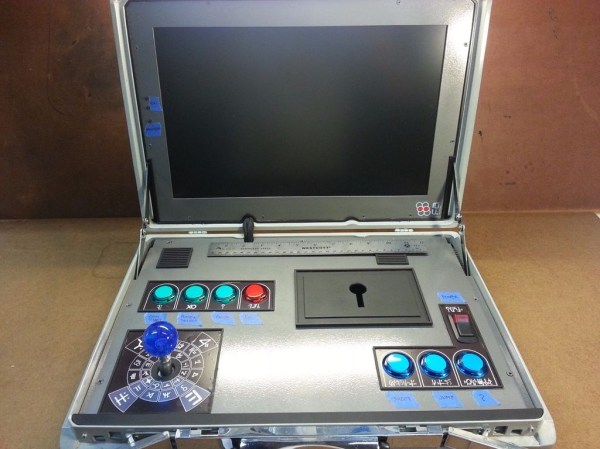
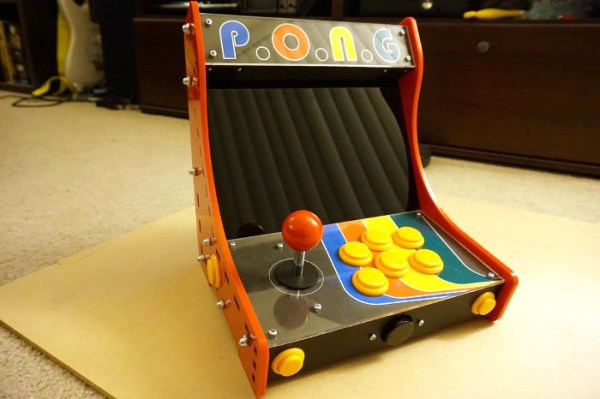
Much like an arcade cabinet we posted earlier, this one sits on a counter top. With full controls and a nice screen, it provides a lot of the experience without the additional explaining to the SO why the living space should house a giant decaled MDF box.
The frame was designed in SketchUp and vectors were made in Inkscape. The frame was lasercut out of MDF and Acrylic. Decals were printed and applied. The resulting case, build from tab and slot construction, is attractive.
The internals are simple. A Raspberry Pi with a fast SD card acts as the brain. Rather than make it difficult on himself, [hhat] bought a pre-made controls kit from eBay. Apparently there is a small market for this stuff. He also purchased an IPS screen with built in controller. The IPS panel gives the arcade cabinet a desireable wide viewing angle.
The final product looks like a lot of fun and we can see it turning at least one person into an unintentional loner at any house party.