C64 Runs On STM32F429 Discovery

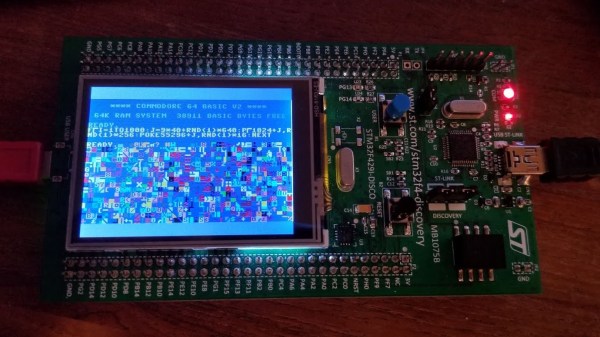
There have been various reincarnations of the Commodore C64 over the years, and [Dave Van Wagner] has created one that can run on an STM32F429ZI Discovery development board. These dev boards have been around quite a few years and feature a 2.4 inch color TFT LCD in addition to the typical I/O circuitry, and are a pretty good value — [Dave] says they currently sell for under $30 through distribution.

The project began earlier this year when [Dave] set out to write a command line program in C# that emulated C64 Basic. He had written a 6502 emulator many years earlier, but had not tested it. [Dave] went on a programming binge in March and got it up and running over a very long weekend. He subsequently decided to add support for VIC-20, TED, and PET as well.

Even though [Dave] says C# is a beautiful language, he subsequently ported the program into C (an ugly language?) in order to run on the Discovery board, swapping the command line terminal interface for real LCD video and a USB keyboard. There’s also an Arduino version (terminal interface only). It runs about 15% slower than a real C64, and there are some limitations still like no SID. But overall, this is a great project and a low-cost way to emulate a C64 in an embedded format. If you want to explore further, here is the Mbed project for the STM32F429, and you can find the Arduino and C# versions on his GitHub page. You may remember [Dave] from the C128 video hack we wrote about last year.

New Life For Old Nintendo Handhelds With ESP32

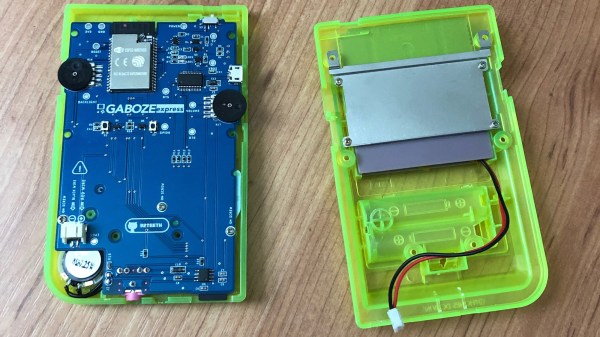
The Game Boy Pocket was Nintendo’s 1996 redesign of the classic 1989 handheld, giving it a smaller form factor, better screen and less power consumption. While it didn’t become as iconic as its predecessor, it still had enough popularity for modders such as [Eugene] to create new hardware for it. His Retro ESP32 board is a drop-in replacement for the console’s motherboard and screen, giving it a whole new life.

[Eugene] is no stranger to making this kind of mod, his previous Gaboze Pocaio project did the exact same thing with this form factor, only with a Raspberry Pi instead of the ESP32-WROVER used here. His choice of integrated SoC was based on the ODROID-GO, which is a similar portable console but with its own custom shell instead.

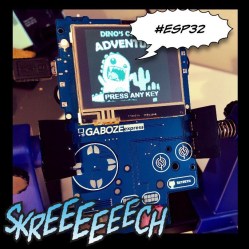
This project doesn’t stop at the hardware though, the Retro ESP32 (previously dubbed Gaboze Express) also offers a user-friendly interface to launch emulators. This GUI code can be used with the ODROID as well since they share the same hardware platform, so if you have one of those you can try it out right now from the software branch of their repository.

If the idea of replacing retro tech innards with more modern hardware is something that interests you, look at what they did to this unassuming Osborne 1, or this unwitting TRS-80 Model 100. Poor thing didn’t even see it coming.

Custom Monitor For Pi-Powered Commodore 64

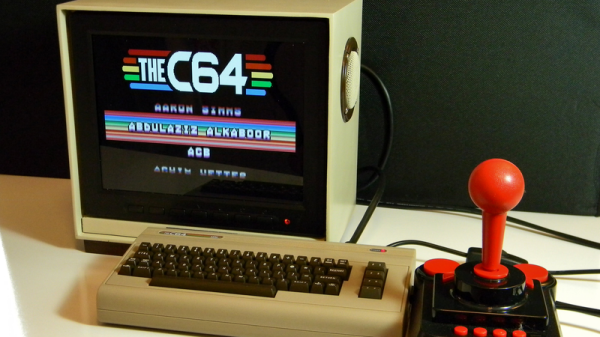
Classic games never seem to have gone out of style and with the emulation powers of the Raspberry Pi, there seems to be no end of projects folks have been coming up with. [Chris Mills] project is a great looking monitor to get his Commodore 64 fix by combining the retro looks of a home-made 64-style monitor with the Raspberry Pi.

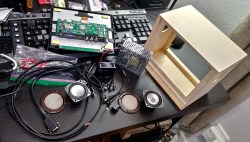
[Chris] is only interested in Commodore 64 emulation, at least with this project, and wanted something that would fit on a desk without taking up too much room. An eight inch LCD security monitor fit the bill perfectly. [Chris] ended up building a wooden enclosure for the monitor to give it that Commodore look. The monitor, power supply and cable connections fit inside along with speakers; each of these having their inputs on the back. A fan vents in the back as well and the Pi sits outside running the Combian 64 emulation software.

[Chris] has put up some galleries of build pics. The logo from the old Commodore logo is a nice touch. Read over the Hackaday site and you could build your own Commodore 64, or use the Commodore 64 itself to house the Raspberry Pi if you wanted.


Roundup: Retro Computers In Your Browser

There are two things that keep me from expanding my collecting old computers: the cost and the space required to house them. I do have my old original TRS-80, and an old serial terminal (see the video below). However, I got rid of my Data General hardware and I lost my old 1802 COSMAC Elf in some flooding. There have been a few replica retro computers of various degrees of fidelity and they are usually cheaper and smaller than the originals. I have a replica Altair, a replica Elf, and a replica KIM-1.

However, it is hard to justify the expense and the cost of either the real things or the replicas. It is even worse with the really large machines, some of which require special power or cooling and are hard to keep running. Another option, of course, is software simulation. Options like SIMH and Hercules work well, but they aren’t always graphical and it is a lot of work to set up a machine just to play with for a few hours or to show a student how it was done in the good old days.

Continue reading “Roundup: Retro Computers In Your Browser”

Reverse Engineering Galaga To Fix The No-Fire Cheat

We didn’t know there was a cheat to Galaga, but [Chris Cantrell] did. And so he did what any curious hacker would do — reverse-engineer the game to diagnose and eventually fix the bug.

Spoilers ahoy! Go read the website first if you’d like to follow [Chris]’s reversing efforts in the order that they actually happened.

The glitch is triggered by first killing most of the bees. When only six are left, they go into a second pattern where they swoop across the screen and wrap around the edges. While swooping, sometimes the bees will fire a shot when they’re at coordinates with X=0. Now two facts: there’s a maximum of eight missiles on the screen at any given time, and the position X=0 was reserved by the software to hide sprites that don’t need updating.

The end result is that eight missiles get stuck in a place where they never drop and don’t get drawn. No further shots are fired in the entire game. You win.

So that’s the punchline, but everyone knows that a good joke is in the telling. If you’re at all interested in learning reverse engineering, go read [Chris]’s explanations and work through them on your own.

And here’s our generic plug for Computer Archaeology:

Ancient video games run on MAME or similar emulators are the perfect playground for learning to reverse engineer; you can pause the machine, flip a bit in memory, and watch what happens next. Memory was expensive back then too, so the games themselves are small. (It’s not like trying to reverse engineer all however many jiggabytes of Microsoft Office.) The assembly languages for the old chips are small and well-documented, and most of the time you’ve also got a good dissasembler. What more could you ask for?

A walkthrough tutorial?  We’ve just given you one.

Oh and PS: If you get past level 255, the game freaks out.

Continue reading “Reverse Engineering Galaga To Fix The No-Fire Cheat”

Linux On A Leapster For Classic Video Game Emulation

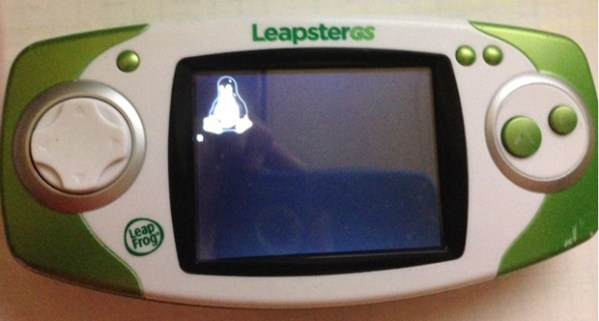
Christmas is coming, and if you have nieces, nephews, or ankle biters of your own roaming your house, you’re probably wondering how you’ll be subsidizing Santa this year. it looks like Toys R Us will be selling the Leapfrog LeapsterGS for $30 on Black Friday this year. It’s a Linux device running on a 550 MHz ARM 9, with 128 MB of RAM and 2 GB of Flash. Overpowered for a children’s toy, but perfect for when the kids forget about it in a month, because now you can replace the firmware with a proper Linux install and run classic emulators.

Putting Linux on these cheap handhelds made for children isn’t anything new; we’ve seen it done with the Leapfrog DIDJ and the Leapfrog Explorer. Those consoles, however, had rather anemic CPUs and not a whole lot of RAM. Moore’s Law finally kicked in for stocking stuffers, it seems, and the Leapster GS is powerful enough to play all those Nintendo, Game Boy and even MAME games.

All that’s needed to flash the new firmware is soldering a few wires onto the LeapsterGS’ board for a serial connection. The new LeapsterGS firmware even has an MP3 and movie player, so even if the recipient of one of these machines grows tired of it in a week, there’s still a lot of life left in it.

Video of the LeapsterGS playing the greatest arcade game below.

Continue reading “Linux On A Leapster For Classic Video Game Emulation”

NES: Nixie Entertainment System

nixieNES

[Bradley W. Lewis] is no stranger to Nixie clock builds, and he felt his latest commission was missing something. Instead of merely mounting the Nixie clock into a case resembling an NES console, he goes full tilt and makes it into an NES console emulator. After some work on the milling machine, a wooden box has room to squeeze in a few new components. [Bradley] originally planned to mount only an Arduino with an ArduNIX shield to handle the Nixie clock, but the emulator demands some space saving. Flipping the Arduino on its side freed up plenty of room and the shield still easily connects to the adjacent Nixie tube board.

A Raspberry Pi serves as the console emulator and was mounted close to the side of the case to allow access to its HDMI port. The other ports from both the Arduino and RasPi stick out of the back, including an extension to the Pi’s RCA video out and buttons to set both the hour and minutes of the clock. The two surplus NES buttons on the front of the case control power to the RasPi and provide a reset function for the Nixie clock.

If that isn’t enough Nixie to satisfy you, check out the WiFi Nixie counter.