Matchbox Transceiver Pushes The Spy Radio Concept To Its Limits

The Altoids tin has long been the enclosure of choice for those seeking to show off their miniaturization chops. This is especially true for amateur radio homebrewers — you really have to know what you’re doing to stuff a complete radio in a tiny tin. But when you can build an entire 80-meter transceiver in a matchbox, that’s a whole other level of DIY prowess.

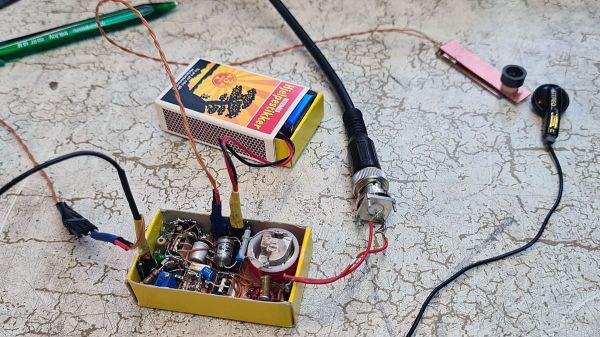
It’s no surprise that this one comes to us from [Helge Fykse (LA6NCA)], who has used the aforementioned Altoids tin to build an impressive range of “spy radios” in both vacuum tube and solid-state versions. He wisely chose solid-state for the matchbox version of the transceiver, using just three transistors and a dual op-amp in a DIP-8 package. There’s also an RF mixer in an SMD package; [Helge] doesn’t specify the parts, but it looks like it might be from Mini-Circuits. Everything is mounted dead bug style on tiny pieces of copper-clad board that get soldered to a board just the right size to fit in a matchbox.

A 9 volt battery, riding in a separate matchbox, powers the rig. As do the earbud and tiny Morse key. That doesn’t detract from the build at all, and neither does the fact that the half-wave dipole antenna is disguised as a roll of fishing line. [Helge]’s demo of the radio is impressive too. The antenna is set up very low to the ground to take advantage of near vertical incidence skywave (NVIS) propagation, which tends to direct signals straight up into the ionosphere and scatter them almost directly back down. This allows for medium-range contacts like [Helge]’s 239 km contact in the video below.

Banging out Morse with no sidetone was a challenge, but it’s a small price to pay for such a cool build. We’re not sure how much smaller [Helge] can go, but we’re eager to see him try.

Continue reading “Matchbox Transceiver Pushes The Spy Radio Concept To Its Limits”

The Fine Art Of Restoring Matchbox Cars

Did you have anything planned for the next hour or so? No? That’s good because if you’re anything like us, watching even one of the restorations performed on [Marty’s Matchbox Makeovers] is likely to send you down a deep dark rabbit hole that you never knew existed. Even if you can’t tell the difference between Hot Wheels and Matchbox (seriously, that’s a big deal in the community), there’s something absolutely fascinating about seeing all the little tips and tricks used to bring these decades-old toy cars back into like new condition.

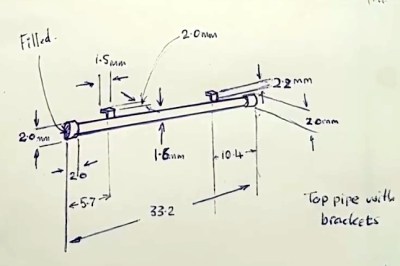
Sketching a replacement part to be 3D printed.

You might think that all it takes to restore a Matchbox car is striping the paint off, buffing up the windows, and respraying the thing; and indeed you wouldn’t be too far off the mark in some cases. But you’ve got to remember that these little cars have often been through decades of some of the worst operating conditions imaginable. That is, being the plaything of a human child. While some of the cars that [Marty] rebuilds are in fairly good condition to begin with, many of them look like they’ve just come back from a miniature demolition derby.

The ones which have had the hardest lives are invariably the most interesting. Some of the fixes, like heating up the interior and manually bending the steering wheel back into shape, are fairly simple. But what do you do when a big chunk of the vehicle is simply gone? In those cases, [Marty] will combine cyanoacrylate “super glue” with baking powder to fill in voids; and after filing, sanding, and painting, you’d never know it was ever damaged.

When a car needs more than just paint to finish it off, [Marty] will research the original toy and make new water slide decals to match what it would have looked like originally. If it’s missing accessories, such as the case with trucks which were meant to carry scale cargo, he’ll take careful measurements so he can design and print new parts. With some sanding and a touch of paint, you’d never know they weren’t original.

There’s plenty of arcane knowledge to be gained from folks like [Marty] who have experience with scale models. We don’t often see much of that come our way, but when we do, we’re always impressed at the lengths individuals will go to get that perfect end result. Whether or not you think you’ll find yourself rebuilding a pocket-sized school bus anytime soon, we think there are lessons to be learned from those who might. Continue reading “The Fine Art Of Restoring Matchbox Cars”

Adorable Matchbox Robot

[wattnotions] has been playing with matches, well the box they come in anyway. One day he was letting synapses fire unsupervised, and wondered if he could build a robot inside of a matchbox. His first prototype was a coin lithium battery and scrounged motors from those 3 US Dollar servos you can buy by the dozen. It scooted around just fine, but it drained the battery instantly and was a little boring.

Next, he etched a board. It had a little PIC micro, a connector for a mini LiPo, and an H bridge. It fired up just fine, and even though it drained the battery way too fast, at least it wasn’t brainless anymore. In our experience, robots tend to discard all the useful data they collect anyway, so being blind wasn’t too much of a problem.

Inspired and encouraged, with synapses gloriously undeterred, [wattnotions] set out to make a version 2. This time he ordered a board from OSHPark, made a 3D model in SketchUp, and proceeded to lock himself out from his own chip. Without a high voltage programmerhe was out of luck. The development was unfortunately put on hold.

It was fun to read along with [wattnotions] as he went on a small robot adventure. We hope he’ll complete a version 3 and have a swarm of the little fellows scooting around.

Continue reading “Adorable Matchbox Robot”

Arduino Parking Lot Attendant

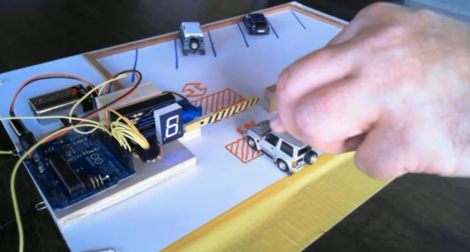
Here’s an automatic parking gate for toy cars. There’s no need to press a button, the electronics detect the presence of a vehicle on either side of the gate, raising it after verifying that the lot is not already full. It’s the same idea as counting how many people enter a room in order to switch the lights but the hardware is just a bit different.

The system is controlled by a pair of sensors in the paper which serves as the parking lot. There are three sheets of heavy stock, the top and bottom both have aluminum foil on them, with the center layer  as a separator. There are holes cut in the separator where the hash marks are seen above. By adding a little pressure to the car when you drive it up to the gate this completes a circuit instructing the Arduino that there’s a vehicle in position.

You can see a demonstration, as well as the guts of the build, in two videos after the break.

Continue reading “Arduino Parking Lot Attendant”

Matchbox Launcher Reacts To Emergency Band Radio Dispatcher

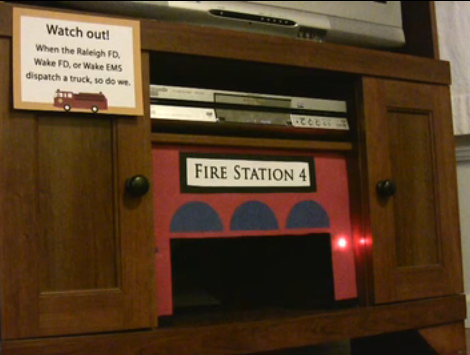
[Jeff] and his wife put together a firefighter themed birthday celebration for their son. As he’s not entirely handy in the kitchen, [Jeff] decided not to lend a hand with the baking or cake decorating. But he didn’t forego the opportunity to combine a couple of different projects to make a Matchbox car launcher that responds to emergency band radio.

Since he’s an amateur radio enthusiast he already had a scanner to monitor the air waves. Apparently there’s a band just for relaying dispatch messages to emergency vehicles. He set the radio equipment to only monitor that channel. An Arduino was added to the mix, taking measurements of the voltage level on the scanner’s audio output. When it’s driven high enough the Arduino trips the toy car launcher.

The car launcher itself is a pretty nifty setup. There are five chutes at the top of a ramp that each fit a car. A sliding gate holds them in place, but can be removed one slot at a time by a geared motor. The addition of a poster board facade and two flashing red LEDs makes the setup look right at home with the other party decorations.

See a call come into the station in the clip after the break. We don’t have a category called “fun parenting” so “toy hacks” will have to do.

Continue reading “Matchbox Launcher Reacts To Emergency Band Radio Dispatcher”

Update: Tiny Line-follower And More

This tiny line-following robot is quite impressive. It’s [Ondrej Stanek’s] second take on the design, which he calls PocketBot 2. Just like the earlier version, this robot is small enough to fit in a matchbox, but it’s received several upgrades in this iteration.

The coin cells that ran the previous version have been replaced by a rechargeable Lithium Ion cell. The ATmega8 which controlled the first robot has been swapped out for an ATmega128 running at 32 MHz. You won’t find an IR receiver on this one either, it’s been traded for a Bluetooth module which adds a quantum leap in functionality. For instance, the graph in the upper left of this photograph shows the reflective sensor data readings used to follow the line.

There’s all kinds of great engineering in this design, which is shown off in the video after the break. One of our favorite parts is that the axles are attracted to the center of the robot by one rare-earth magnet. This keeps the rubber tires pressed against the motor spindles rather than use a gearing system.

Continue reading “Update: Tiny Line-follower And More”

Stop Light For HotWheels

stop

[Paul] wrote in to show us this little project he did for his kids. His children love playing with their toy cars. In an effort to give them even more fun while playing, [Paul] built a stop light for them. He’s using an ATtiny13 to run them and has the source code available on his site. Not only did the kids get a new toy, he got an excuse to go build something in his workshop.