Laser Sequencer Uses Arduino To Enable Super-Microscope!

pcb
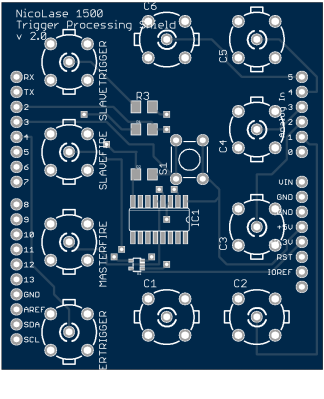
[Philip]’s Laser control Arduino shield.

[Philip Nicovich] has been building laser sequencers over at the University of New South Wales. His platform is used to sequence laser excitation on his fluorescence microscopy systems. In [Philip]’s case, these systems are used for super-resolution microscopy, that is breaking the diffraction limit allowing the imaging of structures of only a few nanometers (1 millionth of a millimeter) in size.

Using an Arduino shield he designed in Eagle, [Philip] was able to build the system for less than half the cost of a commercial platform.

The control system is build around the simple Arduino shield shown to the right, which uses simple 74 series logic to send TTL control signals to the laser diodes used in his rig. The Arduino runs code which allows laser firing sequences to be programmed and executed.

[Philip] also provides scripts which show how the Arduino can be interfaced with the open source micro manager control software.

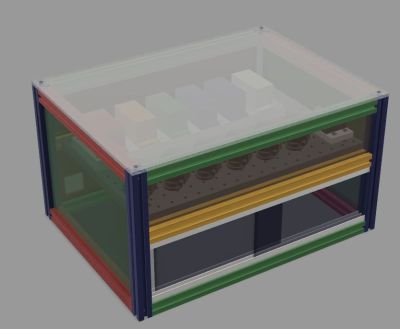
NicoLase1500EnclosureRender

As well as the schematics [Philip] has provided STEP files and drawings for the enclosure and mounts used in the system and a detailed BOM.

More useful than all this perhaps is the comprehensive write-up he provides. This describes the motivation for decisions such as the use of aluminum over steel due to its ability to transfer heat more effectively, and not to use thermal paste due to out-gassing.

While I can almost hear the cries of “not a hack”, the growing use of open source platforms and tool in academia fills us with joy. Thanks for the write-up [Philip] we look forward to hearing more about your laser systems in the future!

Hackaday Prize Entry: A Cheap Robotic Microscope

The microscope is one of the most useful instruments for the biological sciences, but they are expensive. Lucky for us, a factory in China can turn out webcams and plastic lenses and sell them for pennies. That’s the idea behind Flypi – a cheap microscope for scientific experiments and diagnostics that’s based on the ever-popular Raspberry Pi.

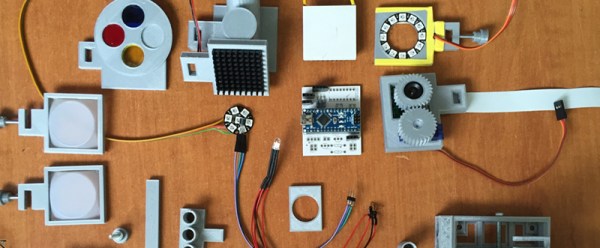
Flypi is designed to be a simple scientific tool and educational device. With that comes the challenges of being very cheap and very capable. It’s based around a Raspberry Pi and the Pi camera, with the relevant software for taking snapshots, recording movies, and controlling a few different modules that extend the capabilities of this machine. These modules include a Peltier element to heat or cool the sample, a temperature sensor, RGB LED, LED ring, LED matrix, and a special blue LED for activating fluorescent molecules in a sample.

The brains behind the Flypi, [Andre Chagas], designed the Flypi to be cheap. He’s certainly managed that with a frame that is mostly 3D printed, and some surprisingly inexpensive electronics. Already the Flypi is doing real science, including tracking bugs wandering around a petri dish and fluorescence microscopy of a zebrafish’s heart. Not bad for a relatively simple tool, and a great entry for the Hackaday Prize.

3D Printed Microscope Chamber Saves Big Bucks

Optical microscopy is over 400 years old, and in that time, it has come a long way. There are many variations of microscopes both in the selection of lenses, lighting, and other tricks to allow an instrument to coax out more information about a sample.

One proven way to increase the resolving power of a microscope is oil immersion. The sample and the lens are placed in oil that is transparent and has a high refractive index. This prevents light from refracting at the air-coverslip interface, improving the microscope’s overall performance.

The University of New South Wales has a lab that uses such a microscope. They use a special (and expensive) chamber to hold down the glass coverslip and contain the oil. The problem? At nearly $400 a pop, the chambers are a constant expense to replace, and they are not flexible enough to handle custom size requirements.

[Ben Goodnow], a first year student at the university, applied his 3D printing and laser cutting know-how to design and build a suitable chamber that costs much less and can be adapted to different projects. In addition to all the design files on GitHub, there’s also a document (PDF) that describes the design iterations and the total cost savings.

Continue reading “3D Printed Microscope Chamber Saves Big Bucks”

Joe Grand Talks Deconstructing Circuit Boards

With the exception of [Eric Evenchick], the Hackaday crew are safely back from Defcon and not missing in the desert. This means we can really start rolling out all the stuff we saw this weekend, beginning with an interview with [Joe Grand], creator of the JTAGulator, early member of l0pht, and generally awesome dude.

The focus of [Joe]’s many talks this year was reverse engineering circuit boards. Most of these techniques involved fairly low-tech methods to peel apart circuit boards one layer at a time: sandpaper and milling machines are the simplest techniques, but [Joe] is also using some significantly more uncommon methods. Lapping machines get a mention, as do acoustic microscopy, CAT scans, and x-rays. [Joe]’s Defcon talk isn’t up on the intertubes yet, but his BSides talk about techniques that didn’t work is available.

In case you forgot, [Joe] is also a judge for a little contest we’re running, and we asked what he’s looking for in a truly spaceworthy entry. [Joe]’s looking for projects with a lot of effort put into them. Don’t get us wrong, project that require no effort can be extremely popular, but documentation is king. [Joe] thinks well documented projects are evidence project creators are building something because they want to build it, and not because they want to win a prize. That’s intrinsic motivation, kiddies. Learn it.