Friday Hack Chat: Talking MQTT With The Community

The Internet of Things is just around the corner, and somehow or another, all these bits of intelligent dust and juice bag squeezers will have to talk to one another. One of the better ways to get IoT bits talking to each other is MQTT, Message Queuing Telemetry Transport, a protocol designed for small code footprints and limited network bandwidth. It gets a lot of IoT hype, but it’s a great alternative to HTTP for your own small projects, so that’s what we’re talking about during this week’s Hack Chat.

MQTT is a machine-to-machine connectivity protocol, very useful in remote locations, where a small code footprint is required, where bandwidth is at a premium, or for turning a lamp on and off from your phone, while sitting in the same room. It’s ideal for mobile applications, and in the twenty or so years since its creation, MQTT has made inroads into all those ‘smart’ devices around your house.

MQTT is based on a very simple publish and subscribe model with ‘topics’ that allow you to configure where messages should be sent. It is an extremely simple protocol, but with MQTT, you can set up a complete home automation system that opens the garage door, turns on a lamp, or pings a few weather sensors.

For this week’s Hack Chat, we’re going to be discussing MQTT with the entire Hackaday.io community. There are dozens of people who have built MQTT-based projects that frequent the Hack Chat, and hundreds more that want to learn. Want to get in on the ground floor of the Internet of Things? This is the Hack Chat you want to check out. It’s a community pow-wow around connected devices.

join-hack-chat

Our Hack Chats are live community events on the Hackaday.io Hack Chat group messaging. This week the crew is going to sit down around the campfire around noon, Pacific time, Friday, April 13th (oooh, spooky). Want to know what time this is happening in your neck of the woods? Have a countdown timer!

Click that speech bubble to the right, and you’ll be taken directly to the Hack Chat group on Hackaday.io.

You don’t have to wait until Friday; join whenever you want and you can see what the community is talking about.

Evolution Of The ESP8266 Party Button

Sometimes the best part of building something is getting to rebuild it again a little farther down the line. Don’t tell anyone, but sometimes when we start a project we don’t even know where the end is going to be. It’s a starting point, not an end destination. Who wants to do something once when you could do it twice? Maybe even three times for good measure?

Original version of the Party Button

That’s what happened when [Ryan] decided to build a wireless “party button” for his kids. Tied into his Home Assistant automation system, a smack of the button plays music throughout the house and starts changing the colors on his Philips Hue lights. His initial version worked well enough, but in the video after the break, he walks through the evolution of this one-off gadget into a general purpose IoT interface he can use for other projects.

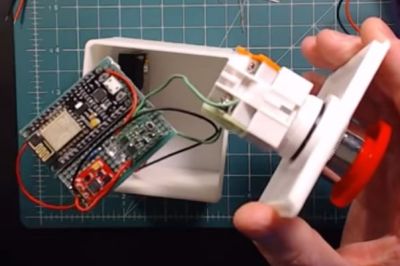
The general idea is pretty simple, the big physical button on the top of the device resets the internal ESP8266, which is programmed to connect to his home WiFi and send a signal to his MQTT server. In the earlier versions of the button there was quite a bit of support electronics to handle converting the momentary action of the button to a “hard” power control for the ESP8266. But as the design progressed, [Ryan] realized he could put the ESP8266 to deep sleep after it sends the signal, and just use the switch to trigger a reset on the chip.

Additional improvements in the newer version of the button include switching from alkaline AA batteries to a rechargeable lithium-ion pack, and even switching over to a bare ESP8266 rather than the NodeMCU development board he was using for the first iteration.

For another take on MQTT home automation with the ESP8266, check out this automatic garage door control system. If the idea of triggering a party at the push of a button has your imagination going, we’ve seen some elaborate versions of that idea as well.

Continue reading “Evolution Of The ESP8266 Party Button”

Build An Excellent Coffee Roaster With A Satisfyingly Low Price Tag

There’s a lot of mysticism around coffee roasting, but in the end it couldn’t be simpler. Take a bunch of beans, heat them up evenly, and stop before they get burned. The rest is details.

And the same goes for coffee roasters. The most primitive roasting technique involves stirring the beans in a pan or wok to keep them from scorching on the bottom. This works great, but it doesn’t scale. Industrial drum roasters heat a rotating drum with ridges on the inside like a cement mixer to keep the beans in constant motion while they pass over a gas fire. Fluidized-bed roasters use a strong stream of heated air to whirl the beans around while roasting them evenly. But the bottom line is that a coffee roaster needs to agitate the beans over a controllable heat source so that they roast as evenly as possible.

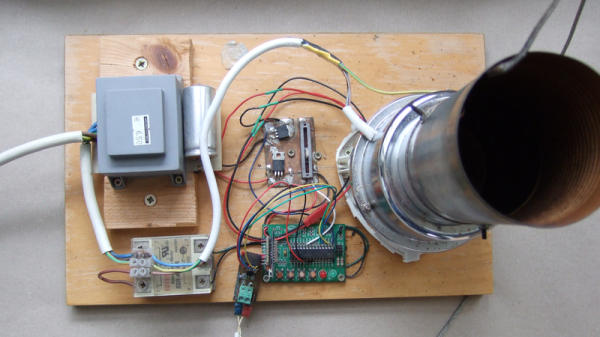
My DIY coffee roaster gave up the ghost a few days ago and I immediately ordered the essential replacement part, a hot air popcorn popper, to avert a true crisis: no coffee! While I was rebuilding, I thought I’d take some pictures and share what I know about the subject. So if you’re interested in roasting coffee, making a popcorn popper into a roaster, or even just taking an inside look at a thoroughly value-engineered kitchen machine, read on!

Continue reading “Build An Excellent Coffee Roaster With A Satisfyingly Low Price Tag”

ESP8266 Beacon Announces Your Arrival

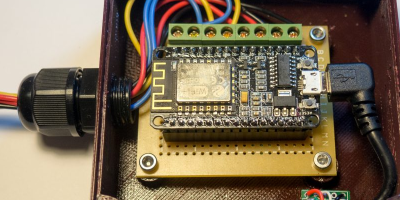
It used to be people were happy enough to just have to push a button in their car and have the garage door open. But pushing a button means you have to use your hands, like it’s a baby toy or something. We’re living in the 21st century, surely there must be a better way! Well, if you’ve got a home automation system setup and a spare ESP8266 laying around, [aderusha] may have your solution with MQTTCarPresence.

The theory of operation here is very clever. The ESP8266 is powered via the in-dash USB port, which turns on and off with the engine. When the engine is started, the ESP8266 is powered up and immediately connects to the WiFi network and pushes an MQTT message to Home Assistant. When Home Assistant gets the notification that the ESP8266 has connected, it opens the garage door.

When [aderusha] drives out of the garage and away from the house, the ESP8266 loses connection to the network, and Home Assistant closes the door. The same principle works when he comes home: as the car approaches the house it connects to the network and the garage door opens, and when the engine is shut off in the garage, the door closes again.

The hardware side of the setup is really just a WeMos D1 mini Pro board, though he’s added an external antenna to make sure the signal gets picked up when the vehicle is rolling up. He’s also designed a very slick 3D printed case to keep it all together in a neat little package.

We’ve covered automated entry systems based on the ESP8266 before, though usually the ESP stays at home. Be sure to check out the awesome series [Elliot Williams] has on the wonders of MQTT if you’re looking to setup your own automation system.

Bark Back IoT Pet Monitor

Does your pet get distressed when you’re not home? Or, perhaps their good behaviour slips when you’re not around and they cause a ruckus for the neighbours. Well, [jenfoxbot] has just such a dog, so she built a ‘bark back’ IoT pet monitor to keep an eye on him while she’s out.

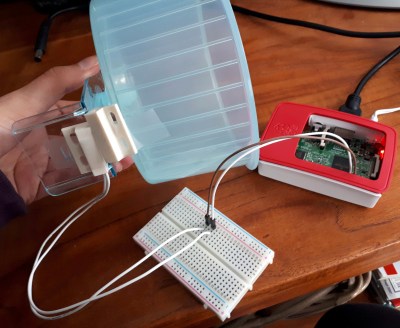
The brains and backbone of the pet monitor is the ever-popular Raspberry Pi 3. A Sparkfun MEMS microphone breakout board listens for any unruly behaviour, with an MCP3002 analog to digital converter chip reading the mic input. Some trial-and-error coding allowed her to set a noise threshold that — once exceeded — will trigger an audio file, shushing her dog. It also logs events and uploads any status updates to a CloudMQTT server to be monitored while away from home. Her Imgur build album can be found here, and the GitHub project page is here if you want to build your own!

Check out the demo video after the break, that was probably confusing for her good dog, Marley.

Continue reading “Bark Back IoT Pet Monitor”

An IoT Christmas Tree For Your Hacker-Mas Celebrations

Smart Christmas trees may soon come to mean something more than a fashionably decorated tree. Forging ahead with this new definition, [Ayan Pahwa], with help from [Akshay Kumar], [Anshul Katta], and [Abhishek Maurya] turned their office’s Christmas Tree into an IoT device you can watch live!

As an IoT device, the tree relies on the ever-popular ESP8266 NodeMCU — activated and controlled by Alexa, as well as from a web page. The LEDs for the tree — and the offline-only tree-topper controlled by an Arduino Pro Mini — are the similarly popular Neopixels.

For those viewing online, a Raspberry Pi and camera have been attached to this project to check out the tree’s lighting. To make that possible, [Pahwa] had to enlist the use of ngrok to make the Pi’s –normally — LAN-only camera server accessible over the internet. The aforementioned web page was coded in Javascript/CSS and hosted on a server running an instance of Ubuntu 16.04.

Continue reading “An IoT Christmas Tree For Your Hacker-Mas Celebrations”

The WiFi Repeater You Probably Have On Your Bench

Few things are as frustrating as a WiFi signal that drops in and out. On a public network it is bad enough but at home? Even if you can live with it, your cohabitants will certainly impune your technical abilities if they don’t have solid WiFi.  One solution is a WiFi repeater. You can buy one, of course. But you can also make one out of an ESP8266 and some code from GitHub. There is also a video about the project, below.

[Martin Ger’s] code implements NAT, so it isn’t a true WiFi repeater, but more of a bridge or router. Of course, that means performance isn’t stellar, but tests show it can sustain about 5 Mbps, which isn’t bad for a little board that costs a couple of bucks. There is a limit of 8 clients, but that’s more than enough for a lot of cases. Even if you don’t want to use it as a router, it has a mesh mode that could be a basis for some interesting projects all by itself.

Continue reading “The WiFi Repeater You Probably Have On Your Bench”