Arduino Star Tracker Raises The Bar

Proving that astrophotography doesn’t have to break the bank, [Gerald Gattringer] has recently documented his DIY “barn door” style star tracker which is built almost entirely from scratch. Short of the Arduino and stepper motor, all the components were either made by hand or are standard hardware store finds.

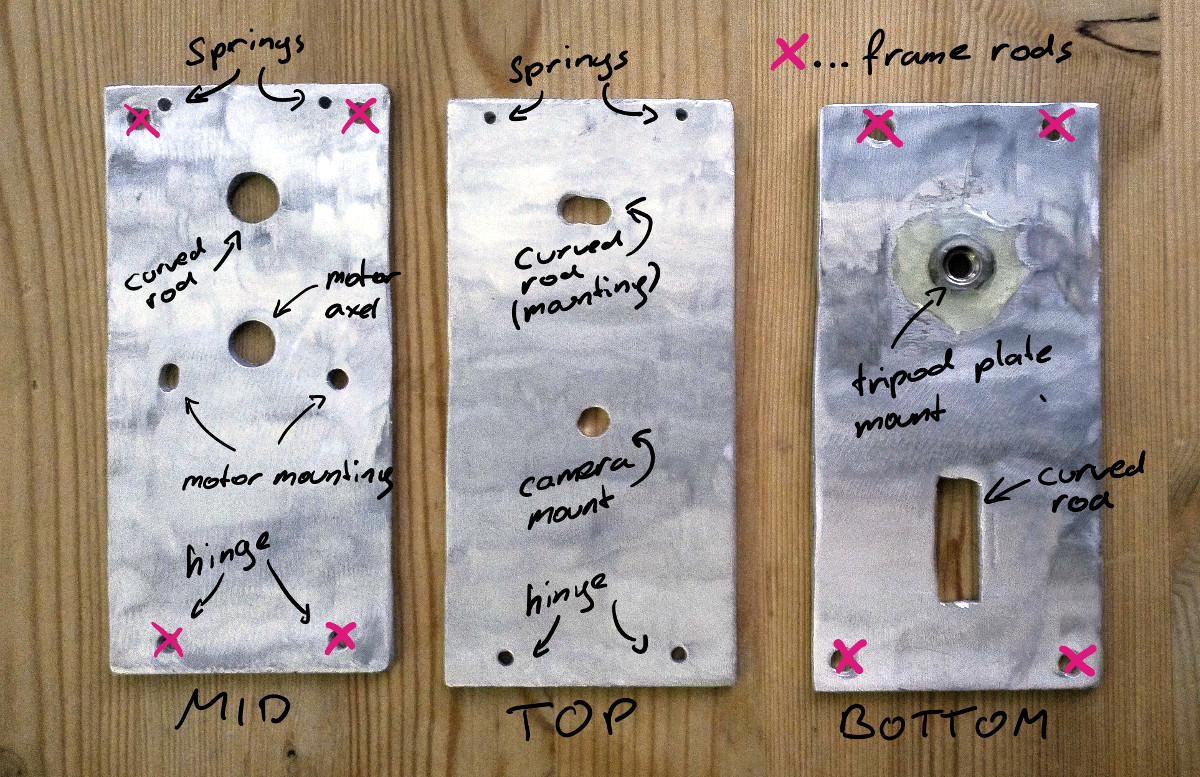
The build starts with three aluminum plates which [Gerald] cut by hand with an angle grinder. He then drilled all the necessary screw holes and a rectangular opening for the threaded rod to pass through. He even used epoxy to mount a nut to the bottom plate which would eventually attach it to the tripod.

The plates were then roughed up and spray painted black so they wouldn’t reflect light. The addition of a couple of screws, nuts, and a standard hinge.

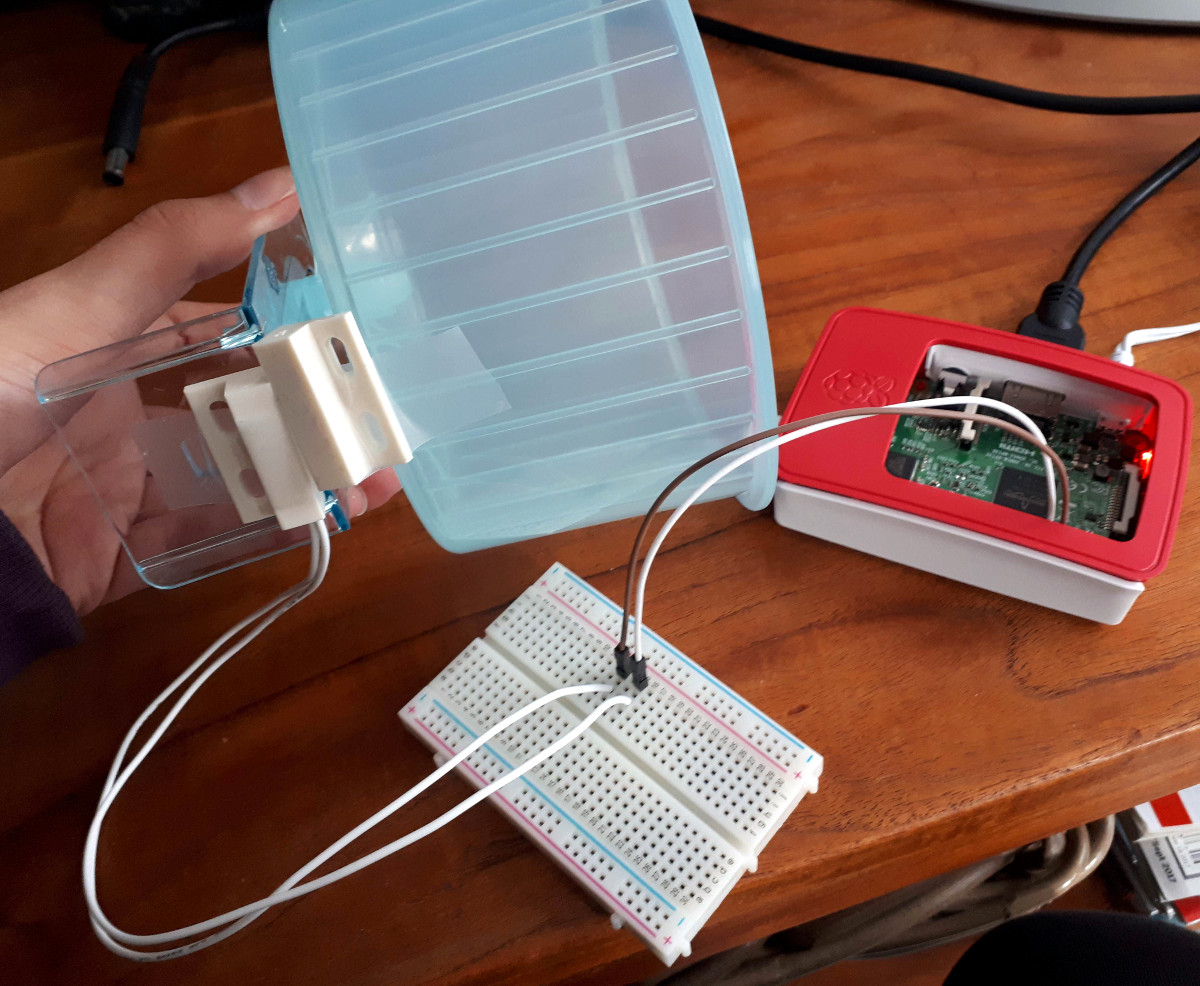
Motion is provided by a 28BYJ-48 stepper which is connected to the drive nut by way of a belt. The spinning nut is used to raise and lower the threaded rod which opens and closes the “door”. To control the motor, [Gerald] is using an Arduino Nano coupled with a ULN2003 Darlington array which live on a routed PCB he made with his school’s Qbot MINImill. While some might say the Arduino is unnecessary for this project, it does make the final calibration of the device much easier.

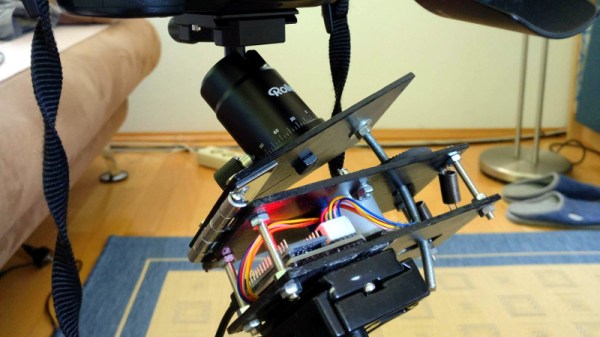
We’ve covered a number of similar star trackers here on Hackaday, including one that you crank by hand. But the professional looking final result really makes this build stand out.

Location Sharing With Google Home

With Google’s near-monopoly on the internet, it can be difficult to get around in cyberspace without encountering at least some aspect of this monolithic, data-gathering giant. It usually takes a concerted effort, but it is technically possible to do. While [Mat] is still using some Google products, he has at least figured out a way to get Google Home to work with location data without actually sharing that data with Google, which is a step in the right direction.

[Mat]’s goal was to use Google’s location sharing features through Google Home, but without the creepiness factor of Google knowing everything about his life, and also without the hassle of having to use Google Maps. He’s using a few things to pull this off, including a NodeRED server running on a Raspberry Pi Zero, a free account from If This Then That (IFTTT), Tasker with AutoRemote plugin, and the Google Maps API key. With all of that put together, and some configuration of IFTTT he can ask his Google assistant (or Google Home) for location data, all without sharing that data with Google.

This project is a great implementation of Google’s tools and a powerful use of IFTTT. And, as a bonus, it gets around some of the creepiness factor that Google tends to incorporate in their quest to know all the data.

Continue reading “Location Sharing With Google Home”

Prop WWII Machine Gun Courtesy Of Home Depot

There’s perhaps nothing worse than working on a project and realizing you don’t have the part you need to complete it. You look through all your stuff twice, maybe three times, on the off chance it’s hiding somewhere. Perhaps even reach out to a few nearby friends to see if they might have something you can use. Forget local stores, what you need is so specific that nobody’s going to keep it in stock. You’re stuck, and now everything has to be put on hold.

That’s precisely what happened to [Nathan Cragun] recently. He needed a Japanese Type 96 Light Machine Gun for a particular scene in the independent World War II film he’s working on, and couldn’t find one anywhere. Out of options, he ended up building a replica with parts from the hardware store. OK, so it isn’t exactly like being short a passive component or two on that new PCB you’re putting together. But while we can’t say a project of ours has ever been short a 70+ year old Japanese machine gun, we can definitely relate to the feeling.

To start his build, [Nathan] printed out a full size diagram of the Type 96 and starting placing PVC pipes on top of it to get a sense for how it would all come together. Once the basic tubular “skeleton” of the weapon was completed, he moved on to cutting the rest of the parts out of EVA foam.

The major pieces that needed to be made were the stock and receiver, but even small details like the spiral ribbing on the barrel and the sights were created to scale using pieces of foam. In a particularly nice touch, [Nathan] even made the magazine removable. If we had to guess, some Japanese soldiers will be shown reloading the weapon onscreen for added authenticity.

The important thing to remember with a filming prop like this is that it doesn’t need to look perfect, just close. It might be used in the background, or seen only for a second during a fast pan. Even in professionally produced TV and movies, many of the props are little more than carved foam. With the excellent job [Nathan] did painting and weathering this build, we have no doubt it will look completely believable in the final production.

We’re no strangers to prop builds here at Hackaday, but they are generally of the science fiction or video game variety, so a historical build is a nice change of pace.

Neural Networks Using Doom Level Creator Like It’s 1993

Readers of a certain vintage will remember the glee of building your own levels for DOOM. There was something magical about carefully crafting a level and then dialing up your friends for a death match session on the new map. Now computers scientists are getting in on that fun in a new way. Researchers from Politecnico di Milano are using artificial intelligence to create new levels for the classic DOOM shooter (PDF whitepaper).

While procedural level generation has been around for decades, recent advances in machine learning to generate game content (usually levels) are different because they don’t use a human-defined algorithm. Instead, they generate new content by using existing, human-generated levels as a model. In effect they learn from what great game designers have already done and apply those lesson to new level generation. The screenshot shown above is an example of an AI generated level and the gameplay can be seen in the video below.

The idea of an AI generating levels is simple in concept but difficult in execution. The researchers used Generative Adversarial Networks (GANs) to analyze existing DOOM maps and then generate new maps similar to the originals. GANs are a type of neural network which learns from training data and then generates similar data. They considered two types of GANs when generating new levels: one that just used the appearance of the training maps, and another that used both the appearance and metrics such as the number of rooms, perimeter length, etc. If you’d like a better understanding of GANs, [Steven Dufresne] covered it in his guide to the evolving world of neural networks.

While both networks used in this project produce good levels, the one that included other metrics resulted in higher quality levels. However, while the AI-generated levels appeared similar at a high level to human-generated levels, many of the little details that humans tend to include were omitted. This is partially due to a lack of good metrics to describe levels and AI-generated data.

Example DOOM maps generated by AI. Each row is one map, and each image is one aspect of the map (floor, height, things, and walls, from left to right)

We can only guess that these researcher’s next step is to use similar techniques to create an entire game (levels, characters, and music) via AI. After all, how hard can it be?? Joking aside, we would love to see you take this concept and run with it. We’re dying to play through some gnarly levels whipped up by the AI from Hackaday readers!

Continue reading “Neural Networks Using Doom Level Creator Like It’s 1993”

Flood Fault Circuit Interrupter Could Save Lives

What if you didn’t have to risk your life to disconnect the power during a catastrophic storm? That’s a question many people in Houston were asking themselves as they watched water from Hurricane Harvey and other storms surge through the streets, swell in the gutters, and flood their homes.

Among these Houstonians were engineering students [Jon] and [Cyrus Jyan]. They watched as homeowners fought to safely disconnect their homes from the power grid and said, it shouldn’t have to be this way. They designed the Flood Fault Circuit Interrupter to monitor target areas and disconnect the power automatically when a credible threat is detected.

The FFCI is built on top of existing protection schemes like GFCIs and Arc Fault Circuit Interrupters. It isn’t meant to replace them, but instead tie them together and turn them off based on input from float switches.

As floodwaters rise, an EEPROM does a lookup and compare to decide if the threat is enough to shut it down. If so, an alarm signal to a shunt trip breaker can either throw the whole system to OFF, or else switch over to an alternate power source. The system is built around a standard security panel and keypad interface that supports 12 V alarm output. We particularly like the float switch enclosures that allow water to enter while keeping out debris.

Retrotechtacular: The Saturn Propulsion System

“We choose to go to the Moon in this decade and do the other things, not because they are easy, but because they are hard; because that goal will serve to organize and measure the best of our energies and skills, because that challenge is one that we are willing to accept, one we are unwilling to postpone, and one we intend to win, and the others, too”

When President Kennedy gave his famous speech in September 1962, the art of creating liquid-fueled rocket engines of any significant size was still in its relative infancy. All the rocketry and power plants of the Saturn series of rockets that would power the astronauts to the Moon were breaking entirely new ground, and such an ambitious target required significant plans to be laid. What is easy to forget from a platform of five decades of elapsed time is the scale of the task set for the NASA engineers of the early 1960s.

The video below the break is from 1962, concurrent with Kennedy’s speech, and it sets out the proposed development of the succession of rocket motors that would power the various parts of the Saturn family. We arrive at the famous F-1 engine that would carry the mighty Saturn 5 and start its passengers on their trip to the Moon at a very early stage in its development, after an introduction to liquid rocket engines from the most basic of first principles. We see rockets undergoing testing on the stand at NASA’s Huntsville, Alabama facility, along with rather superlative descriptions of their power and capabilities.

The whole production is very much in the spirit of the times, though unexpectedly it makes no mention whatsoever of the Space Race with the Soviet Union, whose own rocket program had put the first satellite and the first man into space, and which was also secretly aiming for the moon. It’s somewhat jarring to understand that the people in this video had little idea that such an ambitious program would be as successful as it became, or even that in the wake of Kennedy’s assassination the following year there would be such an effort to fulfill the aim set out in his speech to reach the moon within the decade.

The moon landings, and the events and technology that made them possible, are a subject of considerable fascination for our community. We must have covered innumerable stories about artifacts from the Apollo era in these pages, and no doubt more will continue to come our way in the future. Films like this one do not tell us quite the same story as does a real artifact, but their values lies in capturing the optimism of the time. Anything seemed possible in 1962, and those who lived through the decade were lucky enough to see this proven.

Fifty years from now, what burgeoning engineering efforts will we look back on?

Continue reading “Retrotechtacular: The Saturn Propulsion System”

Welcome To The Internet Of Hamsters

It was only a matter of time. Everything else is getting its data logged and reported to the Internet for detailed analysis, so why should our rodents be any different? The cover story is that [Nicole Horward] hooked her pet hamster Harold up to the web because she wanted to see if he was getting as much exercise as he should. The real reason is, of course, that Harold wanted to show off to his “friends” on Hamsterbook.

The hardware side of this hack is very simple, a magnetic door sensor (like the kind used in alarm systems) is used to detect each time the wheel makes a complete rotation. The sensor is hooked up to the GPIO pins of a Raspberry Pi, where it’s read by a Python script. A small LCD screen was added to give some visual feedback on Harold’s daily activity, and the whole thing was boxed up in a laser cut enclosure.

That gave [Nicole] a cute little display next to Harold’s cage, but it didn’t do much for analyzing his activity. For that, a script is used to upload the data every minute to a ThingSpeak channel via MQTT. This automatically generates attractive graphs from the raw data, making it much easier to visualize what’s happening over the long term.

Now might be a good time to brush up on your MQTT knowledge, so that your pet could be the next to join the IoT revolution.

Continue reading “Welcome To The Internet Of Hamsters”