Tearing Down Nintendo’s Alarmo Alarm Clock

All your Nintendo Alarmo are belong to mew~ (Credit: GaryOderNichts, Blogspot)

Most of us will probably have seen Nintendo’s latest gadget pop up recently. Rather than a Switch 2 announcement, we got greeted with a Nintendo-branded alarm clock. Featuring a 2.8″ color LCD and a range of sensors, it can detect and respond to a user, and even work as an alarm clock for the low, low price of €99. All of which takes the form of Nintendo-themed characters alongside some mini-games. Naturally this has led people like [Gary] to buy one to see just how hackable these alarm clocks are.

As can be expected from a ‘smart’ alarm clock it has 2.4 GHz WiFi connectivity for firmware and content download, as well as a 24 GHz millimeter wave presence sensor. Before [Gary] even had received his Alarmo, others had already torn into their unit, uncovering the main MCU (STM32H730ZBI6) alongside a 4 GB eMMC IC, as well as the MCU’s SWD pads on the PCB. This gave [Gary] a quick start with reverse-engineering, though of course the MCU was protected (readout protection, or RDP) against firmware dumps, but the main firmware could be dumped from the eMMC without issues.

After this [Gary] had a heap of fun decrypting the firmware, which seems to always get loaded into the external octal SPI RAM before execution, as per the boot sequence (see featured image). This boot sequence offers a few possibilities for inserting one’s own (properly signed) contents. As it turns out via the USB route arbitrary firmware binaries can be loaded, which provided a backdoor to defeat RDP. Unfortunately the MCU is further locked down with Secure Access Mode, which prevents dumping the firmware again.

So far firmware updates for the Alarmo have not nailed shut the USB backdoor, making further reverse-engineering quite easy for the time being. If you too wish to hack your Alarmo and maybe add some feline charm, you can check [Gary]’s GitHub project.

Donkey Kong Bongos Ditch The GameCube, Go Mobile

Historically speaking, optional peripherals for game consoles tend not to be terribly successful. You’ll usually get a handful of games that support the thing, one of which will likely come bundled with it, and then the whole thing fades into obscurity to make way for the next new gimmick.

For example, did you know Nintendo offered a pair of bongos for the GameCube in 2003? They were used almost exclusively by the trio of Donkey Konga rhythm games, although only two of them were ever released outside of Japan. While the games might not have been huge hits, they were successful enough to stick in the memory of [bl3i], who wanted a way to keep the DK bongo experience alive.

The end result is, arguably, more elegant than the hokey musical controller deserves. While most people would have just gutted the plastic bongos and crammed in some new hardware, [bl3i] went through considerable effort so the original hardware would remain intact. His creation simply snaps onto the bongos and connects to them via the original cable.

Internally, the device uses an Arduino to read the output of the bongos (which appeared to the GameCube essentially as a standard controller) and play the appropriate WAV files from an SD card as hits are detected. Add in an audio amplifier module and a battery, and Nintendo’s bongos can finally go forth into the world and spread their beats.

As far as we’re able to tell, this is the first time the Donkey Kong bongos have ever graced the pages of Hackaday in any form, so congratulations to [bl3i] for getting there first. But it’s certainly not the first time we’ve covered ill-conceived game gadgets — long time readers will perhaps be familiar with Nintendo’s attempt to introduce the Robotic Operating Buddy (ROB) to households back in 1985.

Continue reading “Donkey Kong Bongos Ditch The GameCube, Go Mobile”

An amber on black interface on a green reproduction Game Boy screen. It has the FM station 88.9 in large letters in the middle of the display and "Ice Cream (Pay Phone) by Black Pumas" displayed in a box below. A volume indicator is on the left side of the tuner numbers and various status icons are along the top of the screen. A paper cutout of an orange is next to the Game Boy on a piece of paper with the words "Orange FM Prototype" written underneath.

Orange FM Brings Radio To The GameBoy

We’ve all been there. You left your Walkman at home and only have your trusty Game Boy. You want to take a break and just listen to some tunes. What to do? [orangeglo] has the answer now with the Orange FM cartridge.

This prototype cart features an onboard antenna or can also use the 3.5 mm headphone/antenna port on the cartridge to boost reception with either a dedicated antenna or a set of headphones. Frequencies supported are 64 – 108 Mhz, and spacing can be set for 100 or 200 kHz to accomodate most FM broadcasts setups around the world.

Older Game Boys can support audio through the device itself, but Advances will need to use the audio port on the cartridge. The Super Game Boy can pipe audio to your TV though, which seems like a delightfully Rube Goldberg-ian way to listen to the radio. Did we mention it also supports RDS, so you’ll know what that catchy tune is? Try that FM Walkman!

Can’t decide between this and your other carts? Try this revolving multi-cart solution. Have a Game Boy that needs some restoration? If it’s due to electrolyte damage, maybe start here?

Continue reading “Orange FM Brings Radio To The GameBoy”

Ultra-Tiny Wii Uses Custom Parts And Looks Amazing

The Nintendo Wii was never a large console. Indeed, it was smaller than both the Xbox 360, PlayStation 3, and most consoles of previous generations, too. That’s not to say it couldn’t be smaller, though. [loopj] has built what is perhaps the smallest Wii yet, which measures roughly the same size as a deck of cards. The best bit? The housing is even to scale!

There’s no emulation jiggery-pokery here. This build uses an original Wii motherboard that’s been cut down to the bare basics. Measuring just 62 mm by 62 mm, it features the CPU, GPU, RAM, and flash memory, while most of the extraneous hardware has been eliminated. Power and data is provided to the board from a special Wii Power Strip PCB, while the Periphlex flex PCB handles breaking out controller interfaces. Indeed, the build is nicknamed Short Stack as it’s built from a number of specialist PCBs for builds like this one. It also uses two boards designed by [YveltalGriffin] — the fujiflex for HDMI video output and the nandFlex to handle the Wii’s NAND memory chip.

[loopj] also had to design two further PCBs specifically for this build. One handles power, the micro SD card, HDMI connector, and controller ports. Meanwhile, the second handles the power, reset, and sync buttons along with status LEDs. Another neat hack of [loopj]’s own devising is using TRRS connectors in place of the original bulky GameCube controller ports.

Ultimately, it’s volume is just 7.4% that of an original Nintendo Wii. It’s probably possible to go smaller, too, says [loopj], so don’t expect things to end here. We’ve seen some other great Wii mods before, too, like this excellent handheld design.

Yuzu And Citra Emulators Shut Down After Legal Pressure From Nintendo

In a move that came rather like a surprise to many, the company behind the well-known Switch and 3DS emulators Yuzu and Citra – Tropic Haze LLC – as reported by PC Gamer has shutdown both projects and associated websites as part of a US$2.4M settlement with Nintendo with a last message left on the Yuzu website. This comes in the wake of Nintendo suing Tropic Haze LLC over the Yuzu emulator, claiming that there’s ‘no lawful way to use Yuzu’, as it requires files extracted from a real Switch device to decrypt game files. Although Citra is not part of the lawsuit, it being made by the same developers seems to have resulted in it getting axed along with Yuzu as collateral damage.

What makes this issue so legally hairy is that even though an emulator by itself isn’t illegal, requiring proprietary firmware and keys already gets one into contested territory about the legality of dumping said files from a console, even if you own it. This was already an issue with the first Playstation emulators, which require the Playstation BIOS image to even boot, but left the emulator developers mostly untouchable. What seems to have set off Nintendo’s lawyers here would seem to be the way that the Yuzu developers leaned into the copyright infringement (often incorrectly called ‘piracy’) angle, giving Nintendo’s legal team enough exposed flesh to launch a ballistic legal strike.

Continue reading “Yuzu And Citra Emulators Shut Down After Legal Pressure From Nintendo”

The Latest Advancements In Portable N64 Modding

[Chris Downing] has been in the mod scene a long time, and his 5th GeN64 Portable is his most modern portable Nintendo 64 yet. The new build has an improved form factor, makes smart use of 3D printing and CNC cutting, efficiently uses PCBs to reduce wiring, and incorporates a battery level indicator. That last feature is a real quality of life improvement, nicely complementing the ability to charge over USB-C.

What’s interesting about builds like this is that it’s all about the execution. The basic parts required to mod a classic games console into a portable unit are pretty well understood, and off-the-shelf modules like button assemblies exist to make the job far easier than it was back in the day when all had to be done from scratch. We’ve admired [Chris Downing]’s previous builds, and what differentiates one mod from another really comes down to layout and execution, and that’s where the 5th GeN64 Portable shines. Continue reading “The Latest Advancements In Portable N64 Modding”

Mapping The Nintendo Switch PCB

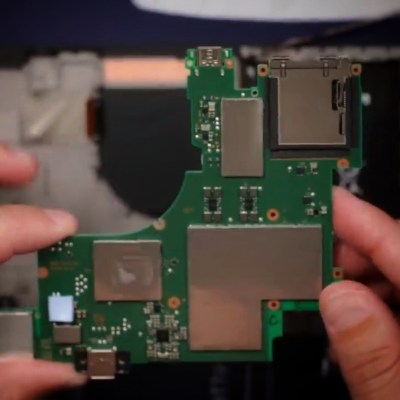
As electronics have advanced, they’ve not only gotten more powerful but smaller as well. This size is great for portability and speed but can make things like repair more inaccessible to those of us with only a simple soldering iron. Even simply figuring out what modern PCBs do is beyond most of our abilities due to the shrinking sizes. Thankfully, however, [μSoldering] has spent their career around state-of-the-art soldering equipment working on intricate PCBs with tiny surface-mount components and was just the person to document a complete netlist of the Nintendo Switch through meticulous testing, a special camera, and the use of a lot of very small wires.

The first part of reverse-engineering the Switch is to generate images of the PCBs. These images are taken at an astonishing 6,000 PPI and as a result are incredibly large files. But with that level of detail the process starts to come together. A special piece of software is used from there that allows point-and-click on the images to start to piece the puzzle together, and with an idea of where everything goes the build moves into the physical world.

[μSoldering] removes all of the parts on the PCBs with hot air and then meticulously wires them back up using a custom PCB that allows each connection to be wired up and checked one-by-one. With everything working the way it is meant to, a completed netlist documenting every single connection on the Switch hardware can finally be assembled.

The final documentation includes over two thousand photos and almost as many individual wires with over 30,000 solder joints. It’s an impressive body of work that [μSoldering] hopes will help others working with this hardware while at the same time keeping their specialized skills up-to-date. We also have fairly extensive documentation about some of the Switch’s on-board chips as well, further expanding our body of knowledge on how these gaming consoles work and how they’re put together.