A Wireless Wood Stove Monitor

[Michel] has a wood stove in his basement for extra heat in the winter. While this is a nice secondary heat source, he has creosote buildup in the chimney to worry about. [Michel] knows that by carefully monitoring the temperature of the gases in the chimney, he can hit the sweet spot where his fire burns hot enough to keep the creosote under control and cool enough that it doesn’t burn down the house. To that end, he built a wireless wood stove monitor.

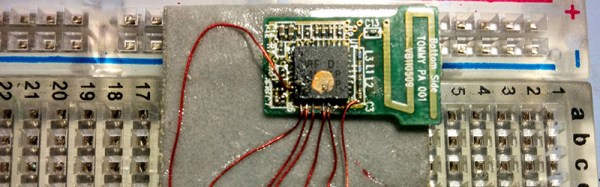
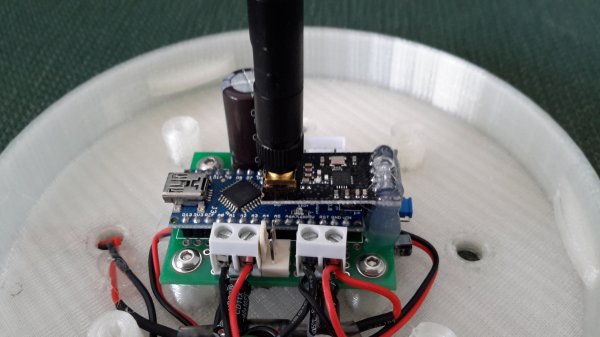
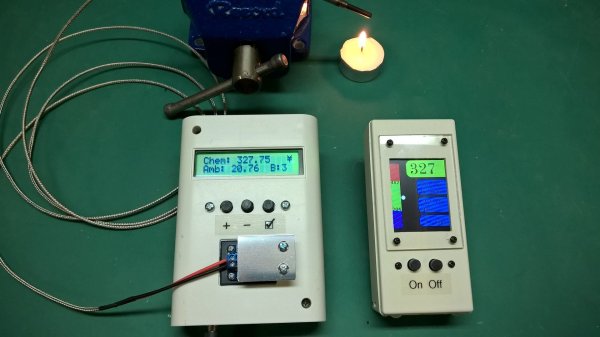
The first version he built involved an annoying 20 foot run between the basement and living room. Also, the thermocouple was mounted on the surface and made poor contact with the chimney. Wood Stove Monitor 2.0 uses a probe thermometer on an Exhaust Gas Temperature (EGT) thermocouple to measure the temperatures. The intel is fed to a thermocouple amplifier to provide a cold-compensation reference. This is shielded so that radiant heat from the stove doesn’t compromise the readings. An nRF24L01+ in the basement monitoring station communicates with another module sitting in the living room display so [Michel] can easily find out what’s going on downstairs. When it’s all said and done, this monitor will be part of a bigger project to monitor power all over the house.

Interested in using a wood stove to help heat your house? Why not build your own?

Motorized Strandbeest Is Remote Controlled And Awesome

If you’ve never seen a Strandbeest before, you’re going to want to watch the video after the break. Invented by [Theo Jansen], a Strandbeest is a kinematic work of art. An eight legged structure that walks around under wind power — or if you’re clever, an Arduino and some motors.

For a weekend project, [Remet0n] decided to motorize a toy version of the Strandbeest, and make it remote-controlled. The toy is normally powered by a propeller spun by the wind — making it very easy to replace with motors. You can pick them up for under $10 on eBay.

Using an Arduino Nano, two small 3V motors , a wireless chip (NRF24L01) and a L9110 H-bridge, he was able to create this awesome little remote-controlled device:

Continue reading “Motorized Strandbeest Is Remote Controlled And Awesome”

A Shareable Wireless Biometric Flash Drive

Wireless storage and biometric authentication are both solved problems. But as [Nathan] and [Zhi] have noticed, there is no single storage solution that incorporates both. For their final project in [Bruce Land]’s ECE 4760, they sought to combine the two ideas under a tight budget while adding as many extras as they could afford, like an OLED and induction coil charging.

final_product_600
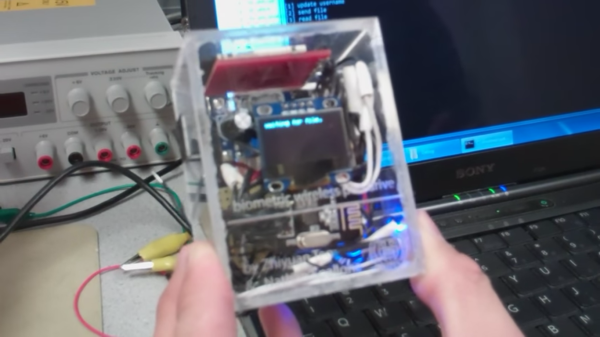
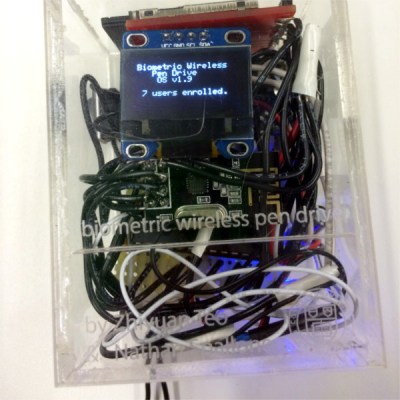
Their solution can be used by up to 20 different people who each get a slice of an SD card in the storage unit There are two physical pieces, a base station and the wireless storage unit itself. The base station connects to the host PC over USB and contains an Arduino for serial pass-through and an nRF24L01+ module for communicating with the storage side. The storage drive’s components are crammed inside a clear plastic box. This not only looks cool, it negates the need for cutting out ports to mount the fingerprint sensor and the OLED. The sensor reads the user’s credentials through the box, and the authentication status is displayed on an OLED. Files are transferred to and from the SD card over a second nRF24L01+ through the requisite PIC32.

Fingerprint authorization gives the unit some physical security, but [Nathan] and [Zhi] would like to add an encryption scheme. Due to budget limitations and time constraints, the data transfer isn’t very fast (840 bytes/sec), but this isn’t really the nRF modules’ fault—most of the transmission protocol was implemented in software and they simply ran out of debugging time. There is also no filesystem architecture. In spite of these drawbacks, [Nathan] and [Zhi] created a working proof of concept for wireless biometric storage that they are happy with. Take a tour after the break.
Continue reading “A Shareable Wireless Biometric Flash Drive”

Hacking A NRF24L01 Radio For Longer Range

[RonM9] wasn’t happy with his 50 foot range on his NRF24L01 project. The RF had to cut through four walls, but with the stock modules, the signal was petering out after two or three walls.  A reasonably simple external dipole antenna managed to increase the range enough to do the job.

[RonM9’s] instructions show where to cut away the existing PCB antenna and empirically tune the 24 gauge wire for best performance. He even includes an Arduino-based test rig so you can perform your own testing if you want.

Continue reading “Hacking A NRF24L01 Radio For Longer Range”

Controlling Quadcopters With Wireless Mouse Dongles

Last week we gave away a few Crazyflie 2.0 quadcopters to some cool Hackaday Prize entries. This quadcopter ships with the intention of being controlled by your smartphone. But it can also be controlled by a PC with USB dongle and an nRF24LU1+ SOC. [ajlitt] didn’t figure out he wanted the USB dongle (the Crazyradio) that can control this quad until after he used his gift code to claim his Crazyflie quad. No matter; the dongles for Logitech wireless keyboards and mice use the same radio as the Crazyflie and can be modded to make this quad fly.

The board inside the Logitech unifying receiver is a simple affair, with some pads for the USB connector, a crystal, the nRF24LU1+ radio module, and a few passives. To get this radio chip working with his computer, [ajlitt] simply needed to break out the SPI pins and wire everything to a Bus Pirate.

Getting the Crazyradio firmware onto this proved to be a little harder than soldering some magnet wire onto a few pins. The chip was first flashed without a bootloader, a full image with the bootloader was found, after wrangling a single byte into place, [ajlitt] had a working Crazyflie radio made from a wireless mouse dongle. The range isn’t great  – only 30 feet or so, or about as far as you would expect a wireless mouse to work. Excellent work, even if [ajlitt] is temporarily without a mouse.

The Crazyflie 2.0 is available from the Hackaday Store, along with the add-ons if you don’t want to hack your own.

Embed With Elliot: Multiplexing SPI Uses Few Pins

[Ralph Doncaster], aka Nerdralph, seems to be absolutely driven to see how few resources he can use on a microcontroller to get the job done. In this post on his blog, [Ralph] writes some custom bit-banged SPI code to cut the number of SPI lines necessary to drive an nRF24L01+ radio module from four down to two. That really helps if you’re using a micro with only six free pins, like an ATtiny85.

If you’re going to say, “why don’t you just buy a bigger microcontroller?”, you’re missing the point. This exercise strikes us as optimization for optimization’s sake and a dirty hack, both of which are points in its favor.  There are also a couple of techniques here for your mental toolbox. We thought it was interesting enough to look at in depth.

Continue reading “Embed With Elliot: Multiplexing SPI Uses Few Pins”

ShakeIt – An Interactive Light Game

Learning becomes interesting when you make it fun, interactive and entertaining. [Arkadi] built ShakeIt – an interactive game for the Mini MakerFaire in Jerusalem to demonstrate to kids and grownups how light colors are mixed. It is a follow up to his earlier project – Smart juggling balls which we featured earlier.

The juggling balls consist of a 6 dof sensor (MPU 6050), a micro controller, transmitter (NRF24L01+), some addressable RGB LED’s and a LiPo battery. An external magnet activates a reed switch inside the balls and triggers them in to action. The ShakeIt light fixture consists of an Arduino Nano clone, NRF24L01+ with SMA Antenna, buck converter, 74 addressable RGB LED’s, and a bluetooth module. The bluetooth module connects to a smartphone app.

[Arkadi] starts out by handing three juggling balls, each with a predefined color (Red, Green, Blue). When the ball is shaken, the light inside the ball becomes stronger. The ShakeIt light fixture is used as a mixer. It communicates with the balls and receives the value of how strong the light inside each of the smart balls is, mixing them up, and generating the mixed color.

The fun starts when the interactive game mode is enabled. Instead of just mixing the light, the Light fixture generates patterns based on how strong the balls are shaken. At first the light fixture shows all three colors filling up the central ball. The three contenders then fight out to get their color to fill up the sphere completely until only one color remains and the winner is declared.

The kids might be learning some color theory here, but it seems the adults are having a “ball” playing the crazy game. If you’d like to build your own shoulder dislocating ShakeIt game, head over to [Arkadi]’s github repository for the ShakeIt and the Juggling Balls. Check the video below to see the adults having fun.

Continue reading “ShakeIt – An Interactive Light Game”