Chiptune Player Uses Preprocessed .MOD Files

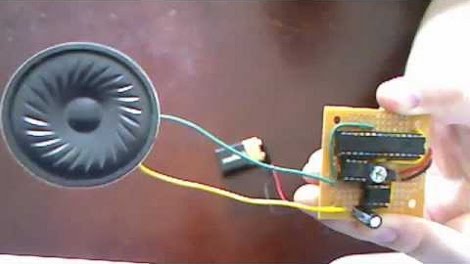
[Kayvon] just finished building this chiptune player based on a PIC microcontroller. The hardware really couldn’t be any simpler. He chose to use a PIC18F2685 just because it’s big enough to store the music files directly and it let him get away with not using an external EEPROM for that purpose. The output pins feed a Digital to Analog Convert (DAC) chip, which in turn outputs analog audio to an LM386 OpAmp. The white trimpot sandwiched between the chips controls the volume.

The real work on this project went into coding a program which translates .MOD files into something the PIC will be able to play. Because of the memory limits of the chip it is unable to directly use all of the instrument samples from these files. [Kayvon] wrote a program with a nice GUI that lets him load in his music and page through each instrument to fine-tune how they are being re-encoded. The audio track from the video after the break doesn’t do the project justice, but you will get a nice look at the hardware and software.

Continue reading “Chiptune Player Uses Preprocessed .MOD Files”

Morse Code Interpreter

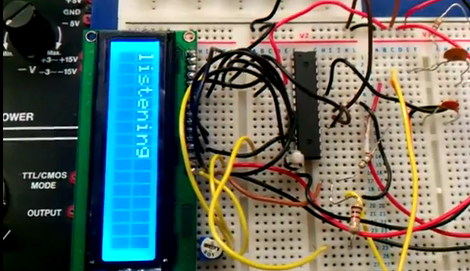
[Sulaiman Habsi] and two classmates put together a Morse Code interpreter as a class project at Sultan Qaboos University. The system listens to a morse code signal using a microphone, then translates that input to text which is displayed on this character LCD.

The breadboarded circuit feeds an audio signal from the microphone, through an OpAmp, to the ADC of an ATmega8 microcontroller. The captured signal is stored as a byte in a special way. The three least-significant bits signify how many total dots or dashes are contained in the character, the remaining bits represent those dots and dashes with zeros and ones. A full description of this process is included in a PDF linked in the article above. As you can see in the video after the break, the hardware waits to process all of the signals once the full message has been received.

This would be a great add-on for a Morse Code practice keyer.

Continue reading “Morse Code Interpreter”

A Bright Idea

[Jeri Ellsworth] had a bright idea – a brain-activated light bulb that floats above your head. While out and about, she saw some guy with a video game icon attached to metal rod sticking out of his backpack. The rod made the icon appear to be floating above his head (think The Sims), which was the inspiration for this LED powered light bulb. The bulb is connected to a metal rod, as well as a metal hoop which is springy enough to keep a pair of electrodes snugly attached to your head.

Those electrodes, along with a third probe used for noise reference, are hooked up to a AD620 instrumentation amplifier. With the help of op amps, it modulates the red or green LEDs that are attached to the back side of the light bulb. The end result is an amusing way to show brain activity while being grilled on a Q/A panel, or while just wandering around taking in all the amazing sights presented at Maker Faire.

Join us after the break for a video demonstration.

Continue reading “A Bright Idea”

Bouncing Ball Analog Computer

bounce

[Eric Archer] constructed an analog computer to model the physics of a bouncing ball. The core is a TL074 opamp that does all the integral math. He had no trouble finding descriptions of analog computers, but how to set the initial conditions was rarely covered. The controls include potentiometers to set the initial velocity, force of gravity, and coefficient of restitution (how much energy is lost in the bounce). The output is displayed on an oscilloscope. He mentions that this output could be used in electronic music, citing Aphex Twin’s Bucephalus Bouncing Ball. Watch the video below for a demo of all the features.

Continue reading “Bouncing Ball Analog Computer”

Light To Sound Converter

lightnoise

[Alex] built what he calls a light to sound converter. It reacts differently depending on the type of light: remote controls, light bulbs, TV screens, etc. A photodiode is used with an amplifier to pick up the light change. That signal is dumped through a dual opamp. He swapped in several different types of photodiodes and settled on the BPW34 intended for visible light. He’ll be incorporating this into a much larger project.

Arduino Duemilanove

The latest generation of Arduino hardware has been released. The Arduino Duemilanove (2009 in Italian) has the same form factor as previous generations. The specs are essentially identical to the Diecimila, but there have been a few changes to the hardware. The power source is no longer chosen using a jumper. A MOSFET and dual OPAMP have been added to the board to automatically selected between USB power and the external plug. Automatic hardware resets are optional now. Next to the USB port are two solder pads labeled RESET-EN. Cut the trace between them to kill the reset. If you ever want it back, just bridge the pads. The hardware was updated to correspond with the release of Arduino cofounder [Massimo Banzi]’s new book.

LED Lightbar Controller

[youtube=http://www.youtube.com/watch?v=6ihIaNN9UBY&hl=en]
[Adam Grieg] recently posted this video of his LED lightbar controller at work making a strip of LEDs flash to the beat of his music. The controller does it by picking up the music via an electret microphone, then amplifying it with an LM386 Amp. The ATtiny13 microcontroller keeps track of the noise level and makes the LED array flash whenever it senses a peak.

In addition to the parts listed, [Grieg] used a small SparkFun box as the enclosure for the controller. If you’re considering trying your hand at this project, check out [Grieg]’s schematics and code. It’s relatively cheap to make, so it wouldn’t be that hard to rig up several of these set to flash at different frequencies.

[via SparkFun]