Library Makes ESP Over The Air Updates Easy

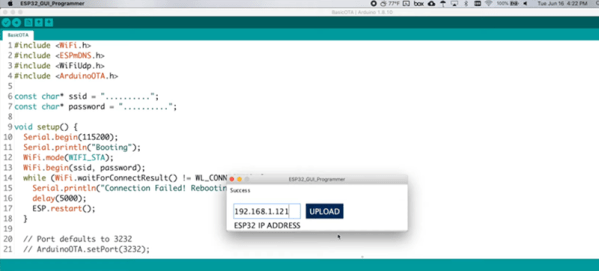
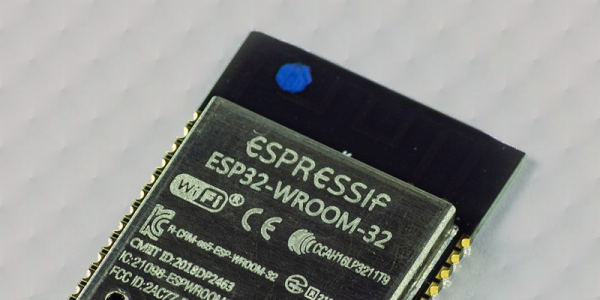
Potentially, one of the great things about having a device connected to the network is that you can update it remotely. However, how do you make that happen? If you use the Arduino setup for the ESP8266 or ESP32, you might try [scottchiefbaker’s] library which promises to make the process easy.

Adding it looks to be simple. You’ll need an include, of course. If you don’t mind using port 8080 and the path /webota, you only need to call handle_webota() from your main loop. If you want to change the defaults, you’ll need to add an extra call in your setup. You also need to set up a few global variables to specify your network parameters.

Continue reading “Library Makes ESP Over The Air Updates Easy”

SMART Response XE Gets Wireless Bootloader

A few months back we first brought word of the progress being made in unlocking the SMART Response XE, an ATmega128RFA powered handheld computer that allowed teachers to create an interactive curriculum in the days before all the kids got Chromebooks. Featuring 2.4 Ghz wireless communication, a 384×160 LCD, and a full QWERTY keyboard, schools paid around $100 each for them 2010. Now selling for as little as $5 on eBay, these Arduino-compatible devices only need a little coaxing and an external programmer to get your own code running.
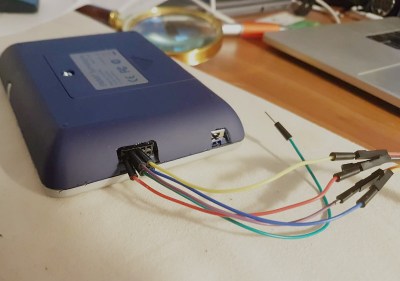
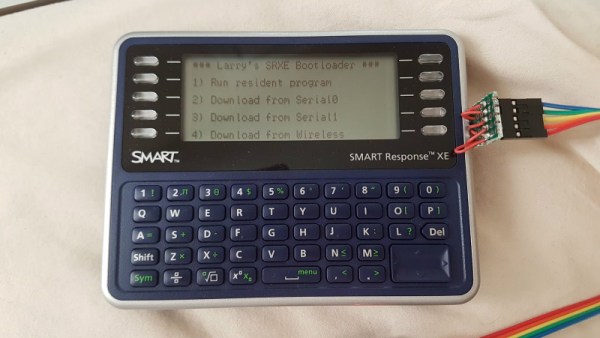
The previous post inspired [Larry Bank] to try his hand at hacking the SMART Response XE, and so far he’s made some very impressive progress. Not only has he come up with his own support library, but he’s also created a way to upload Arduino code to the devices through their integrated 802.15.4 radio. With his setup, you no longer need to open the SMART Response XE and attach a programmer, making it much easier to test and deploy software.

[Larry] has written up a very detailed account of his development process, and goes through the trouble of including his ideas that didn’t work. Getting reliable communication between two of these classroom gadgets proved a bit tricky, and it took a bit of circling around until he hit on a protocol that worked.

The trick is that you need to use one SMART Response XE attached to your computer as a “hub” to upload code to other XEs. But given how cheap they are this isn’t that big of a deal, especially considering the boost in productivity it will net you. [Larry] added a 5 x 2 female header to his “hub” XE so he could close the device back up, and also added a physical power switch. In the video after the break, you can see a demonstration of the setup sending a simple program to a nearby XE.

Between this wireless bootloader and the Arduboy compatibility covered previously, we’d suggest you get your SMART Response XE now. We wouldn’t be surprised if the prices of these things start going up like they did with the IM-ME. Continue reading “SMART Response XE Gets Wireless Bootloader”

Over The Air Updates For Your Arduino

An Arduino and a data radio can make a great remote sensor node. Often in such situations, the hardware ends up installed somewhere hard to get to – be it in a light fitting, behind a wall, or secreted somewhere outdoors. Not places that you’d want to squeeze a cable repeatedly into while debugging.

[2BitOrNot2Bit] decided this simply wouldn’t do, and decided to program the Arduinos over the air instead.

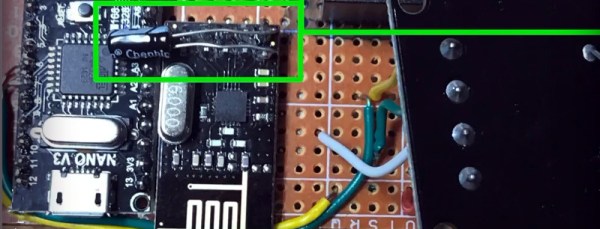
Using the NRF24L01 chip with the Arduino is a popular choice to add wireless communications to a small project. By installing one of these radios on both the remote hardware and a local Arduino connected to the programming computer, it’s possible to remotely flash the Arduino without any physical contact whatsoever using Optiboot.

The writeup is comprehensive and covers both the required hardware setup for both ends of the operation as well as how to install the relevant bootloaders. If you’re already using the NRF24L01 in your projects, this could be the ideal solution to your programming woes. Perhaps you’re using a different platform though – like an Arduino on WiFi? Don’t worry – you can do OTA updates that way, too.

Hijacking The Sonoff OTA Mechanism

ITEAD’s Sonoff line is a range of Internet-of-Things devices based around the ESP8266. This makes them popular for hacking due to their accessibility. Past projects have figured out how to reflash the Sonoff devices, but for [mirko], that wasn’t enough – it was time to reverse engineer the Sonoff Over-The-Air update protocol.

[mirko]’s motivation is simple enough – a desire for IoT devices that don’t need to phone home to the corporate mothership, combined with wanting to avoid the labor of cracking open every Sonoff device to reflash it with wires like a Neanderthal. The first step involved connecting the Sonoff device to WiFi and capturing the traffic. This quickly turned up an SSL connection to a remote URL. This was easily intercepted as the device doesn’t do any certificate validation – but a lack of security is sadly never a surprise on the Internet of Things.

After capturing the network traffic, [mirko] set about piecing together the protocol used to execute the OTA updates. After a basic handshake between client and server, the server can ask the client to take various actions – such as downloading an updated firmware image.  After determining the messaging format, [mirko] sought to create a webserver in Python to replicate this behaviour.

There are some pitfalls – firmware images need to be formatted slightly differently for OTA updates versus the usual serial upload method, as this process leaves the stock bootloader intact. There’s also the split-partition flash storage system to deal with, which [mirko] is still working on.

Nevertheless, it’s great to see hackers doing what they do best – taking control over hardware and software to serve their own purposes. To learn more, why not check out how to flash your Sonoff devices over serial? They’re just an ESP8266 inside, after all.

HDTV Antenna Of A Different Color

We’ve seen our share of commercially available HDTV antennas that work really poorly. For at least four years now we’ve gone without cable television, using a coat hanger antenna we made ourselves to record over-the-air broadcasts. But it’s a pretty ugly beast — we’re lucky enough to have an attic in which it can be hidden. If you’re in need of free television and don’t want an eyesore of a an antenna try building this foil and cardboard version. Even it if doesn’t work at all you’re only out about ten bucks.

The expensive part is the matching transformer which converts screw terminals to a coaxial cable connection so that it may be connected to your HDTV. You’ll need a few nuts and bolts, but we assume you can beg, borrow, or steal the tin foil, cardboard, and glue that round out the parts list. Glue, measure, cut, fold, fasten, finished! You’ll be watching horrible summer TV in no time!

If it doesn’t perform as expected just reuse that connector and try your luck with a fractal antenna.

Stepper Directed HDTV Antenna

Credit: http://www.instructables.com/id/Computer-controlled-OTA-TV-antenna/

Broadcast TV has come a long way from adjusting the rabbit ears on top of the set just to get a fuzzy black and white picture. While nowadays there are often HD signals broadcast in most areas, it can often still be critical to redirect an antenna to get the best possible signal. By harvesting a stepper motor from an old 5 1/2″ floppy drive, and using a PC’s parallel port to control it, this adjustment can be handled automatically. Broadcast tower locations are easily found online, and once you have calibrated your stepper to face North, you are on your way to free HDTV reception.

What we would like to see is this antenna attached to a HTPC, and some kind of script to automatically direct the antenna for the best possible signal for the current channel. If anyone out there makes this happen, be sure to let us know.