Turning A Waffle Iron Into A Reflow Station

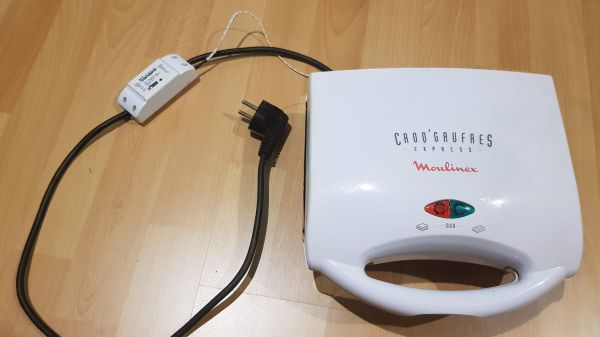
There are a ton of ways to go about building your own reflow oven. Most of these builds start with, well, an oven — usually a toaster oven — with a small but significant minority choosing to modify a hotplate. But this might be the first time we’ve seen a waffle iron turned into a reflow oven.
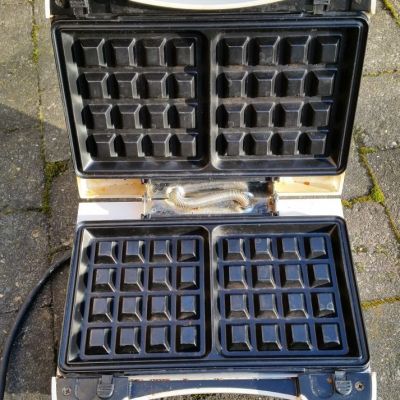
Of course, what [Vincent Deconinck] came up with is not an oven per se. But his “RefloWaffle” certainly gets the job done. It started with an old waffle maker and a few experiments to see just how much modification it would take to create the various thermal reflow profiles. As it turned out, the original cooking surfaces had too much thermal inertia, so [Vincent] replaced them with plain copper sheets. That made for quicker temperature transitions, plus created some space between the upper and lower heating elements for the SMD board.

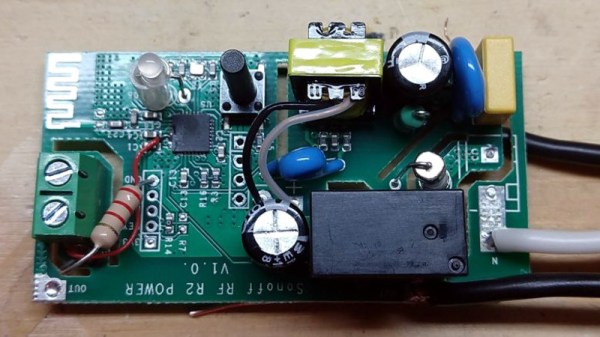
As for control, [Vincent] originally used an Arduino with a relay and a thermocouple, but he eventually built a version 2.0 that used a hacked Sonoff as both controller and switch. Adding the thermocouple driver board inside the Sonoff case took a little finagling, but he managed to get everything safely tucked inside. A web interface runs on the Sonoff and controls the reflow process.

We think this is a great build, one that will no doubt see us trolling the thrift stores for cheap waffle irons to convert. We’ve seen some amazing toaster oven reflows, of course, but something about the simplicity and portability of RefloWaffle just works for us.

Roll Your Own Automation With ESPHome

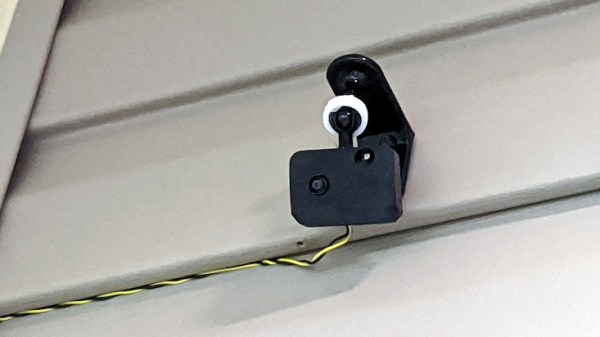
There are several different paths to a smart home, and [Marcus] eventually settled on using ESPHome and ESP8266/ESP32 based devices to create a complete DIY smart home solution which covers his garage door, sprinklers, LED strips, light bulbs, and outlets. There’s even an experimental (and very economical) ESP32-CAM based camera, shown here.

In fact, [Marcus]’s write-up could double as a sort of reference design. If you’re curious about ESPHome, be sure to read what he has to say because he explains exactly how he configured each device and any challenges he encountered in the process.

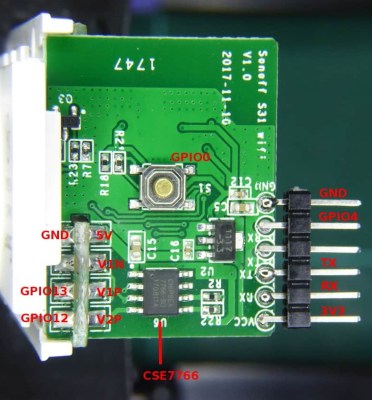
Beyond the software guidance, the post is also a great resource on how to flash a new firmware onto several different smart devices. [Marcus] provides nicely labeled images of the boards that show where you need to connect your programmer, which just might save you some trouble down the line. Though he did manage to set fire to one of the bulbs, so keep an eye out for that.

Tasmota is another open source option for controlling ESP8266-based devices, and if you’d like to explore that direction don’t forget that flashing Sonoff devices with Tasmota firmware recently got much, much easier.

Flashing Sonoff Devices With Tasmota Gets Easier

Tasmota is an alternative firmware for ESP boards  that provides a wealth of handy features, and [Mat] has written up a guide to flashing with far greater ease by using Tasmotizer. Among other things, it makes it simple to return your ESP-based devices, like various Sonoff offerings, to factory settings, so hack away!

Tasmotizer is a front end that also makes common tasks like backing up existing firmware and setting configuration options like, WiFi credentials, effortless. Of course, one can’t really discuss Tasmotizer without bringing up Tasmota, the alternative firmware for a variety of ESP-based devices, so they should be considered together.

Hacks based on Sonoff devices are popular home automation projects, and [Mat] has also written all about what it was like to convert an old-style theromostat into a NEST-like device for about $5 by using Tasmota. A video on using Tasmotizer is embedded below, so give it a watch to get a head start on using it to hack some Sonoff devices.

Continue reading “Flashing Sonoff Devices With Tasmota Gets Easier”

New Part Day: Sonoff USB Smart Adaptor Taps A New WiFi Chip

For decades, we dreamt of a future where all of our electronics used a standardized power connector. Most of us probably didn’t expect that USB would ultimately fill that role, but we’ll take what we can get if it means a future without getting a new wall wart for every piece of tech we buy. From soldering irons to laptops, the number of things you can power with a lowly USB cable these days is pretty incredible.

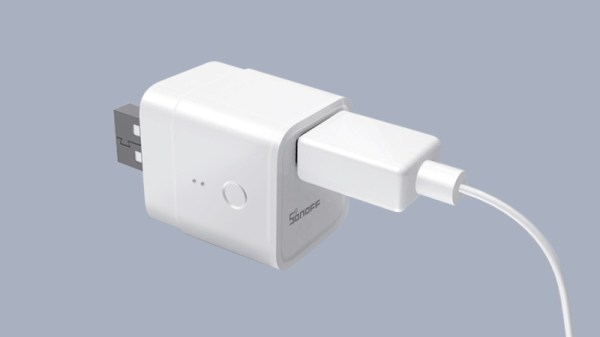
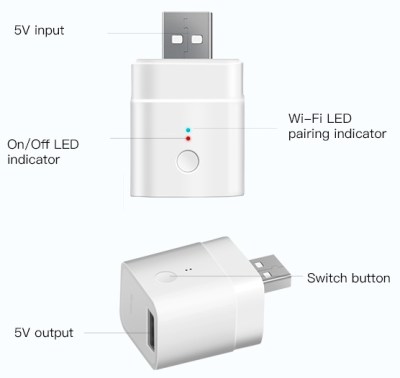
Which makes it all the more surprising it took so long for somebody to come up with a way to toggle USB devices off and on over the network. The Sonoff “USB Smart Adaptor”, which the company says will start shipping before the end of the year, is the logical evolution of their exceptionally popular mains voltage smart switches. The Smart Adapter is designed to go between the device and its existing power supply, allowing the user to drag any USB powered device kicking and screaming into their existing smart home setup. All for the princely sum of $6.50 USD.

In the video after the break, Sonoff gives a few potential uses of the Smart Adapter: from controlling a string of LEDs to limiting how long a smartphone is allowed to charge for. But really, there’s a nearly limitless number of devices which could be easily and cheaply integrated into your home automation routines thanks to this gadget.

On the other end of the spectrum, those who are looking to keep a tighter control on the ears and eyes that are active in their home could use the Smart Adapter to make sure their Google and Amazon listening devices assistants are only powered up during certain hours of the day.

Unfortunately, there’s a catch. Sonoff smart switches are best known, at least among the type of folks who read Hackaday, for the fact that they’re based on the eminently hackable ESP8266 microcontroller. Given the size of this product and its intended use, it would seem logical enough to assume this device also utilizes the insanely popular chip. But according to a Sonoff representative, the USB Smart Adapter won’t be using an ESP at all; leaving its hackability an open question until people can actually get their hands on them and start poking around.

Continue reading “New Part Day: Sonoff USB Smart Adaptor Taps A New WiFi Chip”

Homekit Compatible Sonoff Firmware Without A Bridge

Generally speaking, home automation isn’t as cheap or as easy as most people would like. There are too many incompatible protocols, and more often than not, getting everything talking requires you to begrudgingly sign up for some “cloud” service that you didn’t ask for. If you’re an Apple aficionado, there can be even more hoops to jump through; getting your unsupported smart home devices working with that Cupertino designed ecosystem often involves running your own HomeKit bridge.

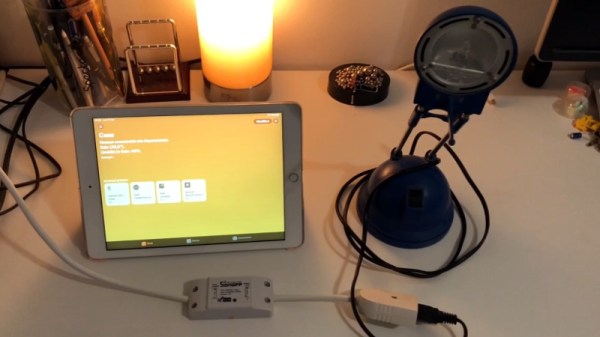
To try and simplify things, [Michele Gruppioni] has developed a firmware for the ubiquitous Sonoff WIFI Smart Switch that allows it to speak native HomeKit. No more using a Raspberry Pi to act as a mediator between your fancy Apple hardware and that stack of $4 Sonoff’s from AliExpress, they can now talk to each other directly. In the video after the break you can see that the iPad identifies the switch as unofficial device, but since it’s compliant with the HomeKit API, that doesn’t prevent them from talking to each other.

Not only will this MIT licensed firmware get your Sonoff Basic, Sonoff Slampher, or Sonoff S26 talking with your Apple gadgets, but it also provides a web interface and REST API so it retains compatibility with whatever else you might be running in your home automation setup. So while the more pedestrian users of your system might be turning the porch light on with their iPhones, you can still fire it up with a Bash script as nature intended.

Of course, if you don’t mind adding a Raspberry Pi bridge to the growing collection of devices on your network, we’ve got plenty of other HomeKit-enabled projects for you to take a look at.

Continue reading “Homekit Compatible Sonoff Firmware Without A Bridge”

A Sonoff Switch Repurposed As A Thermostat

Underfloor heating is a wonderfully luxurious touch for a bedroom and en-suite bathroom, and [Andy] had it fitted so that he could experience the joy of walking on a toasty-warm floor in the morning. Unfortunately after about a year it stopped working and the culprit proved to be its thermostat. A replacement was eye-wateringly expensive, so he produced his own using an ESP8266-powered Sonoff wireless switch.

The thermostat has a thermistor as its temperature sensor, embedded in the floor itself. This could be brought to the ESP’s solitary ADC pin, but not without a few challenges along the way. The Sonoff doesn’t expose the pin, so some very fine soldering was the first requirement. A simple voltage divider allowed the pin to be fed, but through it he made the unfortunate discovery that the ESP’s analogue input has a surprisingly low voltage range. A new divider tying it to ground solved the problem, and he was good to go.

Rather than using an off-the-shelf firmware he created his own, and with a bit of board hacking he was able to hard wire the mains cabling and use one set of Sonoff terminals as a sensor connector. The whole fit neatly inside an electrical fitting box, so he’s back once more to toasty-warm feet.

This isn’t the first ESP thermostat we’ve featured, nor will it be the last. Here’s a particularly nice build from 2017.

Old Wireless Switches Join The Internet Of Things

Just about any appliance comes in an internet enabled version nowadays. However, even the oldest gear can be switched on and off with an Internet connected power socket. [Bill] is in the process of automating his home, and found some old radio controlled power sockets that badly needed to join the 21st Century. Hacking ensued.

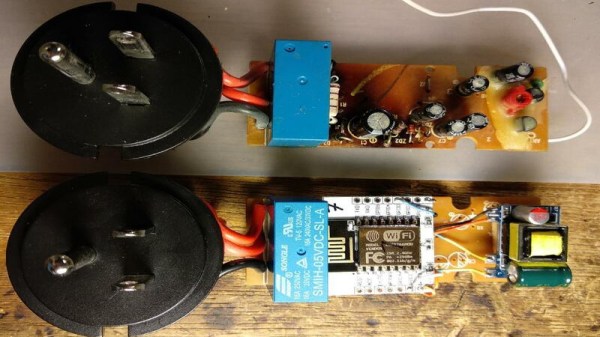
The first set of switches [Bill] came across were easy to work with. Eager to keep things as functional as possible, ESP8266s with Tasmota firmware were wedged into the enclosures. With a bit of circuit sleuthing, [Bill] was able to set up the switches to respond to commands from both the ESP8266 as well as the original push buttons and radio remote.

[Bill] later came across some black switches, which were not up to his standards. These switches were gutted entirely, being used only for their mains plug and enclosure. The relays inside were replaced with 5V versions which were easier to trigger from the ESP8266’s outputs.

[Bill[ readily admits that the cost benefits over buying off-the-shelf Sonoff modules don’t really add up, but good hackers rarely let such concerns get in the way of a fun project. Around these parts, we see plenty of hacks to automate your house – like this zero-intrusion light switch mod. Happy hacking!