Gloriously Impractical: Overclocking The Raspberry Pi 5 To 3.6 GHz

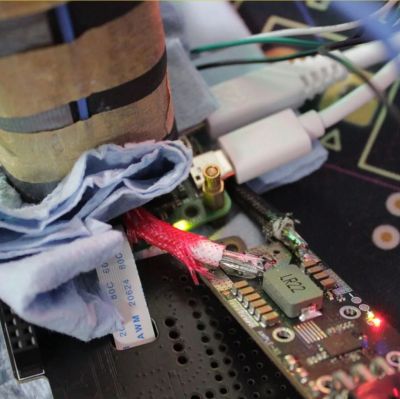
The Raspberry Pi 5 board strapped to a liquid nitrogen cooler and with ElmorLabs AMPLE-X1 power board attached. (Credit: Pieter-Jan Plaisier, SkatterBencher.com)
The Raspberry Pi 5 board strapped to a liquid nitrogen cooler with an ElmorLabs AMPLE-X1 power board attached. (Credit: Pieter-Jan Plaisier, SkatterBencher.com)

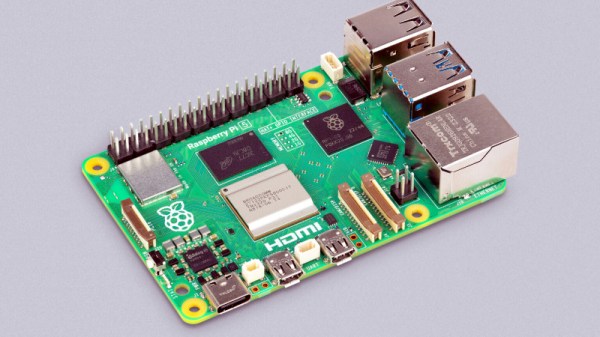
As impractical as most overclocking of computers is these days, there is still a lot of fun to be had along the way. Case in point being [Pieter-Jan Plaisier]’s recent liquid nitrogen-aided overclocking of an unsuspecting Raspberry Pi 5 and its BCM2712 SoC. Previous OCing attempts with air cooling by [Pieter] had left things off at a paltry 3 GHz from the default 2.4 GHz, with the power management IC (PMIC) circuitry on the SBC turning out to be the main limiting factor.

The main change here was thus to go for liquid nitrogen (LN2) cooling, with a small chipset LN2 pot to fit on the SBC. Another improvement was the application of a NUMA (non-uniform memory addressing) patch to force the BCM2712’s memory controller to utilize better RAM chip parallelism.

With these changes, the OC could now hit 3.6 GHz, but at 3.7 GHz, the system would always crash. It was time to further investigate the PMIC issues.

The PMIC imposes voltage configuration limitations and turns the system off at high power consumption levels. A solution there was to replace said circuitry with an ElmorLabs AMPLE-X1 power supply and definitively void the SBC’s warranty. This involves removing inductors and removing solder mask to attach the external power wires. Yet even with these changes, the SoC frequency had trouble scaling, which is why an external clock board was used to replace the 54 MHz oscillator on the PCB. Unfortunately, this also failed to improve the final overclock.

We covered the ease of OCing to 3 GHz previously, and no doubt some of us are wondering whether the new SoC stepping may OC better. Regardless, if you want to get a faster small system without jumping through all those hoops, there are definitely better (and cheaper) options. But you do miss out on the fun of refilling the LN2 pot every couple of minutes.

Thanks to [Stephen Walters] for the tip.

Quake In 276 KB Of RAM

Porting the original DOOM to various pieces of esoteric hardware is a rite of passage in some software circles. But in the modern world, we can get better performance than the 386 processor required to run the 1993 shooter for the cost of a dinner at a nice restaurant — with plenty of other embedded systems blowing these original minimum system requirements out of the water.

For a much tougher challenge, a group from Silicon Labs decided to port DOOM‘s successor, Quake, to the Arduino Nano Matter Board platform instead even though this platform has some pretty significant limitations for a game as advanced as Quake.

To begin work on the memory problem, the group began with a port of Quake originally designed for Windows, allowing them to use a modern Windows machine to whittle down the memory usage before moving over to hardware. They do have a flash memory module available as well, but there’s a speed penalty with this type of memory. To improve speed they did what any true gamer would do with their system: overclock the processor. This got them to around 10 frames per second, which is playable, but not particularly enjoyable. The further optimizations to improve the FPS required a much deeper dive which included generating lookup tables instead of relying on computation, optimizing some of the original C programming, coding some functions in assembly, and only refreshing certain sections of the screen when needed.

On a technical level, Quake was a dramatic improvement over DOOM, allowing for things like real-time 3D rendering, polygonal models instead of sprites, and much more intricate level design. As a result, ports of this game tend to rely on much more powerful processors than DOOM ports and this team shows real mastery of their hardware to pull off a build with a system with these limitations. Other Quake ports we’ve seen like this one running on an iPod Classic require a similar level of knowledge of the code and the ability to use assembly language to make optimizations.

Thanks to [Nicola] for the tip!

New 2 GB Raspberry Pi 5 Has Smaller Die And 30% Lower Idle Power Usage

Recently Raspberry Pi released the 2GB version of the Raspberry Pi 5 with a new BCM2712 SoC featuring the D0 stepping. As expected, [Jeff Geerling] got his mitts on one of these boards and ran it through its paces, with positive results. Well, mostly positive results — as the Geekbench test took offence to the mere 2 GB of RAM on the board and consistently ran out of memory by the multi-core Photo Filter test, as feared when we originally reported on this new SBC. Although using swap is an option, this would not have made for a very realistic SoC benchmark, ergo [Jeff] resorted to using sysbench instead.

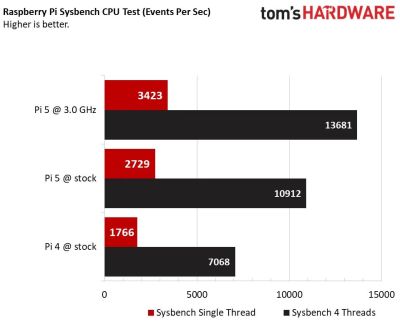
Naturally some overclocking was also performed, to truly push the SoC to its limits. This boosted the clock speed from 2.4 GHz all the way up to 3.5 GHz with the sysbench score increasing from 4155 to 6068. At 3.6 GHz the system wouldn’t boot any more, but [Jeff] figured that delidding the SoC could enable even faster speeds. This procedure also enabled taking a look at the bare D0 stepping die, revealing it to be 32.5% smaller than the previous C1 stepping on presumably the same 16 nm process.

Although 3.5 GHz turns out to be a hard limit for now, the power usage was interesting with idle power being 0.9 watts lower (at 2.4 W) for the D0 stepping and the power and temperatures under load also looked better than the C1 stepping. Even when taking the power savings of half the RAM versus the 4 GB version into account, the D0 stepping seems significantly more optimized. The main question now is when we can expect to see it appear on the 4 and 8 GB versions of the SBC, though the answer there is likely ‘when current C1 stocks run out’.

Overclocking Raspberry Pi 5’s SoC To 3 GHz And 1 GHz GPU

Overclocking computer systems is a fun way to extract some free performance, or at least see how far you can push the hardware before you run into practical limitations. The newly released Raspberry Pi 5 with BCM2712 SoC is no exception here, with Tom’s Hardware having a go at seeing how far both the CPU and GPU in the SoC can be pushed. The BCM2712’s quad Cortex-A76 CPU is normally clocked at 2.4 GHz and the VideoCore VII GPU at 800 MHz. By modifying some settings in the /boot/config.txt configuration file these values can be adjusted.

In order to verify that an overclock was stable, the Stressberry application was used, which fully loads the CPU cores. Here something like a combination of stress-ng and glxgears could also be used, to stress both the CPU and GPU. With the official actively cooled heatsink the CPU reached a temperature of 74°C with a whole board power usage of about 10 Watts. At idle this dropped to 3 Watts at 46°C. At these speeds, the multiple Raspberry Pi 5 units OCed by Tom’s Hardware were mostly stable, though one of the team’s boards experienced a few crashes. This suggests that this level of OCing could still be subject to luck of the draw, and long-term stability would have to be investigated as well.

As for the practical use cases of OCing your Raspberry Pi 5, benchmarks showed a marked uplift in compression and Sysbench benchmark scores, but OCing the GPU had no real positive impact on YouTube or 3D performance, leading even to a massive increase in dropped frames with video playback. This probably means that increasing the CPU clock may be beneficial, but OCing the GPU could be futile without also OCing the RAM frequency, if at all possible.

Realistically, the Raspberry Pi SoCs never were speed monsters, with even the Raspberry Pi 4B’s SoC being beaten handily in 2020 by a budget dual-core Intel CPU.  The current Intel Alder-Lake-N-based N100 SoC has a 6 Watt TDP and boosts up to 3.4 GHz while its Xe-LP-based iGPU (with AV1 decoding support) makes for a decent gaming experience within a ~16 Watt power envelope. Clearly, any OCing of the Raspberry Pi boards is more for the challenge of it, but then so is running the latest Intel CPU at 10 GHz with liquid nitrogen cooling.

The Tale Of The Final EVGA GPU Overclocking Record

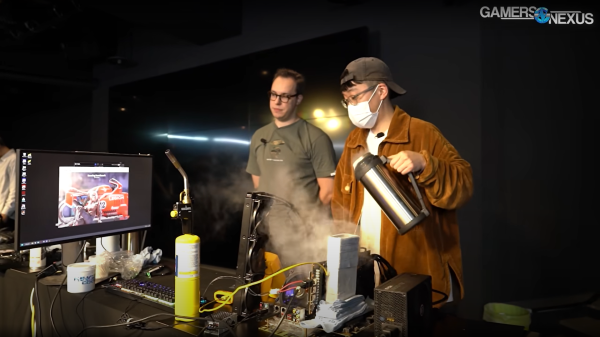
It’s not news that EVGA is getting out of the GPU card game, after a ‘little falling out’ with Nvidia. It’s sad news nonetheless, as this enthusiastic band of hardware hackers has a solid following in certain overclocking and custom PC circles. The Games Nexus gang decided to fly over to meet up with the EVGA team in Zhonghe, Taiwan, and follow them around a bit as they tried for one last overclocking record on the latest (unreleased, GTX4090-based) GPU card. As you will note early on in the video, things didn’t go smoothly, with their hand-lapped GPU burning out the PCB after a small setup error. Continue reading “The Tale Of The Final EVGA GPU Overclocking Record”

Pi Pico Gives Its Life For Overclocking

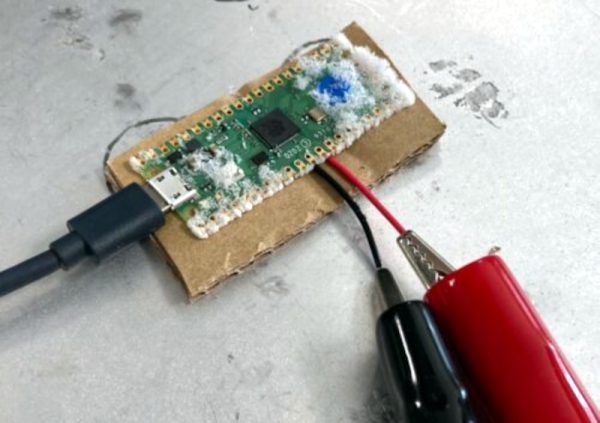
How fast can a Raspberry Pi Pico go? Well, apparently the answer is 1 GHz if you freeze it and give it over twice the voltage it normally gets. Oh, one catch. After a few minutes, the chip will fry itself.

That’s the results reported by [David] who took a Peltier cooler and a pretty serious over-voltage. The dhrystone scores went from around 200 to over 1100. Of course, there’s that pesky early death to worry about, so you probably won’t want to try this at home.

Even before the chip bites the dust, there are other problems to address. For example, once you get much over 250 MHz, the Pico’s SPI flash can’t keep up, so all the software you want to run has to be put in RAM first. You’ll also want to do some poking at the system clock parameters.

Honestly, we enjoy overclocking PCs or just about anything else. The good news is if you fry a Pico, it won’t make a sizable dent in your wallet. It is also a fun way to learn a bit more about the internals of the processor. According to [David], the cooler took the part to -40 C. We wonder how it would fare in a bath of LN2?

Of course, you can push a regular Pi, too. If you really need a 1 GHz overclocked microcontroller, maybe check out the Teensy.

PC Overclocking With An Air Conditioner

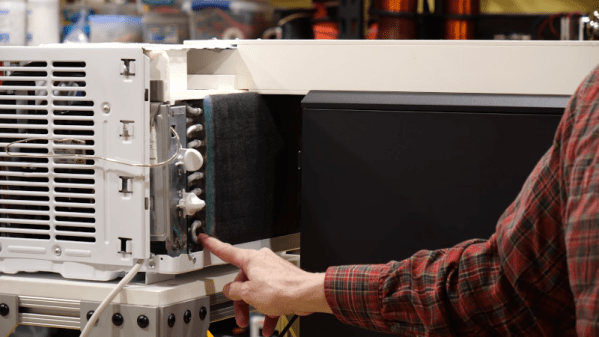
We never insist that a hack be practical. [Tech Ingredients] is living proof as they modded a computer case to use a window air conditioner for overclocking a computer. They think they haven’t hit the ceiling yet, and got their AMD Ryzen 8-core processor up to 4.58 GHz.

An advantage of forcing air from an air conditioner is that the air forced into the system is quite dry and clean. The trick is to create a simple duct to attach to a 5,000 BTU air conditioner. It doesn’t actually interface with the CPU cooling block, instead it just forces cool air into the case and this tends to cool everything inside. Admittedly, it isn’t any worse than plunging your computer in liquid nitrogen, and we’ll admit that air conditioning units are made to keep large areas cold and work at high duty cycles. With the air conditioning running, they disconnected at least some of the stock fans. The temperatures stayed cool even at high speeds.

Continue reading “PC Overclocking With An Air Conditioner”