Hackaday Links: February 21, 2011

PCB Stand

Part PCB, part old IC, and held together with hot glue. It doesn’t take much to make this electronics stand, but it’ll certainly add to the geek level of your desk.

Decorate with light

This busy living room is actually decorated all in white. The patterns that give it life are on lend from a projector and what we’d imagine is some fantastic software. [Thanks MDV]

Flashing butt on your bike

[Eli] sewed lights and flex sensor into her jeans. Now her butt flashes in heart-shaped patterns as she rides. She actually robbed one of the flex sensors from this project to complete that explosive high-five project.

Mini-rake’s progress

A lathe and some sand that needs tending is all that [Spatula Tzar] needed to get this zen garden rake under way. We like how she used a vacuum bag to infuse the wood with mineral oil.

Paper and electrons

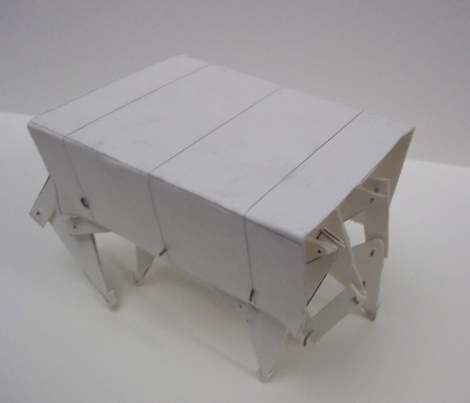
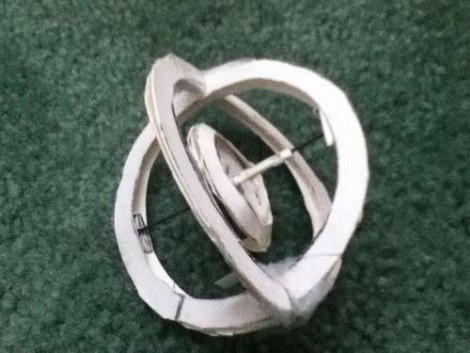
This collection of musical projects forsakes common substrates and builds the mess of circuit boards on pieces of paper. Not much information but the strangeness is worth a look.

Paper Accelerometers For Pennies In The Works

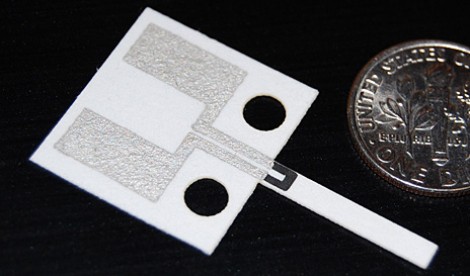
Cheap paper accelerometers? Put us down for a dozen to start. They’re not quite ready for mass production yet but it looks like they’re on the way.

[George Whitesides] led a team to develop the new technology that uses simple manufacturing methods to produce the sensor seen above. Graphite and silver inks were screen printed onto heavy paper. The single limb sticking out from the body of the sensor is a separate piece of paper that bends the carbon area when force is applied. This changes the carbon’s resistance which is measured using a Wheatstone bridge constructed by gluing resistors to the device.

It sounds unsophisticated compared to most of the accelerometer modules we’re used to, but if you need a sensor that detects sudden motion this sounds like the perfect part. Now who wants to be the first person to replicate this in their basement?

[Thanks Fabien]

Custom Enclosures Made Of Paper

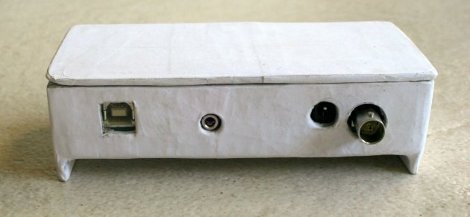
[Sivan Toledo] needed a enclosure for a unique sized electronic project, not finding what he needed in off the shelf solutions, he went to the next best thing, … Papier Mâché!

Using a mold made out of standard corrugated cardboard, he slowly built up layers made of magazine paper, and ordinary “white glue” diluted with water. After getting near the thickness wanted he switched over to typing / copy type paper for a nice clean outer surface. Ports were made in the usual fashion when dealing with soft or thin material, drill a smaller hole, going back with successively larger holes, and then follow up with an appropriate file, all while taking things slow along the way to prevent unwanted results. Finishing up with layers of paper carefully cut into strips to meet the circumferences / edges, along with the final outer surface to make it all even.

The end result is awesome as it stands, but we cant help but wonder what some sanding and paint would look like on a enclosure made like this, though any way you finish it, the idea comes down to custom enclosures that do not need special tools or materials to complete (on the cheap).

Thanks [Drone]

2-bit Paper Processor Teaches How They Work

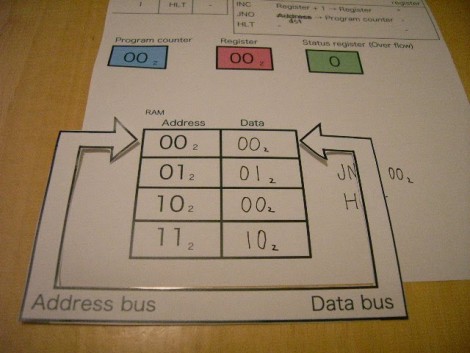
Take a few minutes out of your day, grab your scissors, and learn how a simple processor works. [Saito Yutaka] put together an exercise to teach processor operations with paper. After downloading the PDF you can cut out the Address and Data pointer as well as two-bit data tokens for each. The processor has three instruction sets; Increment register by one, Jump if not over flow, and Halt wait for reset.

Once you’ve got your cutouts you can follow along as the program is executed. The INC operation is run, with the JNO used to loop the program. Once the register has reached an overflow the overflow counter halts the program.

One word of warning, we think there’s a typo in one of the captions.  Once the program starts running and gets to address 01(2) the caption still reads 00(2) for both address and data. As long as you compare the values in the picture along the way you should have no problem getting through execution. which has now been fixed.

Arduino Based Thermal Printer

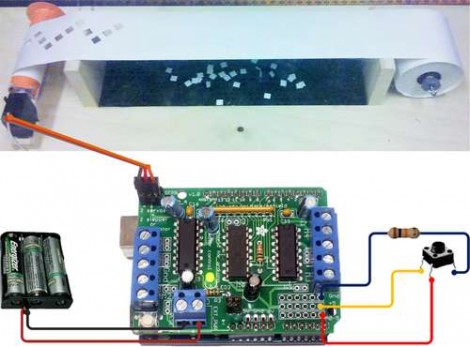
[Manuel] built his own thermal printer based around an Arduino. We’re a bit confused about the parts, his webpage specifies an EFA-1019HW2 print head but the bill of materials on his github shows EPT-1019W2. We can’t find a source for either product number, but we did find similar thermal line printers for as low as $32.00. The controller boards on the other hand look to be around $150 so building your own is a definite win. [Manuel’s] version can print 96 points and has a font set that prints 32 characters per line. Check out the video after the break and let us know if the noise of the print head is a deal killer for you.

Continue reading “Arduino Based Thermal Printer”

Google Maps Wristlet Navigator

This on-wrist navigation system uses Google Maps and something called… paper. This is a throwback to scroll-based directions from the 1920’s and 30’s that [Simon] built. He soldered a couple of brass tubes to a brass back plate, then added sides and a face crystal. Now he prints out step by step direction from the popular mapping website and winds them onto scrolls. We’re not sure that we’d take the time to do this, but hey, at least the screen resolution is fantastic and you don’t have to worry about battery life.

Make Your Own Toner Transfer Paper

Who would have thought that some corn starch could be made into toner transfer paper? We’re not sure of the advantages (perhaps its cheaper?), but if you have a lot of time or just love to get sticky [Matthew Sager] shows the proper method for making the paper, printing, and then etching a PCB.

If you’re just getting started making PCBs, we recommend you check out these DIY circuit etching videos to get a better grasp on the printing and etching steps.