A Modern PC With A Retro OS

Despite the rise of ARM processors in more and more computers from embedded systems to daily driver PCs, the x86 architecture maintains a stronghold in the computing space that won’t be going away anytime soon. One of the main drivers of this is its beachhead in industrial systems; the x86 architecture is backwards-compatible farther back than many of us have been alive and in situations where machines need to run for years with minimum downtime it’s good to know you can grab any x86 system off the shelf and it’ll largely work. This is also true for gaming, so if you’re like [Yeo Kheng Meng] and want to run games like DOOM natively on modern hardware it’s certainly possible, although there are a few catches.

This build goes into the design of a modern AMD Ryzen 5 desktop computer, with all of the components selected specifically for their use running software more than three decades old now. [Yeo Kheng Meng] is targeting DOS 6.22 as his operating system of choice, meaning that modern EFI motherboards won’t necessarily work. He’s turned to business class products as a solution for many of these issues, as motherboards targeting business and industrial customers often contain more support for antiquated hardware like PS/2 and parallel ports while still having modern amenities like DDR5 memory slots. PS/2 ports additionally are an indicator that the motherboard will supports older non-EFI boot modes (BIOS) and can potentially run DOS natively. Everything here can also run modern operating systems, since he isn’t building this system only to run DOS and retro games.

Beyond the motherboard choice, he’s also using a Soundblaster card for audio which is a design choice generally relegated to history, but still used in modern gaming by a dedicated group. There’s also a floppy drive running via a USB header adapter cable. Of course, there are a few problems running DOS and other era-appropriate software natively on such incomprehensibly fast hardware (by early 90s standards). Some video games were hard coded to the processor clock of the x86 process of the era, so increasing the clock speed orders of magnitude results in several playability issues. In emulators it’s easier to provide an artificially slow clock speed, but on real hardware this isn’t always possible. But [Yeo Kheng Meng] has done a lot to get this modern computer running older software like this. Another take we’ve seen for retro gaming on original hardware is this system which uses a brand-new 486 processor meant for use in industrial settings as well.

How Home Made Robot Arms Used To Be Made

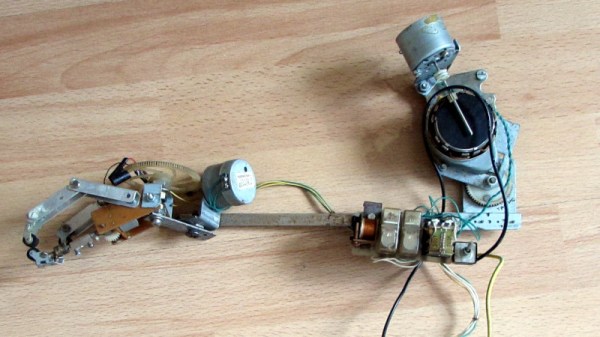
With laser cutters and 3D printers in our arsenal as well as the global toy shop of mass-produced parts and single-board computers, building a robotic project has almost never been easier. In times past though, there was more of a challenge, with a computer likely meaning a chunky desktop model and there being no plethora of motors at low prices, a robot arm required more ingenuity. [Marius Taciuc] shares with us an arm he built from the most minimal of parts back in 2003, and it’s a beautiful exercise in creative reuse.

The arm itself uses metal and FR4 for its structure, and borrows extensively from cassette tape mechanisms for motors and gears. The stronger motor for the forearm is a geared unit from a heating system, and to control all this, a relay board is hooked up to a computer’s parallel port. This last assembly is particularly ingenious, having no optocouplers handy he made his own by coupling LEDs to metal can transistors with their lids removed.

The arm was entered in a competition, and he relates a tale with which we’ll all be familiar — at the critical moment, it didn’t work. Fortunately a last-minute accidental covering of the board with a floppy disk solved the problem, as it turned out that enough light was leaking into those home-made optocouplers to trigger them. The prize was won not just on the strength of the arm, but on his explanation of the lessons learned along the way.

The once-ubiquitous parallel port is now absent from most computers, but there’s still plenty of scope for experimentation if you have one.

TNDLPT Brings Tandy Sound To Any DOS Computer

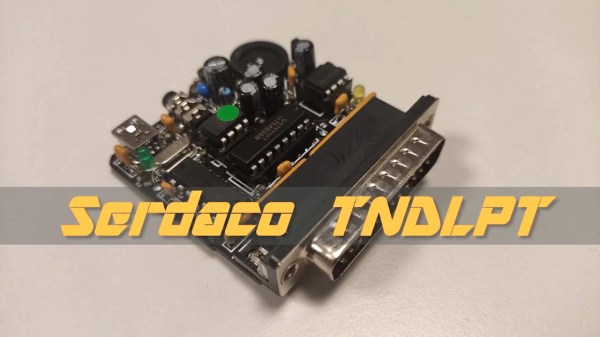
The Tandy 1000, among other contemporary computers and consoles of the 1980s, used the Texas Instruments SN76489 for its sound and musical output. This venerable sound chip can now be used on virtually any DOS machine, as long as it has a parallel port – thanks to the TNDLPT adapter!

The adapter consists of the SN76489, hooked up to the parallel port so that it can be addressed by the host computer via a DOS Terminate and Stay Resident program acting as a driver. With the TSR loaded, classic DOS games can be used with the TNDLPT sound output by simply selecting the Tandy 1000 soundcard at install. It can also be used in a variety of other ways, such as with the TNDY tracker for music creation, or the SBVGM soundtrack player.

For those eager to hear the soaring 3 voices (and one noise channel!) of the SN76489 once again, this is a great way to do it, with kits available on the Serdashop site for those wishing to solder up their own. Alternatively, get a different vibe with the OPL2 instead. Video after the break.

Continue reading “TNDLPT Brings Tandy Sound To Any DOS Computer”

Blinkenlights For Your Parallel Port

Most modern equipment is connected over USB, and generally speaking we’re all the better for it. But that’s not to say there aren’t some advantages to using serial and parallel ports. For example, the slower and less complex protocols can be a bit easier to debug when devices aren’t communicating, which [Jeremy Cook] demonstrates in his latest project.

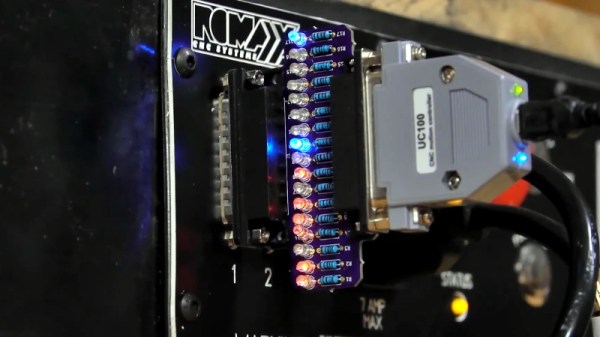
Looking to troubleshoot some communications problems he was having between his computer and CNC router, [Jeremy] came up with a handy little gadget that will allow him to visualize data passing through each pin of the parallel port in real-time. Even from across the room he can tell at a glance if communication is active, and with a keen eye, determine if he’s getting bi-directional traffic or not.

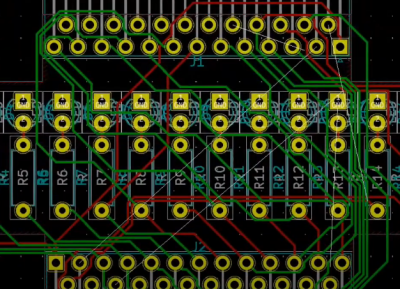
From a technical standpoint, this is a pretty simple project. The custom PCB is essentially just a pass-through, with an array of 3 mm LEDs and matching 10K resistors hanging off the data lines. But [Jeremy] found it to be an excellent excuse to brush up his KiCad skills. As he explains in the video after the break, this project certainly won’t impress the folks that do PCB design on a daily basis; but if you’re still learning the ropes, these are precisely the kind of projects you should be looking for.

Before any of you say it in the comments, we already know devices like this are available commercially for a few bucks. But that’s hardly the point. Things would be awfully slow around these parts if we disregarded any project that had a commercial alternative.

Continue reading “Blinkenlights For Your Parallel Port”

Writing Dance Bangers Like It’s 1990 Again

Dance and house music exploded in a big way at the end of the 1980s. Typically the product of well-equipped studios with samplers and mixers worth thousands of dollars, it was difficult for the home gamer to get involved. That was, until the advent of the glorious Amiga, as [cTrix] ably demonstrates.

Sampling on your Amiga often meant sneaking off with the family hi-fi.

The video explains the history of both the music and the hardware, and highlights just why the Amiga was so special. Packing stereo audio and a four-channel sound chip, it had the grunt to pump out the tunes. All it was lacking was an audio input – which is where third-party hardware stepped in. Parallel-port analog-to-digital converters hit the market in a big way, letting users sample audio on their home computer without breaking the bank.

[cTrix] then proceeds to demonstrate how one would go about producing a dance track on an Amiga way back in 1990. A home stereo is used to play records, hooked up to a Stereo Master parallel port sampler. With a bunch of drum, piano, and synth samples recorded and saved on disk, a tracker is then used to assemble the track. It’s then compared with other music from the era as a great example of how things used to be done.

Overall, the Amiga will long have a legacy as the machine that brought real multimedia capabilities to the home computer. It’s one of our favourites, though keeping them going can be tough sometimes. Video after the break.

Continue reading “Writing Dance Bangers Like It’s 1990 Again”

Converting Parallel Port CNCs To USB

If you’re looking for a small, benchtop CNC machine for PCBs and light milling the ubiquitous Sherline CNC machine is a good choice. There’s a problem with it, though: normally, the Sherline CNC controller runs off the parallel port. While some of us still have a Windows 98 battlestation sitting around, [David] doesn’t. Instead, he built a USB dongle and wrote the software to turn this mini CNC into something usable with a modern computer.

First up, the hardware. The core of this build is the rt-stepper dongle based around the PIC18F2455 microcontroller. With a bare minimum of parts, this chip converts USB into a parallel port for real-time control. It’s fast — at least as fast as the parallel port in the ancient laptops we have sitting around and plugs right into the CNC controller box for the Sherline.

The software is where this really shines. the application used to control this dongle is a hack of the EMC/LinuxCNC project written in nice, portable Python. This application generates the step pulses, but the timing is maintained by the dongle; no real-time kernel needed.

There are a lot of choices out there for a desktop CNC machine made for routing copper clad board, wood, brass, and aluminum. The Othermill is great, and Inventables X-Carve and Carvey are more than up for the task. Still, for something small and relatively cheap, the Sherline is well-regarded, and with this little dongle you can actually use it with a modern computer. Check out the demo video below.

Continue reading “Converting Parallel Port CNCs To USB”

Error: LP0 On ????

You don’t need fancy ICs and DACs to build a sound card for a PC. As [serdef]’s build over on hackaday.io shows, all you really need is a bunch of resistors. [serdef] built a clone of a sound card released for PC in the 80s, but with a few improvements. This mess of resistors features the best 8-bit sound you can get with a low-pass filter, volume divider, and a handy DB-25 connector.

The design of this LPT0 sound card is pretty much the same as when it was introduced to the world as the Covox Speech Thing. This ‘sound card’ was designed to clip onto the parallel port of a computer and send the 8-bit I/O of this port through a resistor ladder. Plug a pair of speakers into this thing, and you have a sound card that is completely made out of resistors. It was cheap, and in the demoscene it was popular.

There are a lot of amazing demos out there using this resistor DAC thing, and [serdef] has videos of his project playing a lot of them. You can check that out below.

Continue reading “Error: LP0 On ????”