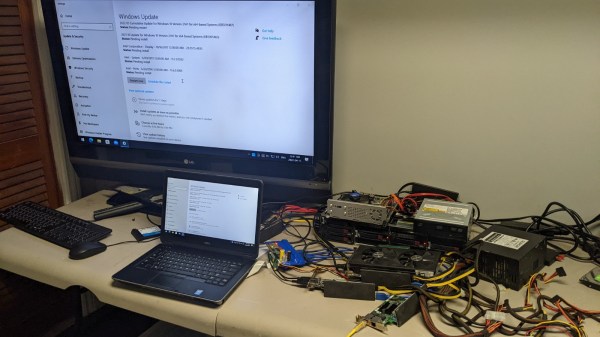
Picture of the setup described in the article, with PCI-E cards strewn around the desk, all interconnected, and a powered-up laptop, a large TV screen behind the laptop

This Laptop Gets All The PCIe Devices

Did you ever feel like your laptop’s GPU was sub-optimal, or perhaps that your laptop could use a SAS controller? [Rob Rogers] felt like that too, so now he has the only Dell Latitude business-class laptop that’s paired with an AMD RX580 GPU – and more. Made possible because of a PCIe link he hijacked from the WiFi card, he managed to get a SAS controller, a USB 3.0 expansion card, the aforementioned GPU and a dual-port server network adapter, all in a single, desk-top setup, as the video demonstrates.

First off, we see a PCIe packet switch board based on a PLX-made chip, wrapped in blue tape, splitting a single PCIe x1 link into eight. The traditional USB 3.0 cables carry the downstream x1 links to the four PCIe cards connected, all laid out on [Rob]’s desk. [Rob] demonstrates that all of the cards indeed function correctly – the SAS controller connected to a server backplane with whole 22 TB of storage in it, a few devices plugged into a USB 3.0 card, an Ethernet cable with an active link in the network card, and wrapping up the video showing 3DMark results of the RX580 clearly paired with the laptop’s mobile CPU. There’s four more spots on the PCIe switch card, so if you wanted to connect a few NVMe SSDs without the costly USB enclosures that usually entails, you absolutely could!
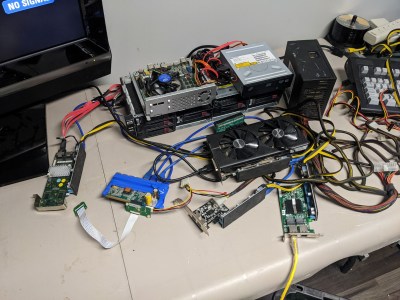
The setup on the desk, laptop-less, still interconnected and with the mini pci-e adapter visibleNow, there’s a reason why we don’t see more of such hacks. This seems to be a Latitude E5440 and the card is plugged into a mini-PCIe slot, which means the entire contraption is bound by a single PCI-E Gen2 x1 link, heavily offsetting the gains you’d get from an external GPU when, say, gaming. However, when it comes to the types and amount of peripherals, this is unbeatable – if you want to add an external GPU, high-speed networking and a SAS controller to the same computer that you usually lug around, there isn’t really a dock station you can buy for that!

Our collection of cool PCIe hacks has been growing, with hackers adding external GPUs through ExpressCard and mini PCIe alike, fitting PCIe slots where the factory refused to provide one, and extending the onboard M.2 slots for full-size PCIe cards. Nowadays, with these packet switches, it’s easy as ever to outfit any PCIe capable device with a whole slew of features – as this Raspberry Pi Computer Module motherboard with eleven PCIe slots demonstrates. Wonder how PCIe works, and why all of that is possible? We’ve written an entire article on that!

Continue reading “This Laptop Gets All The PCIe Devices”

Faster Desktop Ethernet With Server Network Adapters

As far as consumer network hardware goes, we’re all expected to be pretty happy with 802.11n WiFi and Gigabit Ethernet over Cat 6 cables. For most home users, that’s plenty of bandwidth for streaming movies and posting K-pop fancams to Twitter on a daily basis. If you want a fatter pipe, things can get expensive, fast. However, [TobleMiner] found a way to use surplus server-grade cards in a regular PC – providing huge bandwidth on a budget.

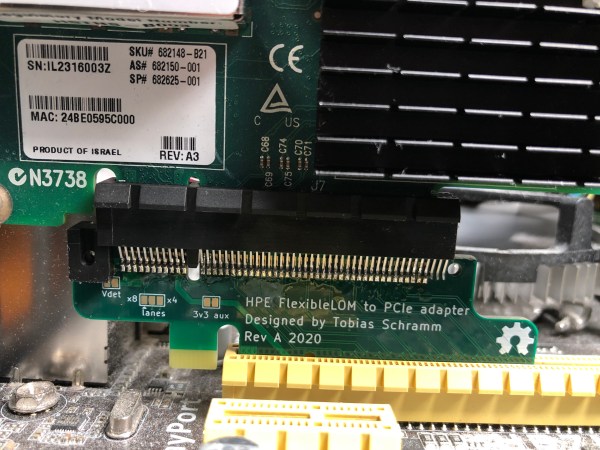
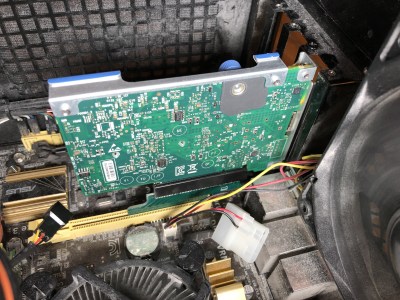
The adapter is designed to allow a FlexibleLOM card to fit into a regular ATX PCI-E card slot. A small additional bracket should be used to fix the card in place with the typical bracket retention screw.

HPE’s FlexibleLOM standard consists of a special edge connector on HPE servers that lets the end-user fit a variety of network adapters in a form factor designed specifically for blade and rack mount servers. At the electrical level, it’s simply PCI-Express 8x. FlexibleLOM network cards are built for high-speed data center use, often featuring SFP+ and QSFP+ interfaces capable of 10 gigabit and 40 gigabit speeds, respectively.

These cards can be had for under $20 on eBay, but won’t fit in a standard PCI-Express slot. Enter [ToberMiner]’s adapter, which hooks up the relevant PCI-Express lines to where they need to go, and mechanically adapts the FlexibleLOM hardware to fit in a regular ATX PC case.

It’s a great way to get server-grade network adapters in your home rig, without breaking the bank. We’ve featured other attempts at high-speed home networking before, too. If you’ve got the low down on a great way to get multi-gigabit speeds out of cheap surplus hardware, you know who to call.

[Thanks to Marco for the tip!]

How Do You Get PCI-E On The Atomic Pi? Very Carefully.

At this point, you’ve almost certainly heard about the Atomic Pi. The diminutive board that once served as the guts of a failed robot now lives on as a powerful x86 SBC available at a fire sale price. How long you’ll be able to buy them and what happens when the initial stock runs out is another story entirely, but there’s no denying that folks are already out there doing interesting things with them.

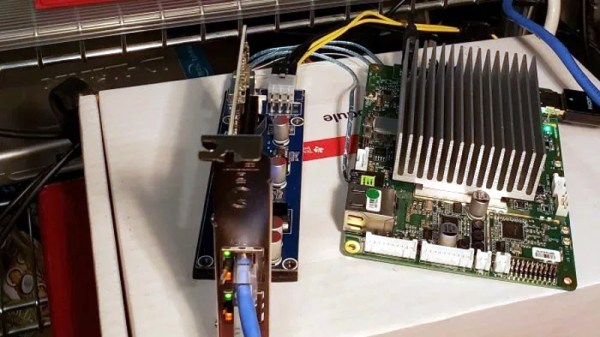
One of them is [Jason Gin], who recently completed an epic quest to add a PCI Express (PCI-E) slot to his Atomic Pi. Things didn’t exactly go according to plan and the story arguably has more lows than highs, but in the end he emerged victorious. He doesn’t necessarily recommend you try the same modification on your own Atomic Pi, but he does think this sets the stage for the development of a more refined upgrade down the line.

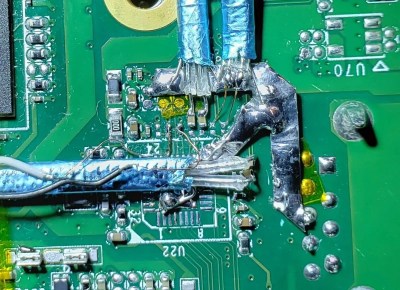
[Jason] explains that the board’s Ethernet controller was already communicating with the Intel Atom x5-Z8350 SoC over PCI-E, so there was never a question about whether or not the modification was possible. In theory, all you needed to do was disable the Ethernet controller and tack on an external PCI-E socket so you could plug in whatever you want. The trick is pulling off the extremely fine-pitch soldering such a modification required, especially considering how picky the PCI Express standard is.

In practice, it took several attempts with different types of wire before [Jason] was able to get the Atomic Pi to actually recognize something plugged into it. Along the way, he managed to destroy the Ethernet controller somehow, but that wasn’t such a great loss as he planned on disabling it anyway. The final winning combination was 40 gauge magnet wire going between the PCB and a thin SATA cable that is mechanically secured to the board with a piece of metal to keep anything from flexing.

At this point, [Jason] has tested enough external devices connected to his hacked-on port to know the modification has promise. But the way he’s gone about it is obviously a bit temperamental, and far too difficult for most people to accomplish on their own anyway. He’s thinking the way forward might be with a custom PCB that could be aligned over the Ethernet controller and soldered into place, though admits such a project is currently above his comfort level. Any readers interested in a collaboration?

Like most of you, we had high hopes for the Atomic Pi when we first heard about it. But since it became clear the board is the product of another company’s liquidation, there’s been some understandable trepidation in the community. Nobody knows for sure what the future looks like for the Atomic Pi, but that’s clearly not stopping hackers from diving in.

ROPS Will Be The Board X86 Robot Builders Are Waiting For

If your robot has outgrown a Raspberry Pi and only the raw computing power of an x86 motherboard will suffice, you are likely to encounter a problem with its interfaces. The days of ISA cards are long gone, and a modern PC is not designed to easily talk to noisy robot hardware. Accessible ports such as USB can have interfaces connected to them, but suffer from significant latency in the process.

A solution comes from ROPS, or Robot on a PCI-e Stick, a card that puts an FPGA on a blazing-fast PCI-e card that provides useful real-world interfaces such as CAN and RS485 and a pile of I/O lines as well as an IMU, barometer, and GPS. If you think you may have seen it before then you’d be right, it was one of the first-round winners of the Open Hardware Design Challenge. They’re very much still at the stage of having an FPGA dev board and working out the software so there aren’t any ROPS boards to look at yet, but this is a project that’s going somewhere, and definitely one to watch.

EEPROM Hack To Fix Autodetection Issues

Autodetection of hardware was a major part of making computers more usable for the average user. The Amiga had AutoConfig on its Zorro bus, Microsoft developed Plug And Play, and Apple used NuBus, developed by MIT. It’s something we’ve come to take for granted in the modern age, but it doesn’t always work correctly. [Evan] ran into just this problem with a video capture card that wouldn’t autodetect properly under Linux.

The video capture card consisted of four PCI capture cards with four inputs each, wired through a PCI to PCI-E bus chip for a total of sixteen inputs. Finding the cause of the problem wasn’t too difficult – the driver was detecting the card as a different model with eight inputs, instead of the sixteen inputs actually present on the card. The driver detects the device plugged in by a unique identifier reported by the card. The code on the card was identical to the code for a different model of card with different hardware, causing the issue.

As a quick test, [Evan] tried fudging the driver selection, forcing the use of a driver for a sixteen-input model. This was successful – all sixteen inputs could now be used. But it wasn’t a portable solution, and [Evan] would have to remember this hack every time the card needed to be reinstalled or moved to a different computer.

Looking further at the hardware, [Evan] discovered the card had four 24c02 EEPROM chips on board – one for each PCI card on board. Dumping the contents, they recognised the unique identifier the driver was using to determine the card’s model. It was then a simple job to change this value to one that corresponded with a sixteen-input card to enable functional autodetection by burning a new value to the EEPROM. [Evan] then published the findings to the LinuxTVWiki page. Continue reading “EEPROM Hack To Fix Autodetection Issues”

Arduino (PCI) Express

It is almost impossible these days to find a PC with old ISA card slots. Full size PCI card slots are in danger of going the same way. Many PCs today feature PCI Express connectors. PCI Express offers a lot of advantages including a small size, lower pin count, and a point-to-point serial bus topology that allows multiple simultaneous transfers between different pairs of end points. You’ll find PC Express connectors in things other than PCs too, including a lot of larger embedded systems.

If you ever wanted to prototype something on PCI Express, you’d usually turn to an FPGA. However, [moonpunchorg] posted a workable design for an Arduino on a mini PCI Express board. (As [imroy264] points out in the comments, the board is using the USB port present on the PCI-E connector.) The design files use KiCAD so it should be fairly easy to replicate or change. Naturally, there are pins on the edges to access I/O ports and power. You do need to use ISP to program the Arduino bootloader on the chip.

The board appears to a host computer as a SparkFun as a Pro Micro 3.3V board, and from there you could easily add function to a computer with a PCI Express slot using nothing more than the Arduino IDE. The board is known to work with the VIA VAB-600 Springboard and VIA VAB-820 boards, although it is likely to work with other PCI Express hosts, too.

Tiny X86 Systems With Graphics Cards

The Intel Edison is out, and that means there’s someone out there trying to get a postage-stamp sized x86 machine running all those classic mid-90s games that just won’t work with modern hardware. The Edison isn’t the only tiny single board computer with an x86 processor out there; the legends told of another, and you can connect a graphics card to this one.

This build uses the 86Duino Zero, a single board computer stuffed into an Arduino form factor with a CPU that’s just about as capable as a Pentium II or III, loaded up with 128 MB of RAM, a PCI-e bus, and USB. It’s been a while since we’ve seen the 86Duino. We first saw it way back at the beginning of 2013, and since then, barring this build, nothing else has come up.

The 86Duino Zero only has a PCI-e x1 connector, but with an x16 adapter, this tiny board can drive an old nVidia GT230. A patch to the Coreboot image and a resistor for the Reset signal to the VGA was required, but other than that, it’s not terribly difficult to run old games on something the size of an Arduino and a significantly larger graphics card.

Thanks [Rasz] for sending this one in.

Continue reading “Tiny X86 Systems With Graphics Cards”