Yamaha SW60XG Hack Lets You Use It As A Standalone MIDI Device

yamaha-sw60xg-hack

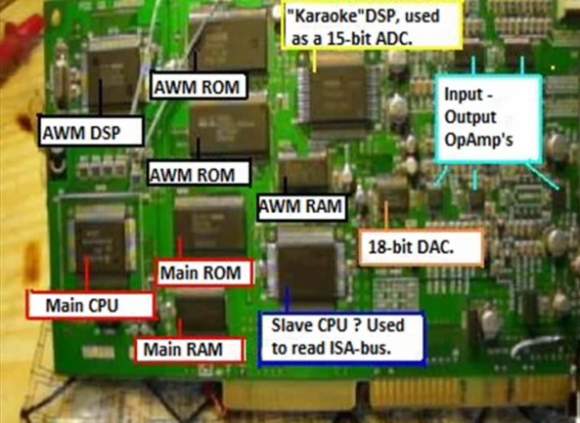
This is a Yamaha XG card, the SW60XG to be exact. It’s an audio card for a PC which extends the MIDI standard to include over six hundred instruments. By today’s standards the almost twenty year old card isn’t all that powerful, but it is interesting to see it used as a standalone device.

[Benji Kimba] posted the video overview of his project which you can watch after the break. The image above is found at about 2:35 seconds and about twenty seconds later you get a look at how he patched into the conductors on the edge connector on both sides followed by the MIDI in and out connections. Finally, we get a look at a proper schematic at the four minute mark which details the pull-up resistors, hardware reset circuit, and the optoisolator he added for the MIDI connections themselves.

Continue reading “Yamaha SW60XG Hack Lets You Use It As A Standalone MIDI Device”

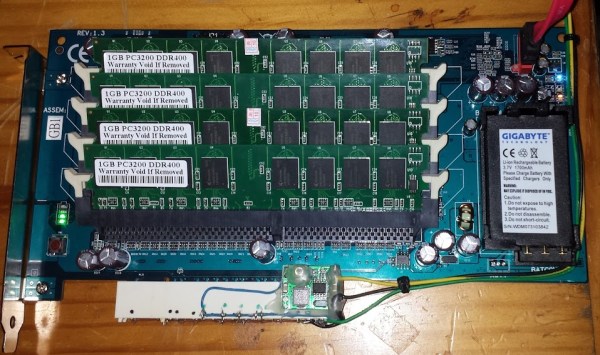
24-port GPIO On A PCI Card

btgpio

So you’ve got a project running on an x86 board and you’d like some GPIO pins. Whether you want to read a few buttons, light up a few LEDs, put an accelerometer in your computer or whatever, you’ve got a problem. Luckily there’s an easy way to get 24 GPIO pins on an x86 board using a PCI card for just a few bucks.

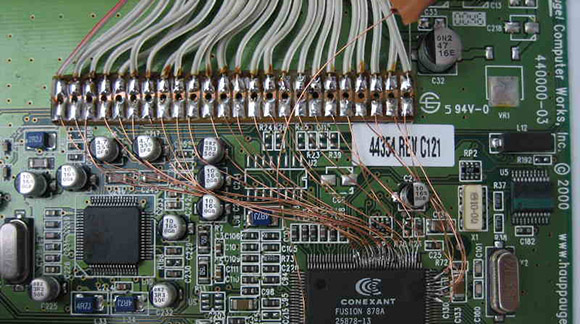
The key component of the build is a PCI TV Tuner card made by Hauppague under the WinTV brand. If you’ve got one of these cards with either a Brooktree bt848, bt849, bt878 or bt879 video capture chip, having 24 GPIO pins is just a spool of magnet wire, a soldering iron, and a steady hand away.

It’s a great build if you’d like some GPIO action without going through the usual parallel port mess, and especially useful since these WinTV capture cards can be had from the usual Internet suppliers for just a few bucks. You’ll need a driver, of course, but the relevant Linux kernel driver – bt8xxgpio – should be included any reasonably modern distro.

Special thanks to [Dex Hamilton] for notifying us of this build.

Machining Cartridge Connectors From PCI Sockets

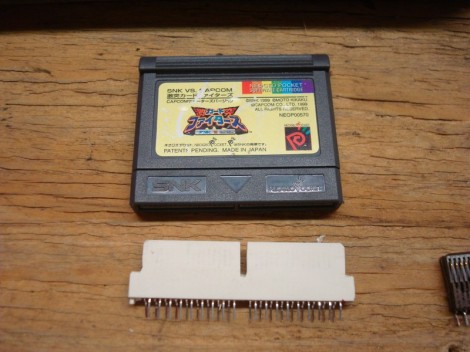
[Ed] needed a bunch of edge connectors for video game cartridges. He was unable to source parts for Neo Geo Pocket games and ended up building his own from PCI sockets. But it sounds like this technique would work with other console cartridges as well.

From the picture you can see that this is a bit more involved than just slapping a cartridge into a socket. Because there are multiple steps, and many connectors were needed, [Ed’s] dad lent a hand and built a few jigs to help with the cutting. The first step was to cut off the key and the narrow end of the socket. These NGP cartridges are one-sided, so the socket was cut in half using a board with a dado cut in it as a jig. From there the plastic bits can be cleaned up before pulling out two center pins and cutting a groove to receive the cartridge key. There are also two shoulder cuts that need to be made after trimming the piece to length. The video after the break will walk you through this whole process.

These PCI sockets are versatile. One of our other favorite hacks used them to make SOIC programming clips.

Continue reading “Machining Cartridge Connectors From PCI Sockets”

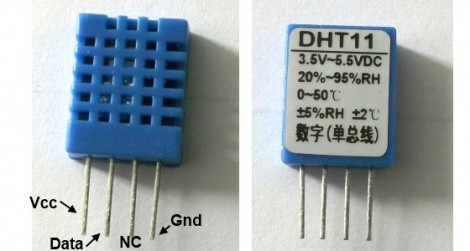
DHT11 Humidity And Temperature Sensor Package

Temperature and humidity measurements are a nice addition to many hobby projects. But [Rajendra Bhatt] makes the point that many of these sensors have a price tag that is well above what most hobbiests are willing to spend. He decided to take an in-depth look at the DHT11 sensor; which you can get your hands on for under $3 if you know where to look.

The four-pin device uses a 1-wire protocol. [Rajendra] discusses the ins and outs of the communications, demonstrating the part using a PIC 16F628. It’s a snap to connect to your project, requiring VCC, GND, and a pull-up resistor on the single data line. We’ve already seen it used on at least one project, and hope to see more of this little guy in your own hacks.

Now we found this part listed on eBay for less than $3 (buy it now price including shipping… how can they do that?). But Octopart didn’t come up with any options. If you know how to get this through traditional parts suppliers let us know in the comments.

Build Your Own SOIC Progamming Clip

[Pyra] was looking for a way to reprogram some ATtiny13 microcontrollers in a SOIC package. He’s re-engineering some consumer electronics so adding an ISP header to the design isn’t an option. He had been soldering wires to the legs of every chip but this is quite tedious. What he needs is an adapter that can make physical contact with the legs just long enough to program new firmware. After looking around he discovered that a PCI socket can be used as a progamming clip (translated). It shares the same pitch as a standard SOIC package but is not wide enough for the chip. He cut out 4 rows of the socket and the section of motherboard it was soldered to. Then he made a cut down the middle of the plastic and bent the two sections apart. The image above illustrates this, but not shown are the eight wires that he later added to connect to the device.

We wonder if this can be adapted to program SOIC parts without removing them from a circuit board. That would be a handy tool for finishing up the LED lightbulb hack.

Visual Hardware Identification Guide

hardwareguide

Check out this visual hardware guide from deviantART member [Sonic840]. It has everything from memory modules, to bus sockets, to power connectors, to an entire array of CPU sockets that have been used over the years. You’re bound to see something in there you didn’t know existed.

[via Gizmodo]