Giving The Pi 4 PCI Express

The release of the Raspberry Pi 4 brought us a new SoC, up to 4 Gigs of memory, and most importantly, got away from that janky USB to USB and Ethernet solution. The Raspberry Pi 4 has a PCI Express interface buried under some chips, and if you’re very good at soldering you can add a PCIe x1 device to the new best single board computer.

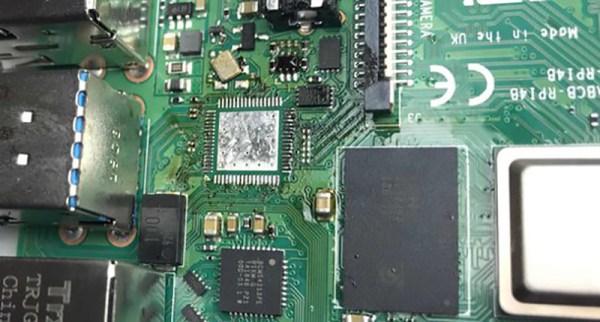
[Thomasz] took a look at the Raspberry Pi 4 and realized the new USB 3.0 chip is attached to the PCI Express interface on the SoC. That is, if you remove this chip and you have some very fine wires, you can patch in a real PCI Express slot. Removing the chip is easy enough with a hot air gun, although a few caps did get messed up. Throw that in an ultrasonic cleaner, and you have a blank canvas to work PCI magic.

This hack requires six wires, or three differential pairs, there’s a reference clock, a lane 0 transmit, and a lane zero receive. Working backwards from a PCI Express riser, [Thomasz] traced out these connections and soldered a few wires in. On the Pi side, a few capacitors were required to be compliant with the PCI Express spec, but the soldering isn’t too bad. You can do a lot with a small tip on an iron and a microscope.

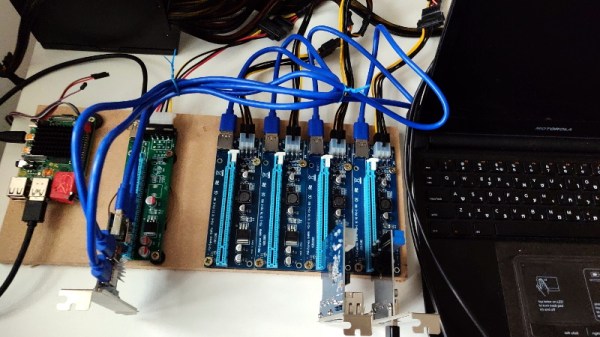
The Pi was successfully wired up to a PCI Express riser card, along with the lines for ground, 5V, link reactivation, and a power good signal. The only thing left to do was to plug in a PCI card and test. This didn’t go as well as expected, because the PCI Express adapter didn’t like being enumerated by the Raspberry Pi kernel. In subsequent experiments, an Adaptec SAS controller worked. Does this mean external graphics cards for the Pi? No, not quite; this is only one lane of PCIe, where modern graphics cards require an x16 slot for the best performance. Still, if you’ve ever wanted a SCSI card for a Pi, this is the best option yet.

Catching The (PCIe) Bus

If you are trying to learn about FPGAs, there is only so far you can go with the usual blinking lights and VGA outputs. Eventually, you want to do something more. Although not terribly cheap, you can get FPGA boards in a PCIe form-factor and use them directly with PC software. Is it easy? Well, it isn’t flashing an LED, but there are tools to help. [Angelos Kyriakos] did a Master’s thesis on the very subject and used a project known as RIFFA to help with the task.

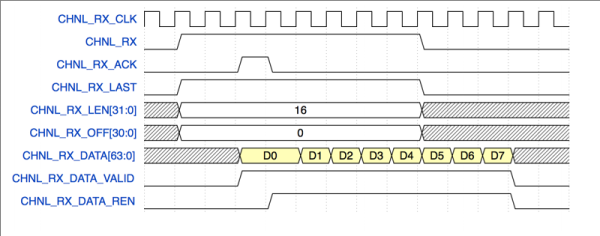
RIFFA (Reusable Integration Framework for FPGA Accelerators) is a simple framework for communicating data from a host CPU to an FPGA via a PCI Express bus. The framework requires a PCIe enabled workstation and an FPGA on a board with a PCIe connector. RIFFA supports Windows and Linux, Altera and Xilinx, with bindings for C/C++, Python, MATLAB, and Java. With proper design, RIFFA can transfer quite a bit of data in a short period of time between your computer and your FPGA.

Continue reading “Catching The (PCIe) Bus”

IPhone NVMe Chip Reversed With Custom Breakout Boards

Ever so slowly, the main storage in our computers has been moving from spinning disks, to SSDs over SATA, to Flash drives connected to a PCI something or other. The latest technology is NVMe — Non-Volitile Memory Express — a horribly named technology that puts a memory controller right on the chip. Intel has a PCI-based NVMe drive out, Samsung recently released an M.2 NVMe drive, and the iPhone 6S and 6S Plus are built around this storage technology.

New chips demand a reverse engineering session, and that’s exactly what [Ramtin Amin] did (Internet Archive). He took a few of these chips out of an iPhone, created a board that will read them, and managed to analyze the firmware.

Any reverse engineering will begin with desoldering the chip. This is easy enough, with the real trick being getting it working again outside whatever system it was removed from. For this, [Ramtin] built his own PCIe card with a ZIF socket. This socket was custom-made, but the good news is you can buy one from ITEAD. Yes, it is expensive — that’s what you get with a custom-made ZIF socket.

With the chip extracted, a custom PCIe card, and a bit of work with the NVMe implementation for Linux, [Ramtin] had just about everything working. Eventually, he was able to dump the entire file system on the chip, allowing anyone to theoretically back up the data on their iPhone or MacBook Air. Of course, and especially for the iPhone, this data is encrypted. It’s not possible to clone an iPhone using this method, but it is a remarkably deep dive into the hardware that makes our storage tick.

STM32 Driving A PCIe Video Card

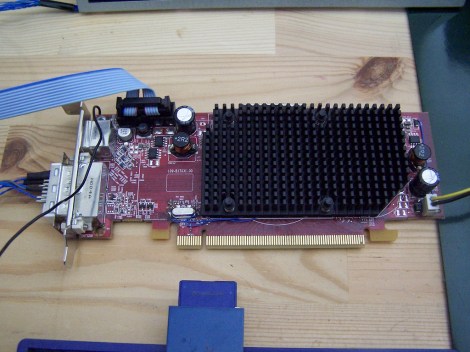
[Gpuhackr] chose his username to explain exactly how he spends his time. For instance, here he’s using an STM32 Discovery board to drive an AMD Radeon HD 2400 graphics card. The ARM microcontroller isn’t actually using the PCIe interface on the card. Instead, [Gpuhackr] has patched into the debugging interface built into the card itself. This isn’t quite as straight forward as it sounds, but if you do the wiring carefully it’s a pretty intersting way to connect an ARM to an LCD monitor.

This project would be almost impossible if it weren’t for the open source code which AMD has released. This lets him implement the card’s 3D rendering features. The demo directly programs the UVD Xtensa CPU which is on the video card. It draws a cube with color gradients on each side. The cube spins while the debug information is overlaid on the screen. In this case the ARM chip/board is really being used as a programmer to upload some custom firmware. But we think a real code-ninja could implement a communications protocol to open up a simple way to drive the card in real-time.

[Thanks uMinded]

Rebuilding A Mac SE As A Server Again

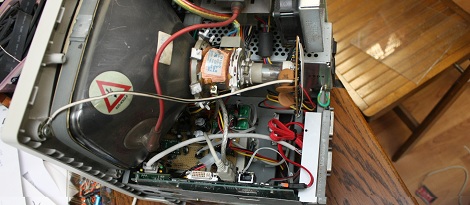
Around this time last year, [Sprite_TM] took a 1980’s-era Macintosh SE and rebuilt it as a home file server. He used a Seagate Dockstar as the new motherboard, but over the past year he’s been annoyed with the fact that the Dockstar doesn’t have real SATA ports. Using USB to SATA converters on a server is a slow way of doing things, so [Sprite_TM] rebuilt his SE using an HP thin client. To do this, he had to break out the onboard SATA and PCIE; not an easy task, but that’s why [Sprite_TM] is around.

The first order of business was installing a pair of SATA ports. The stock thin client had two NAND-flash chips serving as the drive, both connected to a SATA controller. All [Sprite_tm] had to do was desolder the flash chips and wire up the new SATA connections. Easy enough.

Because the HP thin client only had 100Mbps Ethernet, [Sprite_tm] wasn’t looking forward to the order of magnitude difference between his expected rsync speeds and what he would get with a 1Gbps connection. The only problem is the thin client didn’t have a spare PCIE connection for an Ethernet card. That’s really no problem for [Sprite_tm], though: just desolder the GPU and run a few wires.

Just like last year’s work on his SE, [Sprite_tm] ended up with a functional and very cool home server. The old-school System 7 is still there, and of course he can still play Beyond Dark Castle. Awesome work, in our humble opinion.

external_laptop_gpu

Beefing Up Your Laptop’s Gaming Chops With An External GPU

If you’re not willing to shell out for a reasonably powerful laptop it seems that there’s not a ton that can be done to boost your gaming performance. That is, unless you have an empty Express card slot and the right chipset.

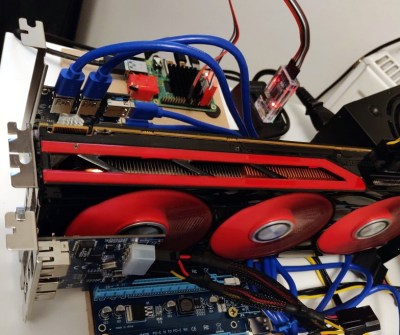
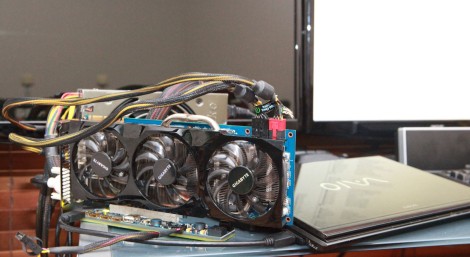
[Phatboy69] recently put together an external video card for his notebook, with fantastic results. His Vaio Z128GG had an Nvidia GT330M graphics card onboard, which is decent but nothing to write home about. Using an Express card to PCIe adapter, he added an external Nvidia GTX580 to his system, and he couldn’t be more pleased with the results. While the card does take a performance hit when connected to his laptop in this way, he claims that his graphics performance has increased ten-fold, which isn’t too shabby.

There are many variables on which this process is heavily dependent, but with the right amount of tweaking, some great laptop gaming performance can be had. That said, it really does take the portability factor of your notebook down to about zero.

If this is something you might be interested in, be sure to check out this thread over at the Notebook Review Forums – it’s where [Phatboy69] found all the information he needed to get his system up and running properly.

[Thanks, Henry]