Comparing PETG And PCTG Filaments

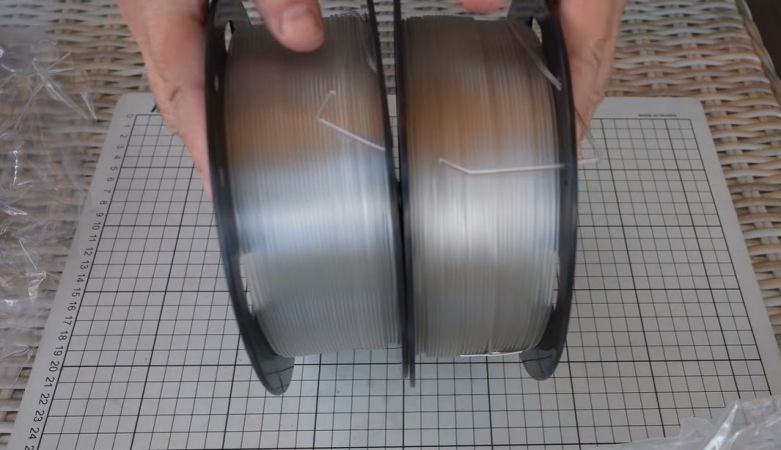
The average 3D printer owner knows a few types of filaments – PLA, ABS, somewhere in the middle, PETG.  PCTG is another option that can be confusingly similar to PETG. Recently, [Igor Gaspar] of [My Tech Fun] took a poke at both types. He obtained both PETG and PCTG transparent filaments from the same manufacturer to compare them directly.

As we recently detailed in an article on PET polyesters, PETG is glycol-modified PET, meaning that some of the glycol monomers are replaced by CHDM monomers to create a more flexible and robust material. PCTG is very similar to PETG, except that more than half of the glycol monomers are replaced rather than less than half. This creates a PET-type material that has distinct physical properties from PETG, which might be desirable for some applications.

Continue reading “Comparing PETG And PCTG Filaments”

PETG: The PLA Filament Alternative That Just Works

A typical response to the previous article on why PLA filament is so darn brittle. This has led some people to not use PLA filament at all, while others promote using PLA only for prototyping and throw-away parts, especially in light of PLA being compostable under the right conditions. For many mechanical parts, people turn to PETG.

Much like the PET polymer used for everything from food containers to drink bottles, PETG is durable, more resistant to degradation through mechanisms like hydrolysis and its filament form doesn’t need to be coddled like PLA does. PETG, on the other hand, tends to come from crude oil and shrugs at industrial composting conditions.

In terms of durability, degradation mechanisms and recyclability, is PETG the basic FDM filament which we should all just be using?

Continue reading “PETG: The PLA Filament Alternative That Just Works”

ESP32 Music Sequencer Is Clearly Nailing The Y2K Aesthetic

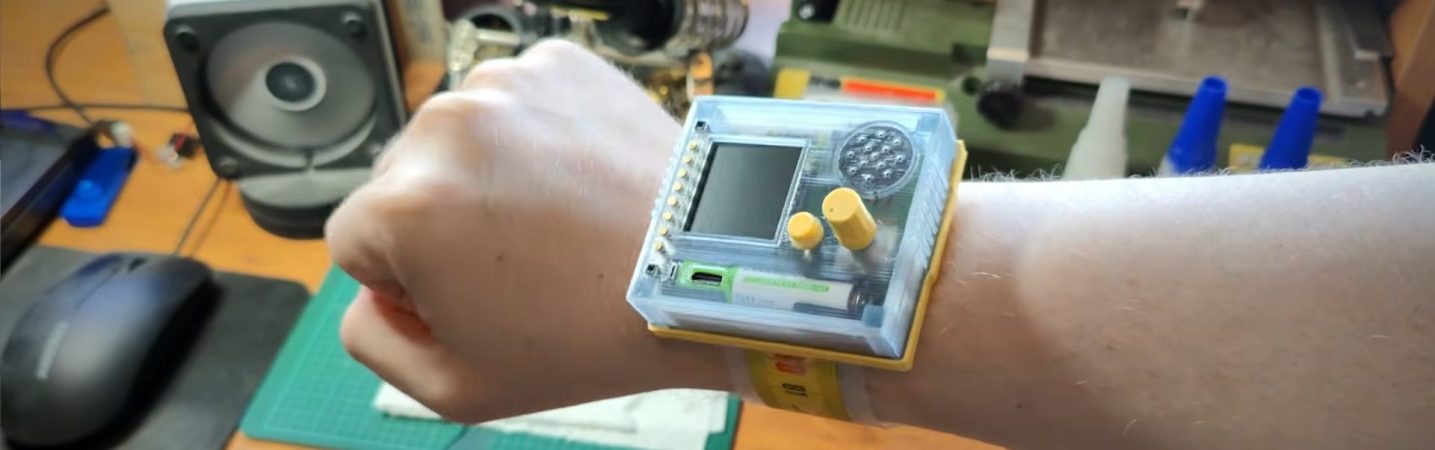
Do you remember back when electronics came in clear cases? Back around the turn of the millennium, when translucency was chic. [3DSage] sure does, which is why he went to great lengths to make a clear case for his Clear Retro Music Sequencer.

The sequencer itself is based around an ESP32-S3 module with a built-in display, and a rotary encoder that handles most of the input. Most, because there’s a second button and a stylophone-like array of brass rods on one edge of the custom PCB he made with his fiber laser that can also handle note input. Other notable features include a phono jack with built-in switching so the tunes come out automatically from headphones or the internal speaker, and a AAA battery-lookalike. It’s a small detail, but that 666 mWh 3.7 V lithium cell is the demon’s meow for this project, seeing as it gives the convenience of a modern battery without compromising that Y2K look — remember you can see the battery through the translucent case.

About that translucent case: it’s 3D printed out of PETG, with settings similar to those we’ve reported on before: hot, slow, and don’t cross the streams! Which is to say every layer must line up with the one above. Oh, use filament fresh out of the drier of you live somewhere as humid as [3DSage]. The result is not totally see-through, but an application of clear enamel fills in the surface well enough to read through, giving the vintage look [3DSage] was after. To complete that Y2K feel, he turns the device into a slap bracelet, because why not? For those of you who missed due to the aforementioned federal prison arc, slap-on wristbands were all the rage amongst the kids back in those days.

The wristband is a length of measuring tape at its core, the springy steel having been cold-worked to hold the radius of [3DSage]’s wrist in its relaxed state, encapsulated in clear gorilla tape for comfort. We probably don’t have to tell you that getting slapped with a raw tape measure isn’t the nicest. For the actual operation of the sequencer, check out the video embedded below — the first 9 minutes cover the build, while the rest shows off the product.

Of course you don’t need an ESP32 for this kind of music maker– you can do it with a C64, or even discrete parts and rope-core memory. 

Continue reading “ESP32 Music Sequencer Is Clearly Nailing The Y2K Aesthetic”

3D Printed Jack Mixes Two Filaments For Great Performance

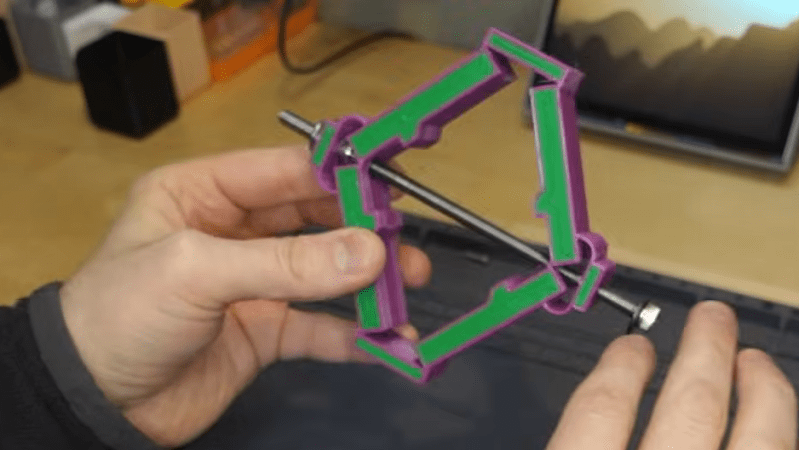
If you’re looking to jack up your car and you don’t have anything on hand, your 3D printer might not be the first tool you look towards. With that said, [Alan Reiner] had great success with a simple idea to create a surprisingly capable scissor jack with a multi-material print.

The design will look familiar if you’ve ever pulled the standard jack out of the back of your car. However, this one isn’t made fully out of steel. It relies on an M6 bolt and a rivet nut, but everything else is pure plastic. In this scissor jack design, rigid PETG arms are held in a scissor jack shape with a flexible TPU outer layer. Combined with the screw mechanism, it’s capable of delivering up to 400 pounds of force without failing. It’s an impressive figure for something made out of 80 grams of plastic. The idea came about because of [Alan’s] recent build of a RatRig VCore4 printer, which has independent dual extruders. This allowed the creation of single prints with both rigid and flexible filaments included.

[Alan] did test the jack by lifting up his vehicle, which it kind of achieved. The biggest problem was the short stroke length, which meant it could only raise the back of the car by a couple inches. Printing a larger version could make it a lot more practical for actual use… if you’re willing to trust a 3D-printed device in such use.

Files are on Printables if you wish to make your own. It’s worth paying attention to the warning upfront that [Alan] provides—”THIS CAN CREATE A LOT OF FORCE (400+ lbs!), WHICH MEANS IT CAN STORE A LOT OF ENERGY THAT MIGHT BE RELEASED SUDDENLY.  Please be cautious using 3d-printed objects for high loads and wear appropriate safety equipment!”

Funnily enough, we’ve featured 3D printed jacks before, all the way back in 2015! Video after the break.

Continue reading “3D Printed Jack Mixes Two Filaments For Great Performance”

How To Print PETG As Transparently As Possible

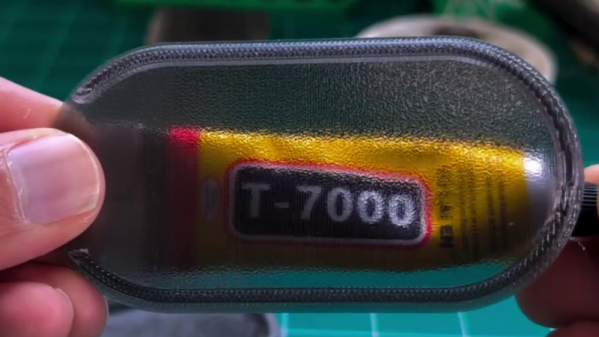
PETG filament can be had in a variety of colors, just like any other. You can even get translucent or transparent forms if you want to print something vaguely see-through. But if you’re looking for a bit more visually impressive, you might like to pick up a few tips from [Tej Grewal] on making sure your prints come out as clear as possible.

Standard print settings aren’t great for transparency.

It all comes down to pathing of the 3D printer’s hot end. If it’s zigzagging back and forth, laying down hot plastic in all different orientations from layer to layer, you’re going to get a hazy, ugly, result that probably doesn’t look very see-through at all.

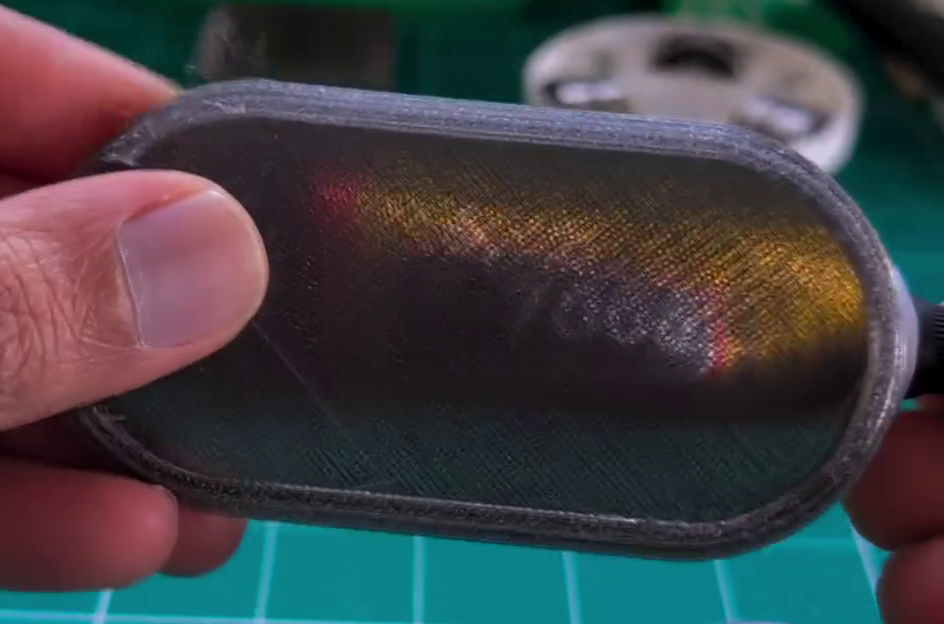
However, you can work around this by choosing slicer settings that make the tool pathing more suitable for producing a clearer part. [Tej] recommends going slow — as little as 20 mm/s during printing. He also states that removing top and bottom shells and setting wall loops to 1 can help to produce a part that’s entirely infill. Then, you’ll want to set infill to 100% and the direction to 0 or 90 degrees. This will ensure your hot end is just making long, straight strokes for layer after layer that will best allow light to pass through. You’ll also want to maximize nozzle flow to avoid any unsightly gaps or bubbles in your print.

[Tej] demonstrates the technique by creating a cover for a display. By using the settings in question, he creates a far more transparent plate, compared to the original part that has an ugly zig-zagging haze effect. You’re not going to get something optically clear this way; the final results are more lightly frosted, but still good.

Transparency will never be something 3D printers are great at. However, we have seen some interesting post-processing techniques that will blow your mind in this regard.

PLA With PETG Core Filament Put To The Test

The Stronghero 3D hybrid PLA PETG filament, with visible PETG core. (Credit: My Tech Fun, YouTube)

Sometimes you see an FDM filament pop up that makes you do a triple-take because it doesn’t seem to make a lot of sense. This is the case with a hybrid PLA/PETG filament by Stronghero 3D  that features a PETG core. This filament also intrigued [Dr. Igor Gaspar] who imported a spool from the US to have a poke at it to see why you’d want to combine these two filament materials.

According to the manufacturer, the PLA outside makes up 60% of the filament, with the rest being the PETG core. The PLA is supposed to shield the PETG from moisture, while adding more strength and weather resistance to the PLA after printing. Another interesting aspect is the multi-color look that this creates, and which [Igor]’s prints totally show. Finding the right temperatures for the bed and extruder was a challenge and took multiple tries with the Bambu Lab P1P including bed adhesion troubles.

As for the actual properties of this filament, the layer adhesion test showed it to be significantly worse than plain PLA or PETG when printed at extruder temperatures from 225 °C to 245 °C. When the shear stress is put on the material instead of the layer adhesion, the results are much better, while torque resistance is better than plain PETG. This is a pattern that repeats across impact and other tests, with PETG more brittle. Thermal deformation  temperature is, unsurprisingly, between both materials, making this filament mostly a curiosity unless its properties work much better for your use case than a non-hybrid filament.

Continue reading “PLA With PETG Core Filament Put To The Test”

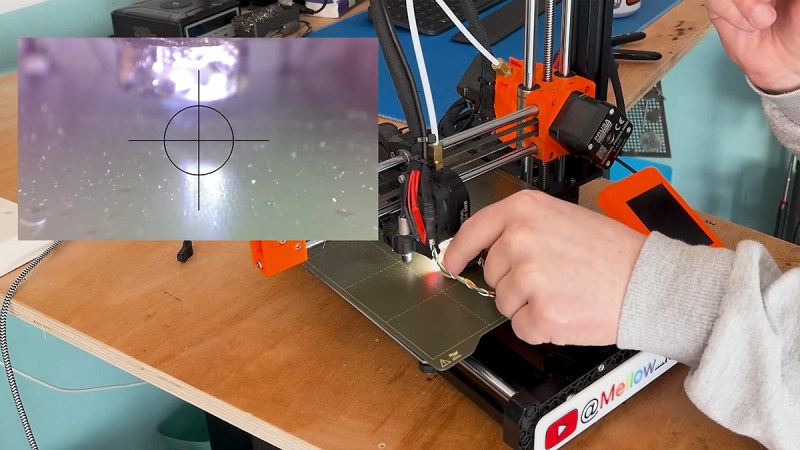
Prusa Mini with endoscope nozzle cam and pip preview

Prusa Mini Nozzle Cam On The Cheap

Let me throw in a curveball—watching your 3D print fail in real-time is so much more satisfying when you have a crisp, up-close view of the nozzle drama. That’s exactly what [Mellow Labs] delivers in his latest DIY video: transforming a generic HD endoscope camera into a purpose-built nozzle cam for the Prusa Mini. The hack blends absurd simplicity with delightful nerdy precision, and comes with a full walkthrough, a printable mount, and just enough bad advice to make it interesting. It’s a must-see for any maker who enjoys solder fumes with their spaghetti monsters.

What makes this build uniquely brilliant is the repurposing of a common USB endoscope camera—a tool normally reserved for inspecting pipes or internal combustion engines. Instead, it’s now spying on molten plastic. The camera gets ripped from its aluminium tomb, upgraded with custom-salvaged LEDs (harvested straight from a dismembered bulb), then wrapped in makeshift heat-shrink and mounted on a custom PETG bracket. [Mellow Labs] even micro-solders in a custom connector just so the camera can be detached post-print. The mount is parametric, thanks to a community contribution.

This is exactly the sort of hacking to love—clever, scrappy, informative, and full of personality. For the tinkerers among us who like their camera mounts hot and their resistor math hotter, this build is a weekend well spent.

Continue reading “Prusa Mini Nozzle Cam On The Cheap”