Retro Portable Computer Packs Printer For The Trip

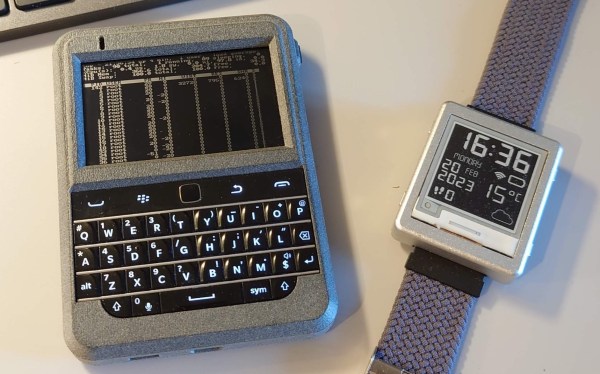
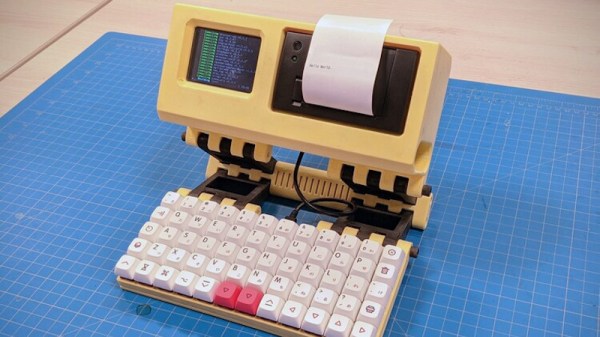
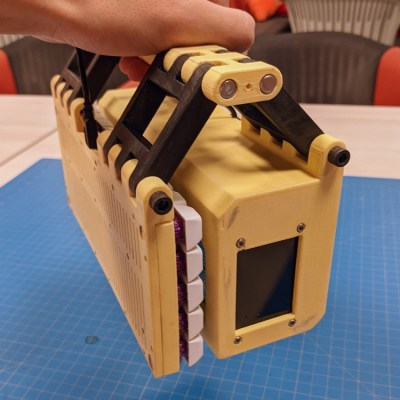
Looking like it dropped out of an alternate reality version of the 1980s, the Joopyter Personal Terminal is a 3D printed portable computer that includes everything you need for life in the retro-futuristic fastlane: a mechanical keyboard, a thermal printer, and the obligatory tiny offset screen. It’s a true mobile machine too, thanks to it’s onboard battery and a clever hinge design that lets you fold the whole thing up into something akin to a PLA handbag. You won’t want to leave home without it.

This gorgeous machine comes our way from [Gian], and while the design isn’t exactly open source, there’s enough information in the GitHub repository that you could certainly put together something similar if you were so inclined. While they might not serve as documentation in the traditional sense, we do love the faux vintage advertisements that have been included.

The upper section of the Joopyter holds a Raspberry Pi Zero W (though the new Pi Zero 2 would be a welcome drop-in upgrade), an Adafruit PiTFT 2.8″ display, a CSN-A2 panel mount thermal printer, and a Anker PowerCore 15600 battery to keep it all running. On the opposite side of the hinge is a hand wired keyboard powered by a Raspberry Pi Pico running KMK.

Speaking of that printed hinge, [Gian] says it comes on loan from [YARH.IO], which Hackaday readers may recall have produced a number of very slick 3D printed portable Linux machines powered by the Raspberry Pi over the last couple of years.

Continue reading “Retro Portable Computer Packs Printer For The Trip”

New Raspberry Pi Zero 2 Upgrades To Quad-Core Processor

Over the years, we’ve seen a steady stream of updates for the Raspberry Pi Foundation’s flagship single-board computer (SBC), with each new release representing a significant boost in processing power and capability. But the slim Raspberry Pi Zero, released all the way back in 2015, hasn’t been quite so fortunate. Beyond the “W” revision that added WiFi and Bluetooth in 2017, the specs of the diminutive board have remained unchanged since its release.

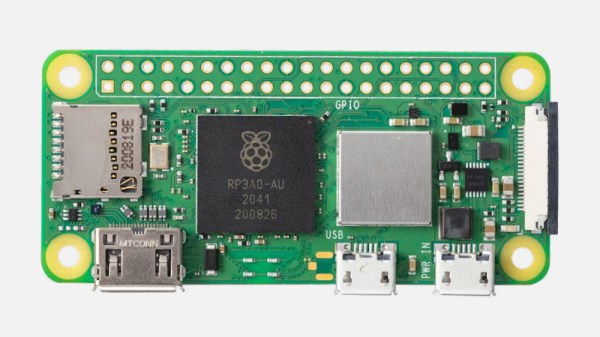
That is, until now. With the introduction of the $15 USD Raspberry Pi Zero 2 W, the ultra-compact Linux board gets a much-needed performance bump thanks to the new RP3A0 system-in-package, which combines a Broadcom BCM2710A1 die with 512 MB of LPDDR2 SDRAM and a quad-core 64-bit ARM Cortex-A53 CPU clocked at 1 GHz. In practical terms, the Raspberry Pi Foundation says the new Zero 2 is five times as fast as its predecessor with multi-threaded workloads, and offers a healthy 40% improvement in single-threaded performance. That puts it about on par with the Raspberry Pi 3, though with only half the RAM.

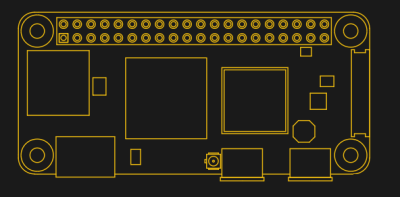
Otherwise, the new Zero 2 isn’t much different from the original. It’s the same size and shape, meaning existing cases or mounts should work fine. You’ll also find the micro SD slot, CSI camera connector, dual micro USB ports, and mini HDMI port in the same places they were in 2015.

Frankly we’re a little surprised they didn’t switch over to USB-C (at least for the power port) and micro HDMI to bring it in line with the Pi 4, but of course, they presumably didn’t want to break compatibility with existing Zero projects. At least we won’t have to wait for a second edition to add wireless, as the Zero 2 W offers 2.4 GHz 802.11 b/g/n WiFi and Bluetooth 4.2 out of the box.

We’ll have samples of the new Zero 2 W in hand shortly, so keep an eye out for a detailed overview of this highly anticipated new member of the Pi family. In the meantime, let us know what you think about the new hardware in the comments. Is it a worthy successor to the original $5 Pi Zero?

Raspberry Pi Powered Standing Desk Rises To New Heights

Like many office workers, [David Kong] found himself the lucky recipient of a motorized sit-stand desk. Also like most office workers with such a desk, he found himself mostly sitting. Reminders on his phone did little to change habits and [David] resolved to automate his desk to rise on a schedule.

the control board for a poppin sit stand desk

Taking off the front panel of the control box required a few screws and [David] was delighted to find some testing pins right on the PCB.By connecting the right pins together, he could simulate any button being pressed. A Toshiba TLP222A solid-state relay made it simple to connect the pins together, the next step was triggering the relay on some sort of timer.

Speaking of timers, the oft-lauded 555 timer was considered. However, the length of time desired wasn’t as well suited for the 555, and the appeal of just tweaking a file to adjust the interval was tempting. Going to the other end of the spectrum, [David] had a Raspberry Pi zero laying around he had been meaning to play with.

After soldering the relay to pin 17 and writing a quick 10 line python script that is executed on startup, [David] had a working solution that could be taped to the underside of the desk, out of sight. Rather than being on a fixed timer, the desk raises every 45 to 60 minutes. The impact on his life has been wonderful, which was the goal of this particular project. It’s been a few months and he hasn’t had to tweak or fix anything. Is a whole 64-bit multicore processor a bit of an overkill for toggling a pin every hour or so? Yes. But we can’t really fault him for reaching for what was already lying around. The results speak for themselves.

Perhaps this would be something you would incorporate when you’re building your own standing desk?

Bringing The Game Boy Camera Into The 21st Century

The Game Boy Camera is probably one of the most limited-specification digital cameras to have been mass-marketed, yet it occupies a special position in the hearts of many because despite being a toy with a paltry 128×128 monochrome sensor it was for many the first camera they owned. [Matt Grey] was among those people, and was always frustrated by the device’s inability to export pictures except to the Game Boy printer. So after having bodged together an interface a decade ago but not being happy with it, he returned to the project and made a wireless carrier for the camera that allows easy transfer through WiFi to his mobile phone.

Inside the slab-like 3D-printed enclosure lies a GBxCart RW Game Boy cartridge reader, whose USB port is wired to a Raspberry Pi Zero on which are a set of scripts to read the camera and make its photos available for download via a web browser. At last the camera is a stand-alone unit, allowing the easy snapping and retrieval of as many tiny black and white images as he likes. There’s a video showing the device in action, which we’ve placed for your enjoyment below the break.

This camera has appeared in so many projects on these pages over the years, but we’re guessing that the work on whose shoulders this one stands would be the moment its workings were reverse engineered.

Continue reading “Bringing The Game Boy Camera Into The 21st Century”

Installing Linux Like It’s 1989

A common example of the sheer amount of computing power available to almost anyone today is comparing a smartphone to the Apollo guidance computer. This classic computer was the first to use integrated circuits so it’s fairly obvious that most modern technology would be orders of magnitude more powerful, but we don’t need to go back to the 1960s to see this disparity. Simply going back to 1989 and getting a Compaq laptop from that era running again, while using a Raspberry Pi Zero to help it along, illustrates this point well enough.

[befinitiv] was able to get a Raspberry Pi installed inside of the original computer case, and didn’t simply connect the original keyboard and display and then call it a completed build. The original 286 processor is connected to the Pi with a serial link, so both devices can communicate with each other. Booting up the computer into DOS and running a small piece of software allows the computer into a Linux terminal emulator hosted on the Raspberry Pi. The terminal can be exited and the computer will return back to its original DOS setup. This also helps to bypass the floppy disk drive for transferring files to the 286 as well, since files can be retrieved wirelessly on the Pi and then sent to the 286.

This is quite an interesting mashup of new and old technology, and with the Pi being around two orders of magnitude more powerful than the 286 and wedged into vacant space inside the original case, [befinitiv] points out that this amalgamation of computers is “borderline useful”. It’s certainly an upgrade for the Compaq, and for others attempting to get ancient hardware on the internet, don’t forget that you can always use hardware like this to access Hackaday’s retro site.

Continue reading “Installing Linux Like It’s 1989”

Raspberry Pi Zero Takes The Wheel In Miniature Fighting Robot

Looking to capitalize on his familiarity with the Raspberry Pi, [Sebastian Zen Tatum] decided to put the diminutive Pi Zero at the heart of his “antweight” fighting robot, $hmoney. While it sounds like there were a few bumps in the road early on, the tuxedoed bot took home awards from the recent Houston Mayhem 2021 competition, proving the year of Linux on the battle bot is truly upon us.

Compared to using traditional hobby-grade RC hardware, [Sebastian] says using the Pi represented a considerable cost savings. With Python and evdev, he was able to take input from a commercial Bluetooth game controller and translate it into commands for the GPIO-connected motor controllers. For younger competitors especially, this more familiar interface can be seen as an advantage over the classic RC transmitter.

A L298N board handles the two N20 gear motors that provide locomotion, while a Tarot TL300G ESC is responsible for spinning up the brushless motor attached to the “bow tie” spinner in the front. Add in a Turnigy 500mAh 3S battery pack, and you’ve got a compact and straightforward electronics package to nestle into the robot’s 3D printed chassis.

In a Reddit thread about $hmoney, [Sebastian] goes over some of the lessons his team has learned from competing with their one pound Linux bot. An overly ambitious armor design cost them big at an event in Oklahoma, but a tweaked chassis ended up making them much more competitive.

There was also a disappointing loss that the team believes was due to somebody in the audience attempting to pair their phone with the bot’s Pi Zero during the heat of battle, knocking out controls and leaving them dead in the water. Hopefully some improved software can patch that vulnerability before their next bout, especially since everyone that reads Hackaday now knows about it…

While battles between these small-scale bots might not have the same fire and fury of the televised matches, they’re an excellent way to get the next generation of hackers and engineers excited about building their own hardware. We wish [Sebastian] and $hmoney the best of luck, and look forward to hearing more of their war stories in the future.

Looks Like A Pi Zero, Is Actually An ESP32 Development Board

ATMegaZero ESP32- S2, showing optional color-coded 40-pin header (top)

The ATMegaZero ESP32-S2 is currently being funded with a campaign on GroupGets, and it’s a microcontroller board modeled after the Raspberry Pi Zero’s form factor. That means instead of the embedded Linux system most of us know and love, it’s an ESP32-based development board with the same shape and 40-pin GPIO header as the Pi Zero. As a bonus, it has some neat features like a connector for inexpensive SSD1306 and SH1106-based OLED displays.

Being able to use existing accessories can go a long way towards easing a project’s creation, and leveraging that is one of the reasons for sharing the Pi Zero form factor. Ease of use is also one of the goals, so the boards will ship with CircuitPython (derived from MicroPython), and can also be used with the Arduino IDE.

If a microcontroller board using the Pi Zero form factor looks a bit familiar, you might be remembering the original ATMegaZero which was based on the Atmel ATMega32U4, but to get wireless communications one needed to attach a separate ESP8266 module. This newer board keeps the ATMegaZero name and footprint, but now uses the Espressif ESP32-S2 to provide all the necessary functions.

CircuitPython has been a feature in a wide variety of projects and hacks we’ve seen here at Hackaday, and it’s a fine way to make a microcontroller board easy to use right out of the box.