Hackaday Links Column Banner

Hackaday Links: April 18, 2021

More bad news from Mars this week, and this time not just from Perseverance. Last week the eagerly anticipated first flight of the helicopter Ingenuity was delayed for a couple of days after failing a full-speed spin-up test of its rotors. That appears to have been a bigger deal than initially thought, as it required a significant rewrite of the helicopter’s software. That meant testing, of course, and subsequent upload to the UAV, which at 174 million miles away takes a bit of doing. The good news is that they were able to complete the full-speed rotor test without the full program upload, so we’re one step closer to flight, which may take place as early as Monday morning.

Meanwhile, over at Elysium Planitia, the Mars InSight lander has troubles of its own. The geophysical laboratory, which has been trying to explore the inner structure of Mars since landing in 2018, entered an “emergency hibernation” state this week because of a lack of sufficient power generation. Unlike the radioisotope-powered Perseverance rover, InSight relies on a pair of solar panels for its electricity, and those panels are being obscured by Martian dust. The panels normally get blown clean by Martian winds, but things have been calm lately and the dust has really built up. If this seems like deja vu all over again, it’s probably because a planet-wide dust storm is what killed the plucky Opportunity rover back in 2018. Here’s hoping the wind picks up a little and InSight can get back to work.

Funny what crops up in one’s newsfeed, especially when one is responsible for putting out content that populates others’ newsfeeds. We recently took a look at the dangers of “zinc fever”, a flu-like illness that can crop up after inhaling gasses produced by molten zinc. That resulted in stumbling across an article from last year about mild steel welding fumes being classified as a human carcinogen. This comes from the Health and Safety Executive, a UK government agency concerned with workplace health issues. The release is an interesting read, and it suggests that mild steel fumes can cause not only lung cancer but kidney cancer. The announcement is mainly concerned with British workplaces, of course, but there are some interesting tidbits in there, such as the fact that welding fumes make dust particles so small that they can reach down into the very lowest reaches of lungs, the alveoli where gas exchange occurs. It’s enough to make one invest in PAPR or some kind of fume extractor.

For those of a certain vintage, our first computer was probably something that bore little resemblance to a PC or laptop. It was likely a single-board affair or something like a C64, and acquiring the essential bit of hardware usually left little in the budget for a proper monitor. Little 12″ B&W TVs were a dime a dozen, though, and easily — if grainily — enlisted into service as a monitor by way of an RF modulator. To recreate a little of that magic with modern hardware, Hackaday contributor Adam Zeloof came up with the PiMod Zero, an RF-modulator hat for the Raspberry Pi Zero that turns the component video into an NTSC analog signal. He’s open-sourced the design files, or there’s a CrowdSupply campaign for those who prefer to buy.

And finally, if you somehow traveled back in time to the 1940s with a laptop, how long would it have taken you to crack the Enigma code? Longer than you think, at least according to Dr. Mike Pound over at Computerphile, who released a fascinating video on how Enigma worked and what it took for Turing and the gang at Bletchley to crack the code. We knew some of the details of Enigma’s workings before seeing this video, but Mike’s explanation was really good. And, his explanation of the shortcut method he used to decode an Enigma message made the whole process clearer to us than it’s ever been. Interesting stuff.

Continue reading “Hackaday Links: April 18, 2021”

Raspberry Pi Hitches A Ride In A 1989 BMW Dashboard

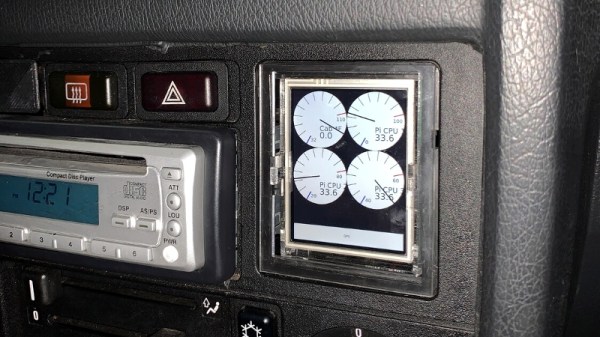
It probably won’t surprise you to find out that a 1989 BMW 325i doesn’t have much in the way of electronic gadgetry onboard. In fact, what passes for an in-dash “computer” in this vintage Beemer is just a digital clock with a rudimentary calendar function. Not content to waste his precious dashboard space any longer, [Ryan Henderson] used his time in quarantine to replace the clock module with a Raspberry Pi.

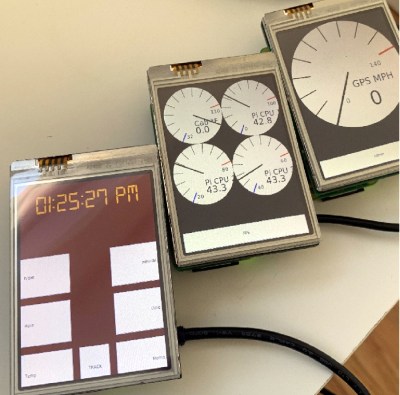
Nestled in a custom laser-cut housing is a touch screen LCD module that connects directly to the GPIO header of a Pi Zero. Combined with some Python code, this provides a very slick multipurpose interface for pretty much anything [Ryan] wants. Right now he’s got it hooked up to a GPS receiver so he can figure out things like speed and acceleration, but the only real limit on what this little drop-in upgrade can do is how much code you want to sit down and write.

Thankfully, it sounds like [Ryan] has done a lot of the hard work for you. He’s put together a Python library that allows the user to easily draw analog gauges on the screen. The faces are parametrically sized, and even have custom minimum/maximum marks. Of course if you’d rather just throw some text and images on the screen, that’s accomplished easily enough with existing libraries such as PyGame.

[Ryan] says he’s also working on some code to better integrate the Pi into the vehicle’s systems by way of a Bluetooth OBD2 adapter. In the most basic application that would allow you to throw various bits of engine data up on the screen, but on more modern cars, you could potentially tap into the CAN bus and bend it to your will.

While the physical size and shape of this particular modification is clearly focused on this model and year of BMW, the general concepts could be applied to any car on the road. [Ryan] has recently started a GitHub repository for the project and hopes to connect with others who are interested in adding a little modern complexity convenience to their classic rides.

The reality is that cars become more dependent on their onboard computers with each passing year. Already we’re seeing Tesla owners struggle with cooked flash chips, and things are likely to get worse before they get any better. While undoubtedly there are some that would rather keep their daily driver as simplistic as possible, we’re encouraged by projects like this that at least let owners computerize their cars on their own terms.

Overall view of Alta's Projects cyberdeck

Cyberdeck Running On Apple Silicon, Though An A12 Not An M1

[Alta’s Projects] built a two-in-one cyberdeck that not only contains the requisite Raspberry Pi (a zero in this case) but also eschews a dumb LCD and uses an iPad mini 5 for a display.

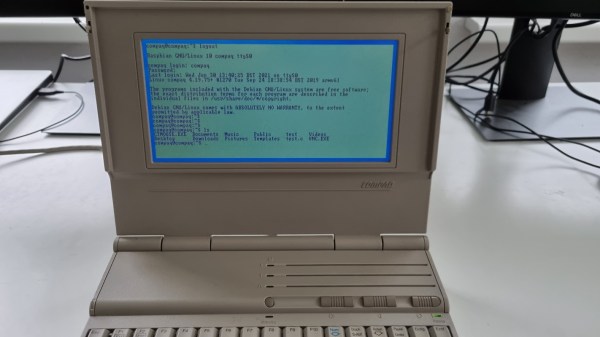
We need to address the donor case right away. Some likely see this as heresy, and while we love to see vintage equipment lovingly restored, upcycling warms our hearts and keeps mass-produced plastic out of landfills too. The 1991 AST 386SX/20 notebook in question went for $45 on an online auction and likely was never destined for a computer museum.

Why is Cupertino’s iOS anywhere near a cyberdeck? If a touch screen is better than an LCD panel, a tablet with a full OS behind it must be even better. You might even see this as the natural outgrowth of tablet cases first gaining keyboards and then trackpads. We weren’t aware that either was possible without jailbreaking, but [Alta’s Projects] simply used a lighting-to-USB dongle and a mini USB hub to connect the custom split keyboard to the iPad and splurged on an Apple Magic Trackpad for seamless and wireless multi-touch input.

Alta's Projects Cyberdeck Internal USB Wiring
Internal USB Wiring, Charging Circuit, and Pi Zero

The video build (after the break) is light on details, but a quick fun watch with a parts list in the description. It has a charming casual feel that mirrors the refreshingly improvisational approach that [Altair’s Projects] takes to the build. We appreciate the nod to this cyberdeck from [Tinfoil_Haberdashery] who’s split keyboard and offset display immediately sprang to mind for us too. The references to an imagined “dystopian future” excuse the rough finish of some of the Dremel cuts and epoxy assembly. That said, apocalypse or not, the magnets mounted at both ends of the linear slide certainly are a nice touch.

Continue reading “Cyberdeck Running On Apple Silicon, Though An A12 Not An M1”

Old Polaroid Gets A Pi And A Printer

There’s nothing like a little diversion project to clear the cobwebs — something to carry one through the summer doldrums and charge you up for the rest of the hacking year. At least that’s what we think was up with [Sam Zeloof]’s printing Polaroid retro-conversion project.

Normally occupied with the business of learning how to make semiconductors in his garage, or more recently working on his undergraduate degree in electrical engineering, [Sam], like many of us, found himself with time to spare this summer. In search of a simple, fun project that wouldn’t glaze over the eyes of people when he showed it off, he settled on a printing party camera. The guts are pretty standard fare: a Raspberry Pi and Pi cam, coupled with a thermal receipt printer for instant hardcopy. The donor camera was a Polaroid Pronto from eBay, in good shape on the outside and mostly complete on the inside. A Dremel took care of the latter, freeing up space occupied by all the plastic bits that held the film cartridge and running gear of the film handling system.

The surgery made enough room to squeeze in the Pi Zero and a LiPo battery pack, along with a buck converter. Adding in the receipt printer and its drive board and mounting the Pi cam presented some challenges, but everything fit without breaking the original look and feel of the Polaroid. The camera now produces low-res hardcopy instantly using a dithering algorithm, and store high-resolution images on an SD card for later download. As a bonus, [Sam] included a simulated time and date stamp in the lower corner of the saved images, like those that used to show up on film.

[Sam]’s camera looks like a ton of fun. We’ve seen other Polaroid conversions, including a stunning SX-70 digital upgrade, but this one shines for its simplicity and instant hardcopy.

[via Tom’s Hardware]

Autonomous Multi-Task Performing Robot

[Ruchir] has been pretty into robotics for a while now and has always been amused by the ever-popular obstacle avoiding robot, but wanted something that could do more. So, like any good hacker, he decided to build something himself.

He wanted to incorporate all the popular beginner robot capabilities into a single invention. His robot can follow a line, detect an obstacle, and retrieve an object without switching between modes. It can even follow another robot, which is pretty neat.

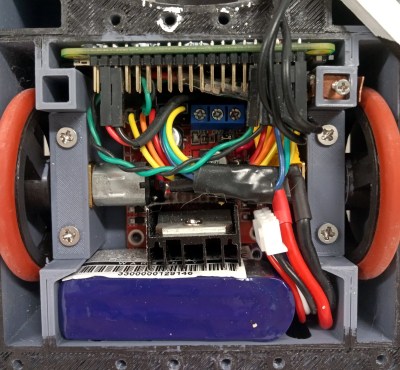
His robot has a lot of the hardware you would expect. It uses a Raspberry Pi for all the heavy image processing, has optical sensors for line following and obstacle avoidance, and includes a speaker for audio feedback. What’s especially cool is the impressive interface, called the Regbot GUI, that [Ruchir] is using with his robot. According to the Wiki page, the Regbot GUI appears to accompany an educational robotics platform developed by Professor Jens Christian Andersen of the Technical University of Denmark for teaching controls to engineering students. [Ruchir] was able to adapt the GUI to his particular bot no problem.

Using the Regbot GUI, [Ruchir] can monitor all the robot’s sensor data in real-time (accelerometer, gyroscope, distance sensor, servo, encoder, etc.), dynamically adjust its calibration settings if needed, or even provide a universal killswitch in case the unthinkable happens. We’d say it’s definitely worth a look before you embark on your next robotics project.

Continue reading “Autonomous Multi-Task Performing Robot”

The Zero Terminal 3: A Pop-Out Keyboard Linux Computer In Your Pocket

The mobile phone revolution has delivered us attractively packaged and convenient computing in our pockets, but without the easy hackability we like in our community. Meanwhile the advent of single board computers has given us affordable super-powerful hardware that can run a very capable GNU/Linux operating system and fulfill all our hackable computing needs. Combine the two though? Plenty have tried, few have succeeded in making something as slick as the former with the open power of the latter. Fine if you like your portable devices to have a cyberdeck vibe, but maybe not something you’d take into the boardrooom. Never fear though, for [N-O-D-E] have the solution, in version 3 of the Zero Terminal. It’s the ultimate in Raspberry Pi based handheld computing, and it resembles a slightly chunky mobile phone.

At its heart is a Waveshare OLED 5.5″ touch screen, on the back owhich is mounted a PCB that carries a USB hub and power circuitry. A Pi Zero is mounted directly to this, and a cleverly designed HDMI adapter board interfaces it to the display. The power board is a generic one, the one designed for the PCB proved difficult to hand solder. There’s a very smartly designed case to give it that mobile phone feel, and on the back are a set of sockets with all the relevant Pi connections. This opens the possibility of some exciting add-ons, the first of which is a sliding keyboard similar to those on early Android phones. The ‘board is based on a [Bobricius] design, though sadly isn’t quite working yet.

As you can see in the video below the break, this is about as slick a mobile Pi as it’s possible to get. [N-O-D-E], we want one. Just take our money!

Continue reading “The Zero Terminal 3: A Pop-Out Keyboard Linux Computer In Your Pocket”

Turn An Unused Pi Zero Into A Parts Bin WiFi Extender

We know a lot of you are sitting on an unused Raspberry Pi Zero W, maybe even several of them. The things are just too small and cheap not to buy in bulk when the opportunity presents itself. Unfortunately, the Zero isn’t exactly a powerhouse, and it can sometimes be tricky to find an application that really fits the hardware.

Which is why this tip from [Tejas Lotlikar] is worth taking a look at. Using the Pi Zero W, a cheap USB WiFi adapter, and some software trickery, you can put together a cheap extender for your wireless network. The Pi should even have a few cycles left over to run ad-blocking software like Pi-hole while it shuffles your packets around the tubes.

[Tejas] explains every step of the process, from putting the Raspbian image onto an SD card to convincing wpa_supplicant to put the Pi’s WiFi radio into Access Point mode. Incidentally, this means that you don’t need to be very selective about the make and model of the USB wireless adapter. Something with an external antenna is preferable since it will be able to pull in the weak source signal, but you don’t have to worry about it supporting Soft AP.

With the software configured, all you need to finish this project off is an enclosure. A custom 3D printed case large enough to hold both the Pi and the external WiFi adapter would be a nice touch.