The 3D Printed Plotter You Didn’t Know You Needed

We’ve been seeing an influx of repurposed 3D printers recently. Thrifty hackers have been leveraging cheap 3D printers as a way to bootstrap their builds, on everything from laser engravers to pick and place machines. There’s nothing wrong with that, and honestly when you can get a cheap 3D printer for less than the cost of the components separately thanks to the economies of scale, you’d be foolish not to.

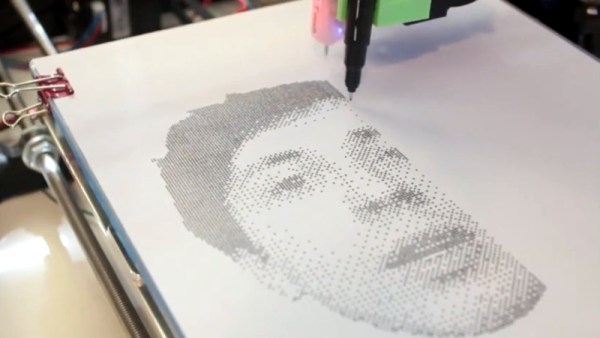
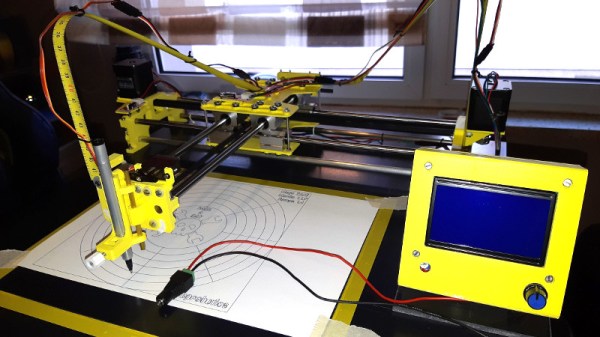
But there’s still something to be said for the classic RepRap mentality of building things using printed parts and smooth rods. Case in point, the largely 3D printed plotter that [darth vader] sent in for our viewing pleasure. This isn’t somebody sicking a pen on the extruder of their open box Monoprice special, this is a purpose built plotter and it shows. In the video after the break you can see not only how well it draws, but also how large of a work area it has compared to a modified 3D printer.

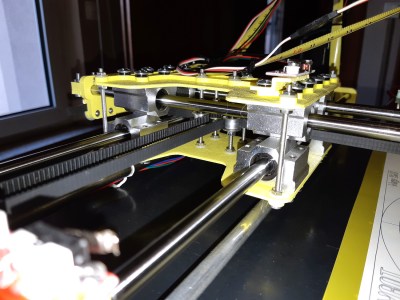
If you know your way around a 3D printer, most of it should look pretty familiar to you. Using the same GT2 belts, steppers, end stop switches, and linear bearings which are ubiquitous in 3D printers, it shouldn’t be difficult to source the parts to build your own. It even uses a Mega 2560 with RAMPS 1.4 running Marlin 1.1.9 for control.

The biggest difference is the physical layout. Since there’s no heavy hotend or extruder assembly to move around, the plotter has a cantilever design which gives it far greater reach. As it only needs to sightly lift the pen off the paper, there’s no need for a complex Z axis with leadscrews either; a simple servo mounted to the end of the arm is used to raise and lift the pen. We especially like the use of a tape measure as strain relief for his wiring, a fantastic tip that we (and many of you) fell in love with last year.

While it’s hard to beat just tossing a pen onto the business end of your desktop 3D printer in terms of convenience, we think it’s pretty clear from this build that the results don’t quite compare. If you want a real plotter, build a real plotter.

Continue reading “The 3D Printed Plotter You Didn’t Know You Needed”

Knock Your 3D Printer Down To 2D

Hackers love 3D printers. In fact, they might love them a little too much. We hope know we aren’t be the only ones who couldn’t turn down a good deal on an overseas printer (or two). But when you’re not pumping out plastic boats and other PLA dust collectors, what are you supposed to do with them?

Well if you’re like [Uri Shaked] you could hand them a pen and tell them to get writing. The holidays are coming up quick, and somebody’s gotta sign all these cards. In his detailed write-up, he shows how he was able to add a pen to his Creality CR-10 printer to turn it into a lean mean letter-writing machine without making any permanent changes to the printer.

The physical aspect of this hack is about as simple as they come: just come up with some way to hold the pen a bit below the printer’s hotend. The positioning here is a bit critical, as you don’t want to crash the nozzle into the bed while writing out a missive. [Uri] got fancy and designed a little bracket that clamps onto the CR-10 and even has a M3 screw to hold the pen in place, but you could get away with zip ties if you just want to experiment a bit.

[Uri] goes into much greater detail on the software side of things, which is good, as it does take a bit of Inkscape trickery to get the printer to perform the specific dance moves required. He goes through step by step (with screen shots) explaining how to set up Orientation Points and configure the tool parameters for optimal performance. Even if you aren’t looking to put a 3D printer to work autographing your 8x10s before the next hackerspace meet, this is an excellent guide on producing GCode with Inkscape which can be helpful for tasks such as making PCBs.

The general process here is very similar to adding a laser module to your 3D printer, but with considerably lower risk of your eyeballs doing their best Death Star impression.

Continue reading “Knock Your 3D Printer Down To 2D”

Tiny Plotter Is Made Of Strings And Cardboard

If you’ve been hanging around Hackaday for any length of time, you’ve undoubtedly seen the work of [Niklas Roy]. A prolific maker of…everything, we’ve covered his projects for over a decade now. He’s one of an elite group of hackers who can say they’ve been around since Hackaday was still using black & white pictures. Yet sometimes projects fall through the cracks.

Thanks to a tip sent in from one of our beloved readers, we’re just now seeing this incredible cardboard plotter [Niklas] made for a workshop he ran at the University of Art and Design Offenbach several years ago. The fully manual machine is controlled with two rotary dials and a switch, and it even comes with a book that allows you to “program” it by dialing in specific sequences of numbers.

Not that it detracts from the project, but its worth mentioning that the “cardboard” [Niklas] used is what is known as Finnboard, a thin construction material made of wood pulp that looks similar to balsa sheets. The material is easy to work with and much stronger than what we’d traditionally think of as cardboard. Beyond the Finnboard, the plotter uses welding rods as axles and slide rails, with glue, tape, and string holding it all together.

The dials on the control panel correspond to the X and Y axes: turning the X axis dial moves the bed forward and backward, and the Y dial moves the pen left and right. The switch above the dial lowers and raises the pen so it comes into contact with the paper below. With coordination between these three inputs, the operator can either draw “freehand” or follow the sequences listed in the “Code Book” to recreate stored drawings and messages.

Believe it or not, this isn’t the first time we’ve seen somebody made a plotter out of cardboard. Though previous entries into this specific niche did use servos to move around.

Continue reading “Tiny Plotter Is Made Of Strings And Cardboard”

Bot Makes Etch A Sketch Art In One Continuous Line

Introduced in 1960 for the princely sum of $2.99 ($25.00 today), Etch A Sketch was to become a standard issue item for the Baby Boomers’ toy box. As enchanting as the toy seems, it’s hard to see why it had staying power: it was hard for young fingers to twirl the knobs, diagonal lines and smooth curves required a concert pianist’s fine motor control, and whatever drawings we managed to make were erased at the slightest jostle of the tablet.

Intent on righting these wrongs, [Sunny Balasubramanian] not only motorized an Etch A Sketch, but he’s also given it a mind of its own in a way. For those unfamiliar with the toy, it’s basically a manual X-Y plotter that drags a stylus across the underside of a glass screen, scraping off a silver powder clinging to the glass to make dark lines. Replacing the knobs with steppers is straightforward, of course, but driving them is the trick. [Sunny] hooked his up to a Raspberry Pi and wrote some Python code to drive them. The Pi also accepts input image files and processes them for rendering through the plotter, first doing Canny edge detection in OpenCV, then plotting a single path through the largest collection of connected pixels in the image. From there it’s just a matter of spinning the motors to create surprisingly detailed images. Check out the short video below to see it in action.

It’s hardly the first automatic Etch A Sketch we’ve seen – here’s one that automates everything including the shake to erase the drawing. That one cheats a little though, in that it rasters across the screen like a CRT. We really like how this one just does a single path. Pretty clever.

Continue reading “Bot Makes Etch A Sketch Art In One Continuous Line”

A Polar Coordinate CNC Plotter Even Descartes Could Love

Take apart a few old DVD drives, stitch them together with cable ties, add a pen and paper, and you’ve got a simple CNC plotter. They’re quick and easy projects that are fun, but they do tend to be a little on the “plug and chug” side. But a CNC plotter that uses polar coordinates? That takes a little more effort.

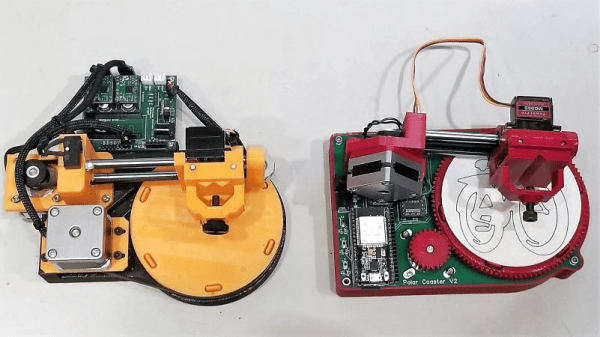
The vast majority of CNC projects, from simple two-axis plotters to big CNC routers, all tend to use Cartesian coordinate systems, where points on a plane are described by their distances from an origin point on two perpendicular axes. Everything is nice and square, measurements are straightforward, and the math is easy. [davidatfsg] decided to level up his CNC plotter a bit by choosing a polar coordinate system, with points described as a vector extending a certain distance from the origin at a specified angle. Most of the plotter is built from FischerTechnik parts, with a single linear axis intersecting the center point of a rotary drawing platform. Standard G-code is translated to polar coordinates by a Java applet before being sent to a custom Arduino controller to execute the moves. Check out the video below; it’s pretty mesmerizing to watch, and we can’t help but wonder how a polar 3D-printer would work out.

Have polar coordinates got you stumped? It can be a bit of an adjustment from Cartesian space for sure. It can be worth it, though, showing up in everything from cable plotters to POV fidget spinners and even to color space models.

Continue reading “A Polar Coordinate CNC Plotter Even Descartes Could Love”

Junk Build Printer Uses Pencil To Print

Sometimes, it is interesting to see what you can build from the bits that you have in your junk drawer. [Dr West] decided to build a printer with spare parts including a hard drive, a scanner base and an Arduino. The result is a rather cool printer that prints out the image using a pencil, tapping the image out one dot at a time. The software converts the image into an array, with 0 representing white and 1 representing black. The printer itself works a bit like an old-school CRT TV: the scanner array moves the printer along a horizontal line, then moves it vertically and along another horizontal line. It then triggers the hard drive actuator to create a mark on the paper if there is a 1 in the array at that point.

We’ve seen a few drawing printers before, but most use a plotter or CNC approach, where the motors move the pencil on an X-Y . This type of dot matrix printer (sometimes called a dotter) isn’t as efficient, but it’s a lot of fun and shows what can be achieved with  a few bits of junk and a some ingenuity.

Continue reading “Junk Build Printer Uses Pencil To Print”

Extracting A Vector Font From A Vintage Plotter

There is a huge variety of hardware out there with a font of some form or other baked into the ROM. If it’s got a display it needs a font, and invariably that font is stored as a raster. Finding these fonts is trivial – dump the ROM, render it as a bitmap, and voilà – there’s your font. However, what if you’re trying to dump the font from a vintage Apple 410 Color Plotter? It’s stored in a vector format, and your job just got a whole lot harder.

The problem with a vector font is that the letters aren’t stored as individual images, but as a series of instructions that, when parsed correctly, draw the character. This has many benefits for generating characters in all manner of different sizes, but makes the font itself much harder to find in a ROM dump. You’re looking for both the instructions that generate the characters, as well as the code used to draw them, if you want a full representation of the font.

The project begins by looking at what’s known about the plotter. The first part of any such job is always knowing where to look, of course. It’s quickly determined that the font is definitely stored in the main ROM, and that there is no other special vector drawing chip or ROMs on board. The article then steps through the search process, beginning with plaintext searches of the binary dump, before progressing to a full disassembly of the plotter firmware. After testing out various assumptions and working methodically, the vector data is found and eventually converted into a modern TrueType font.

In the end, the project is successful, and it’s a great guide on how to approach similar projects. The key is to lay out everything you know at the start, and use that to guide your search step by step, testing and discarding assumptions until you hit paydirt. We’ve seen similar works before, like this project to dump the voice from an ancient Chrysler Electronic Voice Alert.