8-pin Micro Plays Pong On Your Widescreen

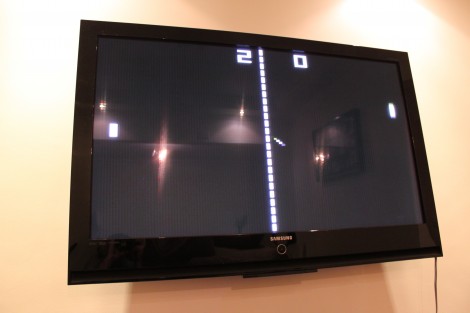
[Fernando] sent in a tangential project update that uses an ATtiny45 to play Pong on his television. Last time we looked in on his work he had just finished getting the eight-pin chip to display a big number on the TV via the VGA port. This expands on the idea while he continues to wait for parts.

Right now the chip plays against itself, but he’s got one input pin left and we’d love to see a button added for a simple one-player game. We’re thinking the paddle would always be moving in one direction or the other, with a click of the button to reverse that direction. The part that he’s waiting for is a Bluetooth module, which we’d love to see used for 2-player games via a pair of Wiimotes (we’re just wishing at this point and don’t know if that would even be possible). The end goal for the hardware is a Bluetooth connected scoreboard for Android devices.

The code is written in Assembly, and we found it relatively easy to follow what [Fernando] is doing with the game logic. On the graphics side of things he gets away with a 120×96 resolution because Pong is supposed to look pixelated. We love the result, which you can see for yourself after the break.

Continue reading “8-pin Micro Plays Pong On Your Widescreen”

A Light-Following Pong Game

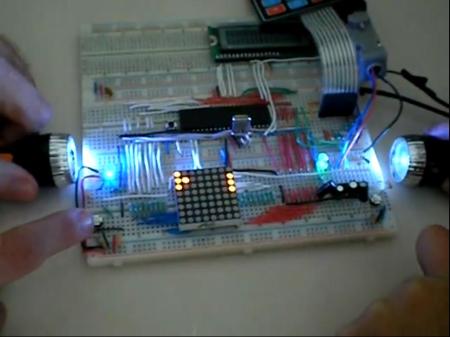
Although not everyone has the ability to make a hacked Pong game Like [Marcelo], even fewer have the ability or the creativity to come up with the elaborate hack that he did. The basic premise of his game is a version of pong played on a breadboard with a 8×8 matrix of LEDs. The controls are really what sets this hack apart. Instead of using a paddle controller or normal switches, small flashlights are used to control the on-screen (on-LED matrix) paddle. This is accomplished using a series of photoresistors and a PIC processor.

Innovative as this would be by itself, [Marcelo] decided to make a program in Flash to display the action on a computer.  Communication is done serially, and C# is used to translate everything as Flash doesn’t natively work with a serial connection.

Another innovation is that there are two LEDs connected on either side powered via pulse width modulation. The lights get dimmer as one player is about to lose. Check out [Marcelo’s] pong game after the break!

Continue reading “A Light-Following Pong Game”

VGA Pong On A ChipKIT

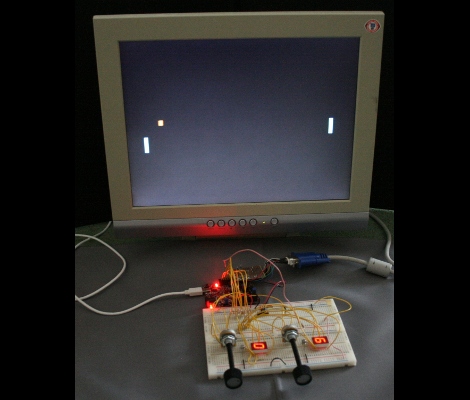
[Nathan] got his hands on a chipKIT Uno32 development board and wrote a Pong sketch that you can play with a VGA monitor. We love the hardware that makes this feel very much like the classic. It uses a collection of resistor-based digital to analog converters to generate the color signals for the VGA protocol. The score for each player is show on a 7-segment display instead of being printed on-screen. And the paddles are made up of a pair of potentiometers.

You’ll remember that the chipKIT Uno32 is an Arudino compatible 32-bit development board. This project shows how the hardware handles, and how easy it can be to generate VGA signals with it if you know what you’re doing.

For those interested in the game physics themselves, [Nathan] provided a nice explanation about ball movement at the bottom of his post. If you need even more details, dive into the code package that he links to.

Super Pong Table Doubles The Fun

super_pong

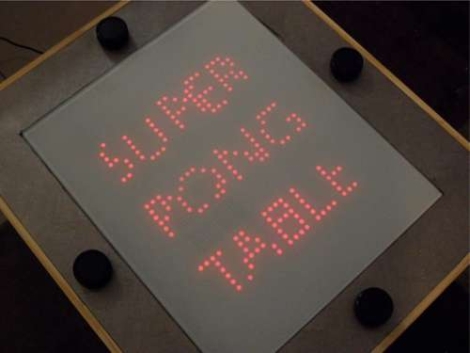
While Pong has traditionally been a game played between two individuals, Instructables user [Brad] has put together a variation that doubles the fun.  His Pong coffee table has the ability to support up to four users at once, and makes for quite the living room centerpiece.

The table is made from sheets of MDF and incorporates a grid of 900 LEDs, all controlled by a PIC18 micro controller. The MCU is installed on a control board he designed, along with the other additional bits required to drive the LED array. A set of old Atari paddle controllers were disassembled and installed around the table, making this a true retro Pong experience.

As you can see in the video, the action is pretty frantic. It’s hard to tell who is winning until the game is over, but [Brad] says that a scoreboard will come in a future revision.

4-way Pong is a really cool idea! , but it looks like there are no open source schematics or code for the control board. We’re hoping someone sees this project and puts together a version for all to use, free of charge.

We were mistaken about the status of this project in relation to whether or not it was open source. [Brad] wrote to us letting us know that his code was not originally included with the Instructable as a result of a late night omission. As always, his projects are open source, and you can now download all of the source code and schematics at the page linked above (and in the first step of the Instructable, no less). Mea culpas all around, thanks for the update, [Brad]!

Continue reading “Super Pong Table Doubles The Fun”

Pong Clocks Using LED Matrix Modules

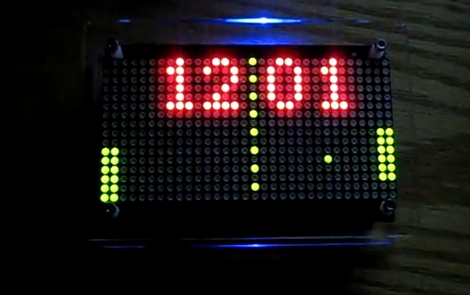
We love Pong clocks because they’re showpieces. This particular offering, called the Wise Clock, is the third hardware revision of the project. The LED display is dead simple since they’re using a 32×16 bi-color module from Sure Electronics. If you don’t want to design and build your own multiplexing display this is a somewhat inexpensive and high-performance alternative.

After the break you can see that the paddle movements look very realistic. They move like a human player might, which is quite often not the case with these clocks. If you want to see how that’s done, check out the code which was originally developed by [123led] for a different project.

Continue reading “Pong Clocks Using LED Matrix Modules”

Build A Pong Gaming Console

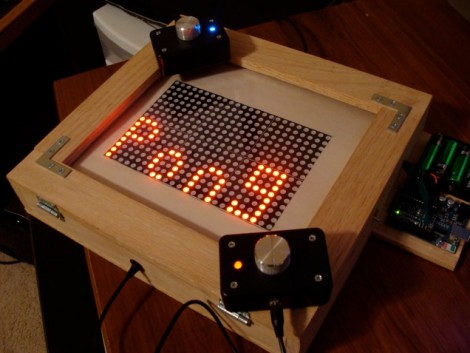
A lot of thought went into [Patrick Mccabe’s] Pong gaming console build. He used components we’re familiar with; an Arduino as a controller, 8×8 LED modules as the display, and potentiometers (with fancy knobs) in project boxes as the controllers. But every step along the way he took care to build this cleanly and robustly. Even the MAX7219CNG drivers for the six LED modules reside on PCBs from a fab house. The finished project is something you’d be proud to pull out and play when you have friends over. Even if they’re not part of the geek elite we think they’d enjoy a game or two. Great job [Patrick]. We hope to see an internalized microcontroller and scoring in your next update!

Want to do this but the cost of the matrix drivers scared you away? Follow our tutorial to build your own display using an AVR for the multiplexing.

Hackvision Is Build-your-own Retro Game

If you wanted to try your hand at programming some retro games Hackvision can jump-start the process. It is an Arduino-based game console in a controller format. You get four directional buttons and one function button. It has two RCA jacks for mono audio, and black and white video.

We’re happy to find that there’s information about game development that will help you follow along with the Space Invaders and Pong examples. The system uses the Arduino TVout library for video, which is robust and fairly easy to interact with. But once you see the game play in the video after the break it’ll be hard to resist building one of these. Don’t forget, this is Arduino based. If you already have an Arduino that uses an ATmega328 you just need to build the audio, video, and button circuits. Continue reading “Hackvision Is Build-your-own Retro Game”