Multiple Buttons And A Pot On one pin

[Kevin Fodor] shares his method of reading multiple inputs on one pin of a microcontroller. The analog to digital convert function of the microcontroller is used to read a potentiometer but with some careful calculations a resistor network can be built into the circuit that provides a unique voltage value for each button pushed. The only real drawback is that the system cannot read multiple button presses at the same time. Theoretically up to ten momentary push buttons can be used but [Kevin] estimates that only four plus the potentiometer will work reliably.

[Thanks Charper]

Two Input Devices Made With Common Items

Here’s two input devices you can easily build with materials you already have on hand.

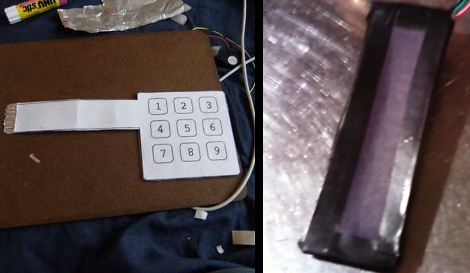
To the left, [John] built a 3×3 keypad matrix from paper and tinfoil. The rows and columns are made up of strips of tin foil on the front and back layers of paper. The layers are separated by spongy double-stick tape. A ‘keypress’ results when the gap between the conductors is compressed with your finger.

In much the same way, [Dave Fletcher] built a touch potentiometer. He made two resistance plates by scribbling pencil lead on sheets of paper. When the two plates face each other, separated by the same type of foam tape as before, they can be pressed together to form a circuit with a variable resistance. This results in a crude version of the SparkFun softpot.

ProtoDeck – MIDIBOX Based Controller

[Julien] let us know about his ProtoDeck. A MIDIBOX based controller for Ableton Live using a Big Max for live patch interface.

One thing that we have seen is less and less hacks for are MIDIbox projects. It is no wonder, considering now a days we have touch screen and multiple other interfaces and sound creation tools – MIDI almost seems like a dying art.

The ProtoDeck uses 87 pots, 90 buttons, and 81 RGB LEDs all controlled by 2 PIC 18F4620s. [Julien] says his main goals where to have lots of color and buttons. We think he succeeded.

Arduinome With Many Pots

[Aggaz] added 16 potentiometers to his Arduinome.The Arduinome is a monome clone based around the Arduino as a microprocessor. We seen some Arduinome builds in the past but [Aggaz’s] work augments the physical interface.

Potentiometers used in circuit bending allow for manipulation of the sounds coming out of the circuits. In this case the pots are connected to the microcontroller instead of the sound generation circuitry which means you can do whatever you want with them depending on how creative you are with the code. So far he’s just starting to get the new set of interfaces to play nicely over the serial connection. This could end up being quite popular as it only requires the addition of a multiplexer IC, the potentiometers, and the knobs.

DIY Mood Lamp Looks Store-bought

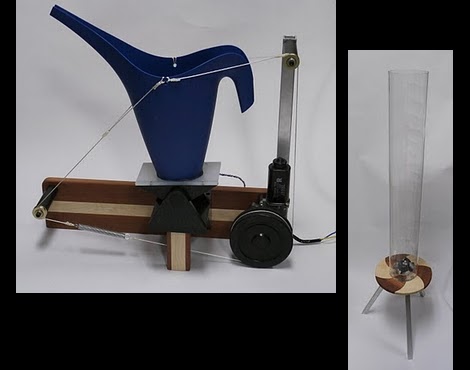
[NeZoomie] built an RGB mood lamp as his first electronics project. He certainly hit it out of the park with this one, ending up with a design so clean it could be a commercial product. The controller is an Arduino board (further proof that this is a fantastic entry-level platform) that interfaces with 8 RGB LEDs. He’s built an enclosure out of thick polypropylene that does a great job of diffusing the light and adding a stylish look. The control system features a rotary potentiometer from SparkFun and what he calls a tilt-potentiometer of his own design after drawing inspiration from Hack a Day.

Blinky things are fun and that’s why we see a lot of mood lamps around here. Take a look at the video after the break and if you’ve got the parts, give this one a try!

Continue reading “DIY Mood Lamp Looks Store-bought”

Push Potentiometer From Spares

ppot

In an effort to simplify his interface, [danwagoner] cobbled together this push potentiometer. It utilizes a potentiometer mounted directly above a push button with a spring mounted around it. This way the user has only one item to deal with. They can twist the knob and press down on it to push the button.  We love seeing people come up with ways of creating their own items instead of buying something. This was fairly inventive and reminds us of the LED buttons we saw back in January. Great job [danwagoner].

Humanoid Robot + Homebrew Waldo = Big Smiles

[youtube=http://www.youtube.com/watch?v=WCTvggKuPvU&feature=player_embedded]

Robot enthusiast [Vitalijus Rodnovas] built this rig to allow a humanoid robot to mimic his own body movements in real time. [Rodonovas] refers to his man-machine interface as a “master-slave suit,” but elsewhere this is often called a waldo after a prescient 1942 [Robert Heinlein] novella. This project page is slight on details and is mostly written in his native Lithuanian, but the pictures speak volumes, and with a little help from Google Translate we can learn the essential facts: The robot itself is a commercially-available kit, the Kondo KHR-1HV from Japan. The custom-built harness uses a collection of surplus Soviet-era military potentiometers (acquired on eBay) to read the positions of his elbows and shoulders, then an ATmega8-based interface board translates these readings into motion commands sent to the robot’s onboard controller. Some additional notes and code can be found on the RoboSavvy Forum.

Does it work? Just watch. His grin as the video progresses is infectious!

Hack a Day has previously covered other Waldos, but this latest deserves style points for its lightweight simplicity.