Repairs You Can Print: Fixing A Rat-Attacked Mic Cord

We’ve all been there — a steamy night in the rainforest of Papua New Guinea, sweaty slumber disturbed by the unmistakable sounds of gnawing. In the morning we discover that a rodent of unusual tastes has chewed the microphone cable of our transceiver right half in two, leaving us out of touch with base camp. If we had a nickel for every time that’s happened.

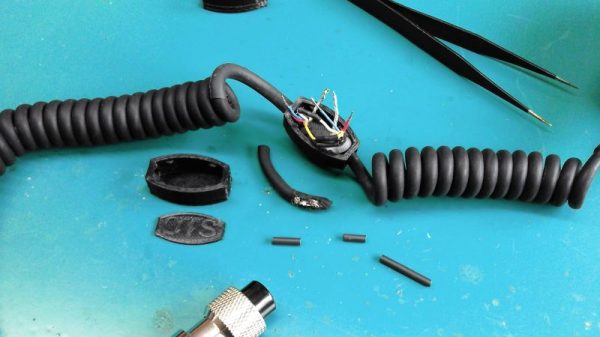
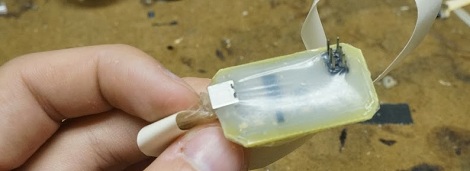
It may sound improbable, but that’s the backstory behind [Marius Taciuc]’s 3D-printed mic cord repair. Even with more mundane failure modes, the retractile cords on microphones are notoriously difficult to fix. Pretty much any of the usual suspects, like heat-shrink tubing or electrical tape, are going to do very little to restore the mechanical stability lost once that tough outer jacket is breached. [Marius]’s solution was to print as small an enclosure as possible to mechanically support the splice. The fit is tight, but there was just enough room to solder the wires and stuff everything back in place. Cable ties provide strain relief where the cord exits the splice, and a liberal squirt of hot glue pots the joint. It’s not perfect — we’ll bet the splice acts as a catch point and gets a little annoying after a while — but if it gets you back on the air fast and cheap, it probably makes sense.

[Marius] entered this rat-race beating hack into the Repairs You Can Print contest. Do you have an epic repair that was made possible by a 3D printer? Let the world know about it and you might just win a prize.

Continue reading “Repairs You Can Print: Fixing A Rat-Attacked Mic Cord”

Exploring Options For DIY Waterproofing

TL;DR — Don’t use silicone to pot electronics.

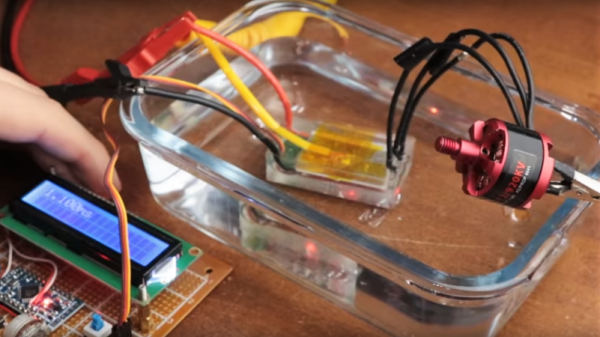
That’s the conclusion [GreatScott!] comes to after trying out several methods for waterproofing electronics. His efforts stem from a recent video in which he discovered that water and electricity sometimes actually do mix, as long as the water is distilled and the electronics in the drink are relatively simple. He found that the main problem was, unsurprisingly, electrolytic corrosion, so he set out to experiment with various waterproofing coatings. In a series of careful experiments he goes through the pros and cons of both conformal coatings and potting compounds. The conformal tests used simple clear nail polish on an ESC board; that worked pretty well, but it was a little hard to reach all the nooks and crannies. He also tried potting with a thick black silicone compound, but that ended up never really curing in the middle. A final attempt with legitimate two-part epoxy potting compound sealed up the ESC tight, although we doubt the resulting brick would perform well on a quadcopter.

If you want to explore potting a bit further, check out this introduction to the basics.

Continue reading “Exploring Options For DIY Waterproofing”

Conductive Concrete Confounds Circuitry

There’s a fairly good chance you’ve never tried to embed electronics into a chunk of concrete. Truth be told, before this one arrived to us via the tip line, the thought had never even occurred to us. After all, the conditions electronic components would have to endure during the pouring and curing process sound like a perfect storm of terrible: wet, alkaline, and with a bunch of pulverized minerals thrown in for good measure.

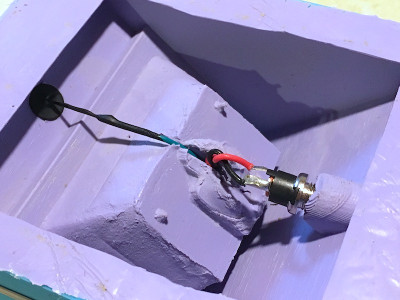
But as it turns out, the biggest issue with embedding electronics into concrete is something that most people aren’t even aware of: concrete is conductive. Not very conductive, mind you, but enough to cause problems. This is exactly where [Adam Kumpf] of Makefast Workshop found himself while working on a concrete enclosure for a color-changing barometer called LightNudge.

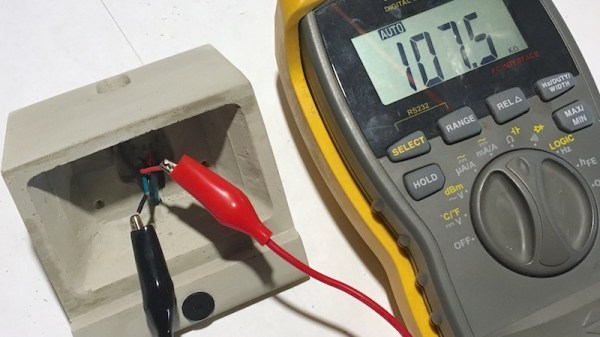
While putting a printed circuit board in the concrete was clearly not workable, [Adam] was hoping to simplify manufacturing of the device by embedding the DC power jack and capacitive touch sensor into the concrete itself. Unfortunately, [Adam] found that there was a resistance of about 200k Ohm between the touch sensor and the power jack; more than enough to mess with the sensitive measurements required for the touch sensor to function.

Even worse, the resistance of the concrete was found to change over time as the curing process continued, which can stretch out for weeks. With no reliable way to calibrate out the concrete’s internal conductivity, [Adam] needed a way to isolate his electronic components from the concrete itself.

Through trial and error, [Adam] eventually found a cheap method: dipping his sensor pad and wire into an acrylic enamel coating from the hardware store. It takes 24 hours to fully cure, and two coats to be sure no metal is exposed, but at least it’s an easy fix.

While the tip about concrete’s latent conductivity is interesting enough on its own, [Adam] also gives plenty of information about casting concrete parts which may be a useful bit of knowledge to store away for later. We have to admit, the final result is certainly much slicker than we would have expected.

This is the first one we’ve come across that’s embedded in concrete, but we’ve got no shortage of other capacitive touch projects if you’d like to get inspired.

A Short Introduction To Staking And Potting

Staking and potting are not often used in the hobby electronics world, not really entering to the common vernacular. However, everyone who’s ever busted out a glue-gun to convince that dang wire that keeps coming loose to stay has done it.

However, as [Sean Thomas] touches on, staking is not necessarily as easy as a dob of hot glue. There is a method to the madness. [Sean] gives some examples in pictures, but also directs people to the excellent NASA standard methods for staking. It’s surprising how many unintuitive caveats there are to the proper technique.

Potting, or covering everything in epoxy forever, is a great way to get a waterproof, unserviceable, and practically mechanically invincible circuit. The big challenge in potting is picking the right material. A soft silicone, for example, might transfer an unexpected force to an unexpected section of the circuit and cause a mechanical failure. A nice hard epoxy may be too insulating and cause a thermal failure. The standard RTV from the big box store has acetic acid that will eat your components.

These two techniques that come in handy when you need them and worth the bit of reading it takes to get familiar. Have you used either in your own workshop? Let us know the application and the material/techniques you have tried in the comments below.

Tint Your Epoxy Resin With Toner Powder

Epoxy resin is useful stuff. Whether for gluing stuff together or potting components, epoxy is a cheap and versatile polymer that finds its way into many hackish projects. But let’s face it – the stock color of most commercially available epoxies lacks a certain pizzazz. Luckily, [Rupert Hirst] at Tallman Labs shows us that epoxy is easily tinted with toner powder from a laser printer or copier.

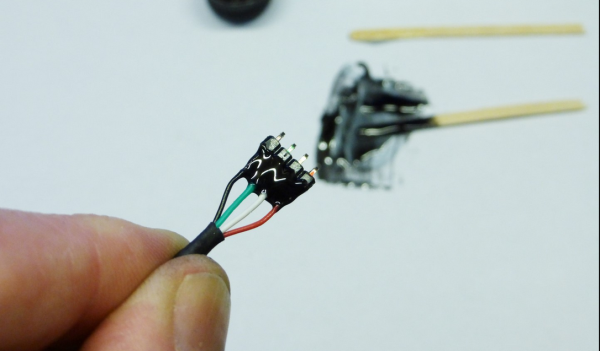
Looking for a way to make his epoxy blend into a glue-up, [Rupert] also demonstrates that colored epoxy makes a professional looking potting compound. There’s just something about the silky, liquid look of a blob of cured black epoxy. [Rupert] harvested his toner powder from a depleted printer cartridge; only a smidgen is needed, so you should be able to recover plenty before recycling the cartridge. We’ve got to admit that seeing toner handled without gloves gives us the willies, though. And don’t forget that you can find cyan, magenta and yellow cartridges too if basic black isn’t your thing.

Sometimes it’s better to leave your epoxy somewhat clear, like when you’re potting an LED matrix for a pendant. But this neat trick might just spiff up your next project a bit.

[Thanks, Jake]

Potting Electronics With Silicone

If you want to improve the reliability of your electronics, just cover them in silicone or epoxy. Potting, as this technique is called, protects your project from impact and loose wires, but most of the time ends up as a gloppy mess. [Charles] figured out an awesome way to make pro-looking potted electronics using silicone and a few supplies from the emergency room.

On one of [Charles]’s trips to the ER, a nurse put Tegaderm on a wound and he noticed his skin could breathe. Figuring Tegaderm would also allow silicone to breathe, he asked for a sample and went back to the lab. After putting a few globs of silicone on a PCB, [Charles] wrapped the whole thing in Tegaderm. Much to his surprise, the silicone cured and made a smooth, glossy protective covering on his board.

[Charles] put up a Picassa album of his Tegaderm/silicone potted electronics, and we’ve got to say they’re looking very professional. This technique could also be applied to [Charles]’ glass PCB touch sensor, allowing for the creation of clear (or at least tranlucent) PCBs.

After the break, you can check out [Charles] potting his ATtinyISP board in silicone with Tegaderm. One word of warning, though: don’t use a silicone that uses acetic acid to cure – that’s a death sentence to electronics. Luckily, there’s an easy test to see if your particular brand of silicone produces acetic acid while curing. Just squeeze a bit of silicone on a piece of scrap, and if it smells like vinegar after a while, don’t use it.

Continue reading “Potting Electronics With Silicone”