Tint Your Epoxy Resin With Toner Powder

Epoxy resin is useful stuff. Whether for gluing stuff together or potting components, epoxy is a cheap and versatile polymer that finds its way into many hackish projects. But let’s face it – the stock color of most commercially available epoxies lacks a certain pizzazz. Luckily, [Rupert Hirst] at Tallman Labs shows us that epoxy is easily tinted with toner powder from a laser printer or copier.

Looking for a way to make his epoxy blend into a glue-up, [Rupert] also demonstrates that colored epoxy makes a professional looking potting compound. There’s just something about the silky, liquid look of a blob of cured black epoxy. [Rupert] harvested his toner powder from a depleted printer cartridge; only a smidgen is needed, so you should be able to recover plenty before recycling the cartridge. We’ve got to admit that seeing toner handled without gloves gives us the willies, though. And don’t forget that you can find cyan, magenta and yellow cartridges too if basic black isn’t your thing.

Sometimes it’s better to leave your epoxy somewhat clear, like when you’re potting an LED matrix for a pendant. But this neat trick might just spiff up your next project a bit.

[Thanks, Jake]

Perfect PCBs With An Inkjet Printer

Instead of mucking about fabbing PCBs with the toner transfer method, or making masks for photosensitive boards, the holy grail of at-home circuit board manufacturing is a direct inkjet-to-etch method. [Don] isn’t quite there yet, but his method of producing circuit boards at home is one of the easiest we’ve ever seen.

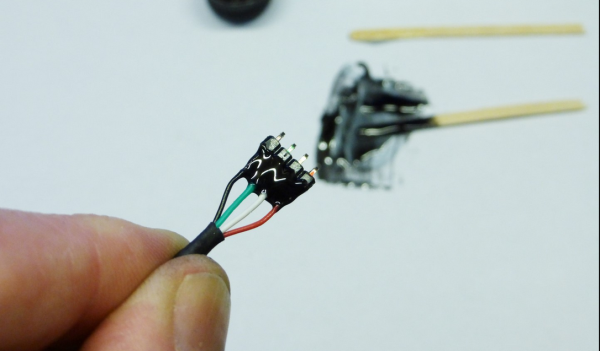
[Don]’s boards begin by taking the output from Eagle and printing them with an Epson Artisan 50 inkjet printer. By sticking a piece of cardstock in the printer before the copper board, he’s able to precisely align the traces and pads onto the copper board.

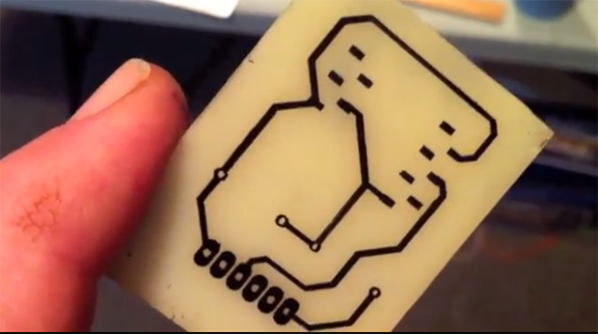
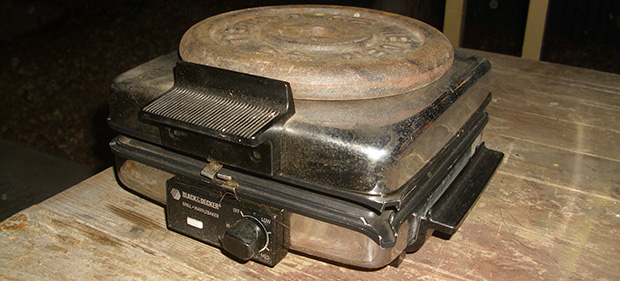
When the board comes out of the printer, it’s only covered in ink. While some specialty inks are enough of an etch resist, [Don] comes up with a clever way to make sure acid doesn’t eat away copper in the needed places – he simply dusts on toner from a copier or laser printer, blows off the excess, and bakes the entire board in a toaster oven.

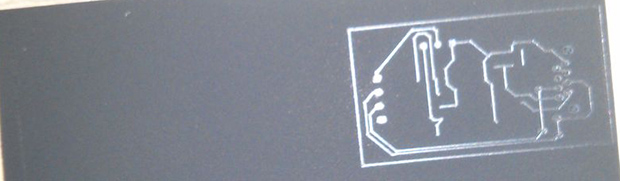
The result, seen above, are perfect traces on a circuit board without the need for ironing sheets of photo paper onto copper boards.

As far as the, “why didn’t someone think of this sooner” ideas go, this one is at the top. [Don] says the method should work  on sheets of aluminum for printing solder paste masks. Impressive work, and now the only thing left to do is getting two-layer boards down pat. For more direct to copper printing check out the hacks we’ve covered in years past.

Continue reading “Perfect PCBs With An Inkjet Printer”

PCBs With Powder Coat

pcb

The toner transfer method of PCB production should be a staple in every maker’s bag of tricks. That being said, it’s a far from ideal solution with a lot of things that can go wrong, ruining hours of work. [Ryan] thinks he has a better solution up his sleeve, still using heat activated toner, but replacing the laser printer with a powder coating gun and a laser engraver.

[Ryan] is using a powder coating gun he picked up from Amazon for about $100. The theory behind it is simple: particles of toner coming out of the gun are statically charged, and bonded to the grounded copper clad board. In real powder coat shops, this coating is baked, resulting in a perfectly hard, mirror-like finish. [Ryan] skipped the baking step and instead through the powder coated board into a laser engraver where the PCB design is melted onto the copper. After that, wash the board off, etch it, and Bob’s your uncle.

What’s really interesting about this method of PCB production is that it doesn’t require a very high power laser. [Ryan] was actually having a problem with the toner burning with his laser engraver, so it might be possible to fab PCBs with a high power handheld laser, or even a Blu Ray laser diode.

Making PCBs And Waffles

waffle

The toner transfer method of fabricating PCBs is a staple in every maker’s toolbox. Usually, tutorials for this method of making PCBs rely on a clothes iron or laminating machine. They work perfectly well, but with both of these methods (sans high-end laminators), you’re only heating one side of the board at a time, making perfect double-sided PCBs somewhat of a challenge.

[Mark] just came up with an interesting solution to this problem. A waffle iron PCB press. Technically, [Mark] is using his ‘grill and waffle baker’ as a two-sided griddle, with a few aluminum plates sandwiching the copper board for good thermal conduction.

After a whole lot of trial and error, [Mark] eventually got a good transfer onto a piece of copper clad board. Now that he has the process dialed in, it should be a snap to replicate his results with a new project and a new PCB design.

Direct To PCB Inkjet Printing

[Rhys Goodwin] has been working on a system to print resist onto copper clad using an inkjet printer. This is a toner transfer alternative as it still uses toner, just not quite as you’d expect. The first step is to modify an inkjet printer, separating the carriage from the feed rollers in order to increase the clearance for the substrate. Instead of printing with etch resistant ink, as we’ve seen before, [Rhys] prints with black ink and then covers the board (ink still wet) in laser toner. Once there’s good adhesion he blows off the excess and bakes the board in a sandwich press, with spacers to keep the iron from touching the surface of the copper clad. This cooks the resist into a hard plastic layer and the board is ready for the acid. Watch him walk you through the process after the break.

[Rhys] uses the same method for silk screen, printing in red and baking the ink onto the substrate without added toner. This produces a nice looking board but it’s still quite a bit of work. It certainly sheds more light on the process than that laser-printer method from back in May. We hope you’ve been inspired by this and come up with the next innovation that makes this process easier.

Continue reading “Direct To PCB Inkjet Printing”

DIY Circuit Etching Video Tutorial

toner-paper

Circuit-bending blog GetLoFi has posted the best tutorial yet on home-made printed circuit boards using the toner transfer method.

We’ve covered homebrew PCB fabrication techniques about a billion times before. What sets this tutorial apart is that it collects many bits of knowledge otherwise scattered all about the web, and then depicts the entire process on video, from initial printing to cut PCB…because reading about it versus seeing it done are two different things entirely. They give a number of immensely useful tips throughout: choice of materials and where to get them, tools and techniques, and dispelling several myths about these methods (for example, they’re adamant about not using acetone to clean toner from the PCB). Well worth the 30 minutes to watch. If that’s too much and you’ve been stuck on just one part of the process, the tutorial is in three segments.

Trimming finished boards on a paper cutter? Who would’ve guessed?

[via Make]

PCB Toner Transfer With Dowel

Pulsar Professional FX has a neat tip on their site for getting a really even toner transfer when making your own PCBs. First, the PCB is cut to size, and the paper is tacked to the board. Then, the PCB is placed paper up onto a dowel and rolled back and forth with the iron. Since the board bends slightly over the dowel the toner sticks evenly to the copper. After that, just remove the paper as usual and etch with your preferred method.