Zine Printing Tips From A Solopreneur

Zines (self-produced, small-circulation publications) are extremely DIY, and therefore punk- and hacker-adjacent by nature. While they can be made with nothing more than a home printer or photocopier, some might benefit from professional production while losing none of their core appeal. However, the professional print world has a few gotchas, and in true hacker spirit [Mabel Wynne] shares things she learned the hard way when printing her solo art zine.

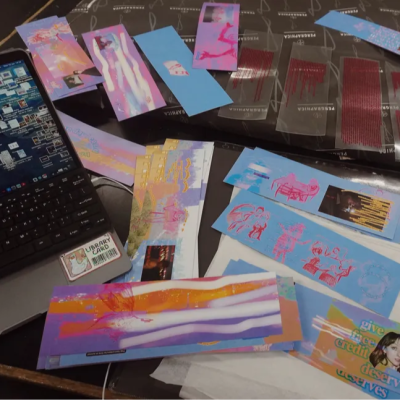
As with assembling hardware kits, assembling a zine can take up a lot of physical table space.

[Mabel] says the most useful detail to nail down before even speaking to printers is the zine’s binding, because binding type can impact layout and design of an entire document. Her advice? Nail it down early, whether it’s a simple saddlestitch (staples through a v-shaped fold of sheets), spiral binding (which allows a document to lay flat), or something else.

Aside from paper and print method (which may be more or less important depending on the zine’s content) the other thing that’s important to consider is the finishing. Finishing consists of things like cutting, folding, and binding of the raw printed sheets. A printer will help arrange these, but it’s possible to do some or even all of these steps for oneself, which is not only more hands-on but reduces costs.

Do test runs, and prototype the end result in order to force unknown problems to the surface before they become design issues. Really, the fundamentals have a lot in common with designing and building kits or hardware. Check out [Mabel]’s article for the full details; she even talks a little about managing money and getting a zine onto shelves.

Zine making is the DIYer’s way to give ideas physical form and put them into peoples’ hands more or less directly, and there’s something wonderfully and inherently subversive about that concept. 2600 has its roots in print, but oddball disk magazines prove one doesn’t need paper to make a zine.

Receipt paper mural from above eye level

Massive Mural From Thermal Receipt Paper

Turning trash into art is something we undoubtedly all admire. [Davis DeWitt] did just that with a massive mural made entirely from discarded receipt paper. [Davis] got lucky while doing some light dumpster diving, where he stumbled upon the box of thermal paper rolls. He saw the potential them and, armed with engineering skills and a rental-friendly approach, set out to create something original.

The journey began with a simple test: how long can a receipt be printed, continuously? With a maximum length of 10.5 feet per print, [Davis] designed an image for the mural using vector files to maintain a high resolution. The scale of the project was a challenge in itself, taking over 13 hours to render a single image at the necessary resolution for a mural of this size. The final piece is 30 foot (9.144 meters) wide and 11 foot (3.3528 meters) tall – a pretty conversational piece in anyone’s room – or shop, in [Davis]’ case.

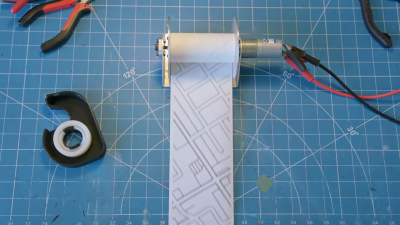
Once the design was ready, the image was sliced into strips that matched the width of the receipt paper. Printing over 1,000 feet of paper wasn’t without its issues, so [Davis] designed a custom spool system to undo the curling of the receipts. Hanging the mural involved 3D-printed brackets and binder clips, allowing the strips to hang freely with a kinetic effect.

Though the thermal paper will fade over time, the beauty of this project lies in its adaptability—just reprint any faded strips. Want to see how it all came together? Watch the full process here.

Continue reading “Massive Mural From Thermal Receipt Paper”

Hacking A Brother Label Maker: Is Your CUPS Half Empty Or Half Full?

On the one hand, we were impressed that a tiny Brother label maker actually uses CUPS to support printing. Like [Sdomi], we were less than impressed at how old a copy it was using – – 1.6.1. Of course, [Sdomi] managed to gain access to the OS and set things up the right way, and we get an over-the-shoulder view.

It wasn’t just the old copy of CUPS, either. The setup page was very dated and while that’s just cosmetic, it still strikes a nerve. The Linux kernel in use was also super old. Luckily, the URLs looked like good candidates for command injection.

Continue reading “Hacking A Brother Label Maker: Is Your CUPS Half Empty Or Half Full?”

Retrotechtacular: Circuit Potting, And PCBs The Hard Way

There was a time when the very idea of building a complex circuit with the intention of destroying it would have been anathema to any electrical engineer. The work put into designing a circuit, procuring the components, and assembling it, generally with point-to-point wiring and an extravagant amount of manual labor, only to blow it up? Heresy!

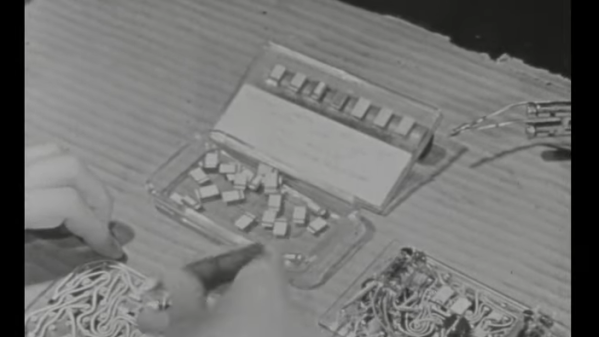
But, such are the demands of national defense, and as weapons morphed into “weapon systems” after World War II, the need arose for electronics that were not only cheap enough to blow up but also tough enough to survive the often rough ride before the final bang. The short film below, simply titled Potted and Printed Circuits, details the state of the art in miniaturization and modularization of electronics, circa 1952. It was produced by the Telecommunications Research Establishment (TRE), the main electronics R&D entity in the UK during the war which was responsible for inventions such as radar, radio navigation, and jamming technology.

Continue reading “Retrotechtacular: Circuit Potting, And PCBs The Hard Way”

3D Printed Copper Rocket Nozzle Costs Under Two Grand

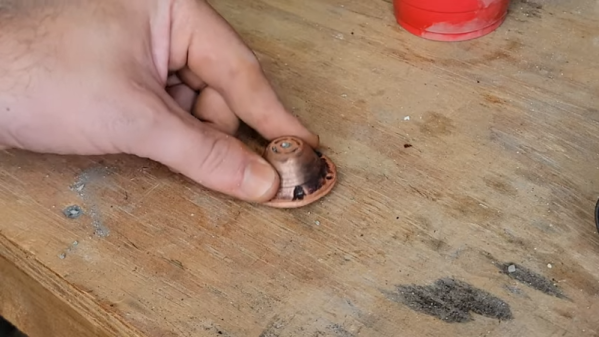
You don’t think of hobby-grade 3D printing as a good method for creating rocket nozzles. But [Mister Highball] managed to create a copper nozzle using a common printer, a kiln, and some special copper-bearing filament.

The copper filament is about 90% metal. Virtual Foundry recommends preheating it before printing and you have to sinter it in an oven to remove the plastic and leave a solid metal piece which will, of course, shrink.

Continue reading “3D Printed Copper Rocket Nozzle Costs Under Two Grand”

3D Printed Printing Press Turns You Into Gutenberg

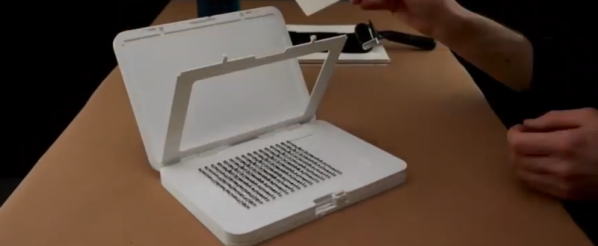
A few machines have truly changed the world, such as the wheel, steam engines, or the printing press. Maybe 3D printers will be on that list one day too. But for today, you can use your 3D printer to produce a working printing press by following plans from [Ian Mackay]. The machine, Hi-Bred, allows you to place printed blocks in a chase — that’s the technical term — run a brayer laden with ink over the type blocks and hand press a piece of paper with the platen.

The idea is more or less like a giant rubber stamp. As [Ian] points out, one way to think about it is that white pixels are 0mm high and black pixels are 3mm high. He suggests looking at old woodcuts for inspiration.

Continue reading “3D Printed Printing Press Turns You Into Gutenberg”

Use Blueprint Process To Print On Fabric With Lasers

[Shih Wei Chieh] has built a laser cyanotype printer for fabrics. You know, for art!

How do you get an inkjet head on a shoe or a couch? Most printing processes require a flat surface to print. But hearkening back to the days when a blueprint was a blueprint, a mixture of an iron salt and an acid are mixed and applied to a surface an interesting reaction occurs when the surface is exposed to UV light. The chemicals react to form, of all things, prussian blue. After the reaction occurs simply washing away the remaining chemicals leaves a stable print behind.

[Shih Wei Chieh] uses two galvanometers and a laser to cure the fabric. He uses a slightly newer process which reduces the exposure time required. This lets him print very large pictures, but also on uneven surfaces. As you can see in the video, viewable after the break, the effect is very pretty. There’s a new way to have the coolest pen plotter on the block.

Continue reading “Use Blueprint Process To Print On Fabric With Lasers”