Cheap Front Panels With Dibond Aluminium

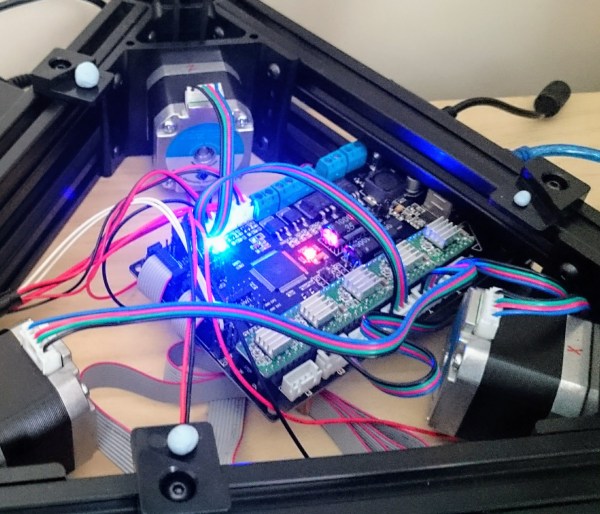
The production capability available to the individual hacker today is really quite incredible. Even a low-end laser engraver can etch your PCBs, and it doesn’t take a top of the line 3D printer to knock out a nice looking enclosure. With the wide availability of these (relatively) cheap machines, the home builder can churn out a very impressive one-off device on a fairly meager budget. Even low volume production isn’t entirely out of the question. But there’s still one element to a professional looking device that remains frustratingly difficult: a good looking front panel.

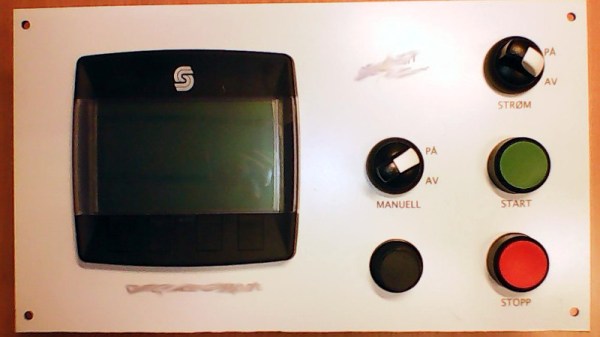
Now if your laser is strong enough to engrave (and ideally cut) aluminum sheets, then you’ve largely solved this problem. But for those of us who are plodding along with a cheap imported diode laser, getting text and images onto a piece of metal can be rather tricky. On Hackaday.io, [oaox] has demonstrated a cost effective way to create metal front panels for your devices using a print service that offers Dibond aluminum. Consisting of two thin layers of aluminum with a solid polyethylene core, this composite material was designed specifically for signage. Through various online services, you can have whatever you wish printed on a sheet of pre-cut Dibond without spending a lot of money.

As explained by [oaox], the first step is putting together the image you’ll send off to the printer using a software package like Inkscape. The key is to properly define the size of the Dibond plate in your software and work within those confines, otherwise the layout might not look how you expected once the finish piece gets back to you. It’s also important to avoid lossy compression formats like JPEG when sending the file out for production, as it can turn text into a mushy mess.

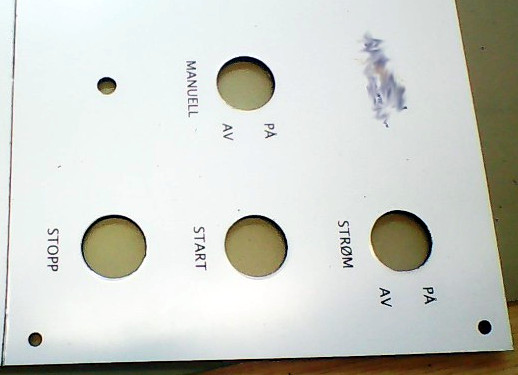
When you get the sheet back, all you need to do is put your holes in it. Thanks to the plastic core, Dibond is fairly easy to cut and drill as long as you take your time. [oaox] used a step drill for the holes, and a small coping saw for the larger openings. The final result looks great, and required very little effort in the grand scheme of things.

But how much does it cost? Looking around online, we were quoted prices as low as $7 USD to do a full-color 4×4 inch Dibond panel, and one site offered a 12×12 panel for $20. For a small production run, you could fit several copies of the graphics onto one larger panel and cut them out with a bandsaw; that could drop the per-unit price to only a couple bucks.

We’ve seen some clever attempts at professional looking front panels, from inkjet printing on transparencies to taking the nuclear option and laser cutting thin plywood. This is one of those issues the community has been struggling with for years, but at least it looks like we’re finally getting some decent options.
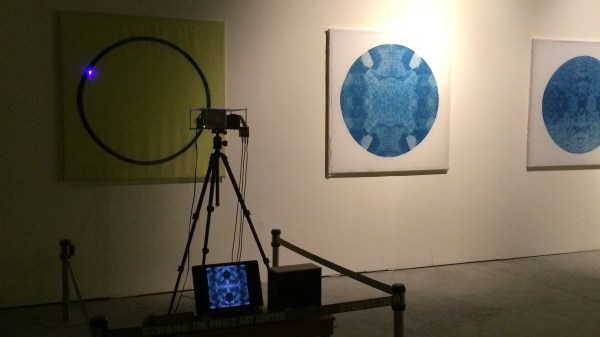
Wire-bots, Roll Out!

Designing and 3D-printing parts for a robot with a specific purpose is generally more efficient than producing one with a general functionality — and even then it can still take some time. What if you cut out two of those cumbersome dimensions and still produce a limited-yet-functional robot?

[Sebastian Risi] and his research team at the IT University of Copenhagen’s Robotics, Evolution, and Art Lab, have invented a means to produce wire-based robots. The process is not far removed from how industrial wire-bending machines churn out product, and the specialized nozzle is also able to affix the motors to the robot as it’s being produced so it’s immediately ready for testing.

A computer algorithm — once fed test requirements — continuously refines the robot’s design and is able to produce the next version in a quarter of an hour. There is also far less waste, as the wire can simply be straightened out and recycled for the next attempt. In the three presented tests, a pair of motors shimmy the robot on it’s way — be it along a pipe, wobbling around, or rolling about. Look at that wire go!

Continue reading “Wire-bots, Roll Out!”

Printing Bed Off-Kilter? Blu-Tack To The Rescue!

For all their applications, 3D printers can be finicky machines. From extruder problems, misaligned or missing layers, to finding an overnight print turned into a tangled mess, and that’s all assuming your printer bed is perfectly leveled. [Ricardo de Azambuja’s] new linear delta printer was frustrating him. No matter what he did, it wouldn’t retain the bed leveling calibration, so he had to improvise — Blu-Tack to the rescue.

It turns out [Azambuja]’s problem was so bad that the filament wouldn’t even attempt to adhere to the printing bed. So, he turned to Printrun Pronterface and a combination of its homing feature and the piece-of-paper method to get a rough estimate of how much the bed needed to be adjusted — and a similar estimate of how big of a gob of Blu-Tack was needed.

Pressing the bed into place, he re-ran Pronterface to make sure he was on the level. [Azambuja] notes that you would have to redo this for every print, but it was good enough to print off a trio of bed leveling gears he designed so he doesn’t have to go through this headache again for some time.

Continue reading “Printing Bed Off-Kilter? Blu-Tack To The Rescue!”

Print Directly On Fabric With An Inkjet Printer

[fungus amungus] was reading online about printing directly on fabrics with a home printer. He’d read a few hopeful tutorials about printing on them with a laser printer, but he didn’t own one.

Considering that you can occasionally buy an inkjet for less than the ink, he decided to take the plunge and see if he could print on a swatch of fabric with his inkjet. The technique requires a printer, some wax paper, scissors, and an iron.

By adhering the wax paper to the fabric properly, it’s possible to run it through the printer without tears. (We’ll let you pick the heteronym.) The final step is to let the ink sit for an hour before running the iron over it again. This seems to cure the ink and it can even survive a few washings.

Being able to make any pattern of cloth on demand seems like a useful thing to keep in the toolbox!

Putting Sand, Water, And Metal Into A 3D Print

[Adam] over at Makefast Workshop writes about some of the tests they’ve been running on their 3D printer. They experimented with pausing a 3D print midway and inserting various materials into the print. In this case, sand, water, and metal BBs.

The first experiment was a mixture of salt and water used to make a can chiller for soda or beer (the blue thing in the upper right). It took some experimentation to get a print that didn’t leak and was strong. For example, if the water was too cold the print could come off the plate or delaminate. If there was too much water it would splash up while the printer was running and cause bad layer adhesion.

They used what they learned to build on their next experiment, which was filling the print with sand to give it more heft. This is actually a common manufacturing process — for instance, hollow-handled cutlery often has clay, sand, or cement for heft. They eventually found that they had to preheat the sand to get the results they wanted and managed to produce a fairly passable maraca.

The final experiment was a variation on the popular ball bearing prints. Rather than printing plastic balls they designed the print to be paused midway and then placed warmed copper BBs in the print. The printer finished its work and then they spun the BB. It worked pretty well! All in all an interesting read.

Take Your 3D Printing To The Next Dimension

In what is being hailed as the next great advancement in 3D printing, scientists have been able to get a 3D printed shape to change form when it is exposed to water, bringing 3D printing squarely into the realm of the fourth dimension. Although the only examples we’ve seen so far are with relatively flat prints (which arguably subtracts one “D” from the claim) the new procedure is one which is groundbreaking for the technology.

The process uses cellulose fibers which, when aligned in a particular way and exposed to water, swell in order to change shape. This is similar to how a bimetallic strip in a thermostat works, but they really took their inspiration from biological processes in plants that allow them to change shape according to environmental conditions. It’s hard to tell if this new method of printing will forever alter the landscape of 3D printing but, for now, it’s an interesting endeavor that will be worth watching. The video after the break shows a fast-motion print using the technique, followed by a demo of the print submersed in water.

We often see new technological advancements that use biology as a springboard for new ideas, and this one is no different. There have been building structures inspired by pinecones and this Processing hack inspired by squid. Biology is all around us, and any of it could be used for inspiration for your next project!

Continue reading “Take Your 3D Printing To The Next Dimension”

Computer-aided Paint Brush

[Nirav] painted this masterpiece by hand… with a little help from a computer. He calls it the semi-automatic paintbrush because you do need to move it over the canvas by hand, but a computer decides when to dispense the ink.

He’s using a piece of hardware we looked at back in September called the InkShield that got a boost from Kickstarter. It’s an Arduino shield that drives an inkjet printer cartridge. The trick is how to know when the cartridge is in position for printing.

The system uses visual processing for that. [Nirav] added an IR led to the cartridge, and uses a camera to extrapolate its position. He actually reused a Python homography module which he had written for use with a projector. That setup was developed as a digital white board, but works just as well for this purpose.

He mentions that results like this won’t be featured in an art museum. But the look is unique, and we’d love to make a set of geeky thank-you notes using the technique.