Discussing Pulse-Width Modulation

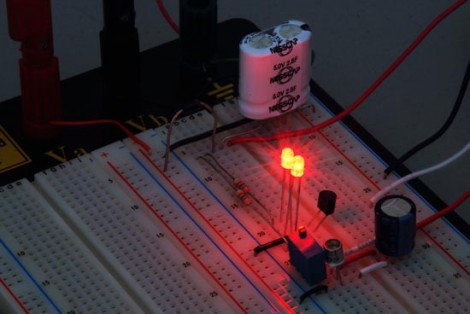
[Michael Kleinigger] posted a lengthy discussion on Pulse-Width Modulation that goes beyond the traditional beginner tutorial. He starts a bit of background info on PWM and a tip about using a camera to judge frequency and duty cycle of LEDs. From there it’s down the rabbit hole with some testing of power-loss versus frequency.

When you change from frequencies of 50 Hz to 1 MHz how does the parasitic power loss from switching affect the overall efficiency of the circuit? It turns out there’s a rather large amount of loss at the highest level, around 1.5 mW. The greatest balance of low power loss and elimination of flicker seems to be right in the 300-500 Hz range.

5 Tones, 1 Arduino

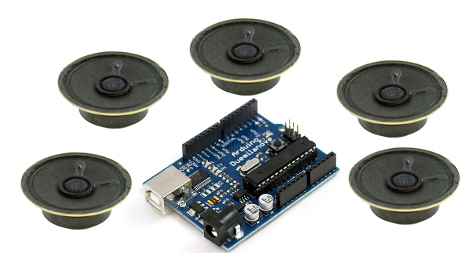
Because the Arduino is in such high demand for producing multiple musical tones at the same time; [Jeremy Blum] has successfully figured out the math and other necessaries that will take your once previously single tone producing MCU and turn it into a 5 tone producing machine. unsurprisingly its really just some creative use of PWM control but it all works out in the end anyway and helps prevent you from purchasing additional sound generating chips. This truly does open up some new doors, as [Jeremy] shows with his still in production thingamakit like project: ReacXion.

Serial Port Controlled CPU Fan

[Christian] was running a Linux box as a home server but needed a way to quiet the noisy machine. Like many Linux servers, he’s using some pretty old hardware which doesn’t have an on-board header for the CPU fan which generates much of the unwanted sound. Those headers are nice because software can monitor the CPU and board temperature and adjust the fan accordingly.

[Christian’s] solution was to use the serial port for the task. He built a small circuit in which serial pin 3 drives the base of a transistor, pin 5 provides ground, and a floppy drive power cable supplies 5 volts. From there he wrote a RUBY program to monitor the CPU temperature and generate a PWM signal on the serial port, throttling the fan speed as needed.

[CC Photo Credit: Garrette via Flickr]

Controlling An AC Drill Using One PWM Connection

This peculiar setup allows [Ben Krasnow] to control an alternating current device using one pin on a microcontroller. He’s experimenting with a power drill and has relocated the trigger circuitry that makes it spin. On that board he found a variable resistor combined with a capacitor which control a triac, actuating the speed of a drill. [Ben’s] solution works great and isolates the drill from the control circuitry. He replace the variable resistor with a cadmium sulfide photoresistor (basically a variable resistor whose resistance depends on the intensity of light). Pulse-width modulation is used to adjust the brightness of an LED shining on that photoresistor and thereby affect the speed of the drill. This is such as simple alteration to the drill we’d call it MacGyver-esque.

See a demonstration after the break.

Continue reading “Controlling An AC Drill Using One PWM Connection”

RGB Lamp Bulb Replacement

[youtube=http://www.youtube.com/watch?v=TwZBMJS1teg]

Wanting to make some unique and interesting gifts for his nieces as well as improve his PCB skills and expand beyond Arduino, [Jay] has made these color changing Ikea lamps. He’s using an ATTiny2313 for the brains, a handful of RGB LEDs plus 3 warm white LEDs to keep the wife happy. you can download the schematic and PCB files if you want to reproduce this one yourself. You can see his PCB making skills have improved since the nursery room temperature monitor. We think his nieces will be pleased with their gifts.

[via HackedGadgets]

Sound Card Driven Servo Motor

[youtube=http://www.youtube.com/watch?v=1LG2Ecsk13Q]

[Darrell] is using a sound card to drive this servo motor. The motor draws power from a cellphone battery with the control signal coming from one of the audio channels. It’s not too surprising that this works since the motor just needs a PWM signal to operate and that’s what is used to create the different frequencies of sound on electronic speakers. We’re not sure what [Darrell’s] got planned for this system but he mentions that two servos can be used, one on each audio channel. If you’re not using your sound card this would be a way to stop using the Arduino for that mail checker and just use a little flag attached to a servo. When mail comes in the appropriately engineered sound raises the flag.

USB VU-meter

[youtube http://www.youtube.com/watch?v=jsg24MGNpRc&feature=player_embedded%5D

WaitingForFriday’s [Simon Inns] is quite possibly the USB interface and PIC master. This week he let us know about his VU-meter repurposed as a computer performance monitor using a PIC18F2550 and his open source USB Generic HID communication class. With PWM the meter’s needles and RGB LED can be accurately set and even dampened for CPU usage, network usage, HDD utilization, and even memory usage. Oddly enough, in his software we didn’t find the ability to use the device as a VU-meter – go figure.