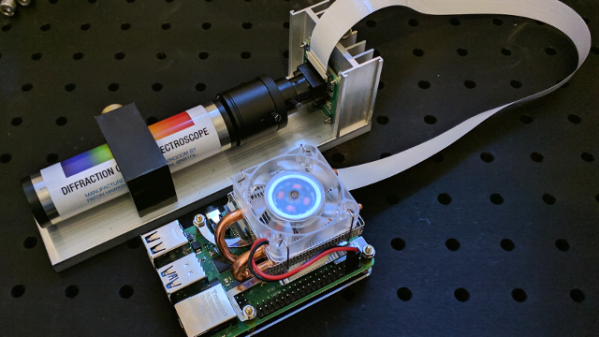
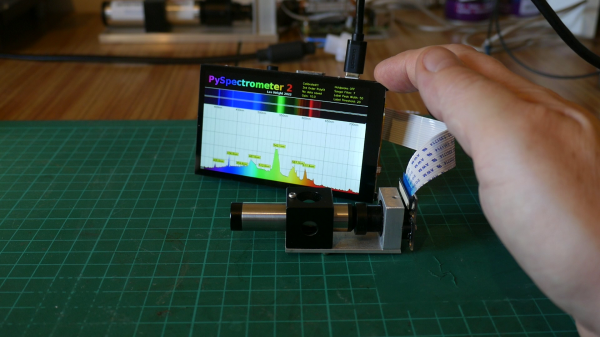
PySpectrometer version 2, showing mini spectroscope, 4 inch display and hand for scale

Pi-based Spectrometer Gets An Upgrade

Here at Hackaday, we love to see projects re-visited and updated after we’ve covered them on the site. It’s always exciting to see what the creators come up with next, and this Pi-Based Spectrometer project is a great example of that.

[LesWright] found himself with a problem when the new version of Raspberry Pi operating system was released (Bullseye), and it broke some functionality on his original software. Rather than just fix the issues, [Les] chose to rewrite the software more dramatically and has ended up with a much more capable spectrometer that is able to match professional devices costing many times more.
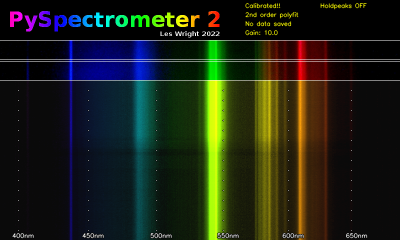
Screenshot of Waterfall Display for PySpectrometer 2

By using multi-wavelength calibration and polynomial regression data, the new version is much more accurate and can now resolve wavelengths down to +/- 1nm.

The whole project is now written in OpenCV, and there’s a nifty new waterfall spectrum display, that will show changes in measured spectra over time.

A low-cost benchtop spectroscope is coupled to a RaspberryPi Camera via a CCTV zoom lens and the whole setup is mounted to a small block of aluminium for thermal and mechanical stability. The spectroscope is pointed at a fluorescent lamp and the user is guided through a calibration routine to tune the software to the hardware.

We’re impressed with the precision [Les] has achieved with his builds, and the write-up is sufficiently detailed to allow others to follow in his footsteps. We’d love to see if readers build one themselves, and what they use them for!

If you want to read up on the original build, you can find our article here. We’ve covered several spectrometry projects in the past, including this Gamma-Ray Spectrometer and this one based around an STM32 Nucleo board. Continue reading “Pi-based Spectrometer Gets An Upgrade”

Using A Laser To Blast Away A Bayer Array

A Bayer array, or Bayer filter, is what lets a digital camera take color photos. It’s an array of tiny color filters that sit on top of a camera’s CCD. The filter makes it so that each sub-pixel in the image sensor only sees red, green, or blue light. The Bayer filter is an elegant tool that gives us color digital photos, but what would you do if you wanted to remove one?

[Les Wright] has devised a way to remove the Bayer filter from the Raspberry Pi Camera. Along with filtering red, green, and blue light for their respective sensors, Bayer filters also greatly reduce the amount of UV and IR light that make it to the CCD sensor. [Les] uses the Raspberry Pi camera in his Pi-based Spectrometer, and he wants to remove the Bayer filter to improve and expand its sensitivity.

Of course, [Les] isn’t the first one to want to do this. Some have succeeded in physically scratching the filter off of the CCD, but because the Pi Camera has vital circuitry around the outside of the sensor, scratching the filter off would likely destroy the circuitry. Others have stripped it off using chemical means, so [Les] gave this a go and destroyed no small number of cameras in his attempt to strip the filter off with solvents like DMSO, brake fluid, and industrial paint stripper.

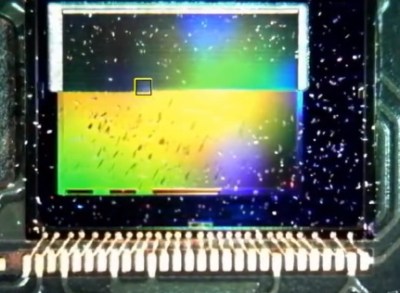
A look at the CCD, halfway through the process.

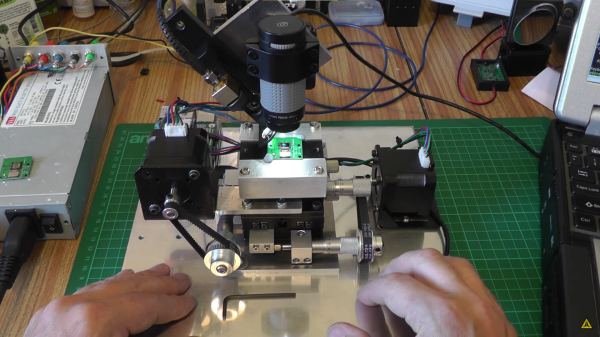
Inspired by techniques used in industry, [Les] eventually tried to use a several-kW nitrogen laser to burn off the filter (which seems appropriate given his experience with lasers). He built a rig that raster scans the laser across the sensor using stepper motors to drive micrometer bases. A USB microscope was included to allow progress to be monitored, and you can see a change in the sensor’s appearance as the filter is removed.

After blasting off the Bayer filter, [Les] plugged his improved camera into his home-built spectrometer and pointed it outside. The new camera gives the spectrometer much more uniform sensitivity and allows [Les] to see further into the IR and UV bands. The spectrometer can even detect the Fraunhofer lines—subtle dips in the sun’s spectrum from absorption by molecules in the atmosphere.

This is incredible for a DIY setup and instrument, and we can’t wait to see what [Les] does next to improve his measurements. If your spectrometry needs are more mass than visual, take a look at this home-built mass spectrometer. Home spectrometers aren’t just for examining light spectra—they can also be used to judge the ripeness of fruit!

Continue reading “Using A Laser To Blast Away A Bayer Array”

Pi-Based Spectrometer Puts The Complexity In The Software

Play around with optics long enough and sooner or later you’re probably going to want a spectrometer. Optical instruments are famously expensive, though, at least for high-quality units. But a useful spectrometer, like this DIY Raspberry Pi-based instrument, doesn’t necessarily have to break the bank.

This one comes to us by way of [Les Wright], whose homebrew laser builds we’ve been admiring for a while now. [Les] managed to keep the costs to a minimum here by keeping the optics super simple. The front end of the instrument is just a handheld diffraction-grating spectroscope, of the kind used in physics classrooms to demonstrate the spectral characteristics of different light sources. Turning it from a spectroscope to a spectrometer required a Raspberry Pi and a camera; mounted to a lens and positioned to see the spectrum created by the diffraction grating, the camera sends data to the Pi, where a Python program does the business of converting the spectrum to data. [Les]’s software is simple by complete, giving a graphical representation of the spectral data it sees. The video below shows the build process and what’s involved in calibrating the spectrometer, plus some of the more interesting spectra one can easily explore.

We appreciate the simplicity and the utility of this design, as well as its adaptability. Rather than using machined aluminum, the spectroscope holder and Pi cam bracket could easily be 3D-printer, and we could also see how the software could be adapted to use a PC and webcam.

Continue reading “Pi-Based Spectrometer Puts The Complexity In The Software”

Open Source Raman Spectrometer Is Cheaper, But Not Cheap

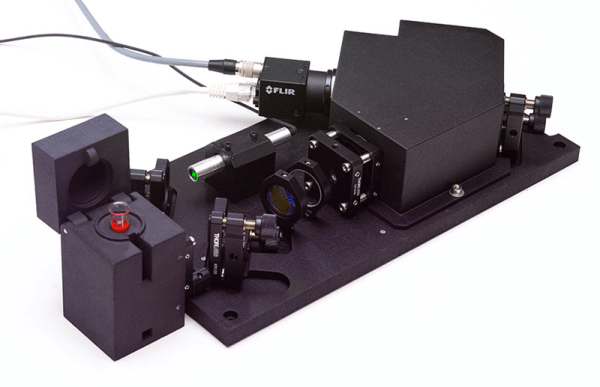
Raman spectrography uses the Raman scattering of photons from a laser or other coherent light beam to measure the vibrational state of molecules. In chemistry, this is useful for identifying molecules and studying chemical bonds. Don’t have a Raman spectroscope? Cheer up! Open Raman will give you the means to build one.

The “starter edition” replaces the initial breadboard version which used Lego construction, although the plans for that are still on the site, as well. [Luc] is planning a performance edition, soon, that will have better performance and, presumably, a greater cost.

Continue reading “Open Source Raman Spectrometer Is Cheaper, But Not Cheap”

Arduino Does Hard Science

We don’t know why [stoppi71] needs to do gamma spectroscopy. We only know that he has made one, including a high-voltage power supply, a photomultiplier tube, and–what else–an Arduino. You also need a scintillation crystal to convert the gamma rays to visible light for the tube to pick up.

He started out using an open source multichannel analyzer (MCA) called Theremino. This connects through a sound card and runs on a PC. However, he wanted to roll his own and did so with some simple circuitry and an Arduino.

Continue reading “Arduino Does Hard Science”