Remote Controlled Lawn Mower Lets You Sit Back And Enjoy The Show

“Its hard to find people that actually WANT to mow their lawn.” A more true statement has never been made. [Kurt’s] project turns an old lawn mower into a remote control lawn mower.

The first step of this build is to replace the front drive wheels with mini-bike tires which have built-in gear tooth sprockets. The rear wheels were then replaced with large caster wheels. The 12-24V DC motors and gear boxes used come from National Power Chair. While we have seen more complicated RC lawn mowers before, this project is a great way to get started. All that [Kurt] wanted was to make lawn mowing more fun, we believe that he has succeeded. This thing is very mobile and can turn on a dime. Check out the demo video after the break.

What’s next? Add a GPS, a Raspberry Pi, and a few other odds and ends. Tie it together with some clever programming and you will have your own autonomous lawn mower. Have you already created a completely autonomous lawn mower? Let us know!
Continue reading “Remote Controlled Lawn Mower Lets You Sit Back And Enjoy The Show”

3D Printed Netduino Remote Controlled Car

netduinocar

[Matt] lives in South Africa, where homes have smallish crawlspaces (some only 30cm high!) that he can’t quite squeeze himself into. Even if he could, he probably wouldn’t: they’re apparently vacation homes for the local rats. He did, however, want to explore these spaces to get a better idea what’s going on inside, so he built a Windows Phone-controlled car with a Netduino and 3D-printed parts.

Such a specialized application requires unique parts, so [Matt] designed and 3D-printed the wheels and frame from scratch. You’ve probably noticed that the wheels aren’t your typical cylinders. The terrain [Matt] faces is sand, so the spiked shape provides better grip. The body’s design required extra attention because it holds the motors, the Netduino, the motor driver, and the battery.

A Bluetooth module connects to the Netduino and allows [Matt] to drive the car with his Windows Phone, and an inexpensive 5V LED board provides some light for those dark corners. How does it see once inside the crawlspace? It looks like [Matt’s] getting to that part. His plan is to simply mount a second phone running Skype and watch the stream. Stick around after the break to see [Matt] use the car to both confuse and excite his dog.

Continue reading “3D Printed Netduino Remote Controlled Car”

Sniffing Wired Garage Door Opener Signals

sniffing-garage-door-signals

In addition to being something fun to do with an oscilloscope, this could be a valuable time-saver for anyone looking to tap into the wired communications on a garage door opener. If you own an older model you might be scratching your head. But newer units have more than just one button operation, usually extending to at least two extra buttons that control the lights on the motor unit and lock out wireless control. A quick probing turned up the communication scheme used by the button unit mounted next to the door into the house.

We’ve patched into our own garage door using a simple relay to interface with a microcontroller which will still work for opening and closing the door But if you’re looking for extended control you need to spoof one of the timing signals detailed in this post. We like the stated examples for future hacks: building a better wired button unit, or adding some type of RFID integration. We could see this approach for hacking in motion light control for door openers that don’t have it.

[Thanks Victor]

Fubarino Contest: Hackaday Tells You You’re A Terrible Pilot

glider

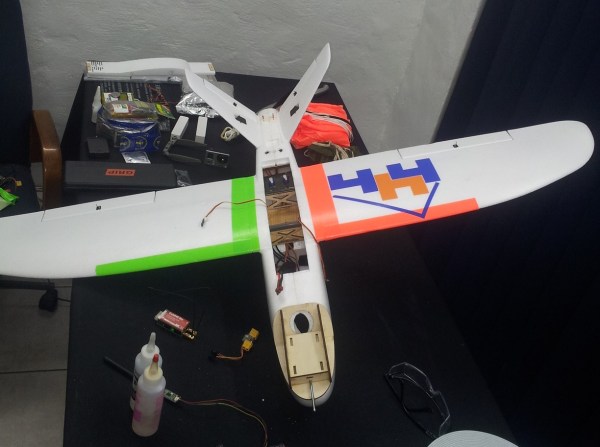
[Mikko] is in to flying F3B racers – remote control airplanes with a three meter wingspan. These races require the pilot to know how much time he has left, and when flying a remote controlled airplane to the edges of visual contact, it’s just not possible to look down and check a stopwatch.

To solve this problem, [Mikko] created a talking F3B timer to announce the flight time and how much time is left in 30 second increments. It’s based on a WTV020 audio module that plays audio from an SD card.  Right now it’s just in the prototype phase, but he does have some code and documentation online.

As for the easter egg, [Mikko] programmed his timer so that if the flight lasts exactly 33 seconds (with millisecond resolution), the Hackaday URL is displayed on the Nokia LCD. We’re betting a flight time of 33 seconds would be highly correlated with a horrible malfunction and the loss of a thousand dollar airframe, so we’re more than happy to cheer [Mikko] up if he eventually sees this easter egg in the field.

Video of the talking timer speaking Finnish below, and a video showing off what these huge sailplanes can do right here.


This is an entry in the Fubarino Contest for a chance at one of the 20 Fubarino SD boards which Microchip has put up as prizes!

Continue reading “Fubarino Contest: Hackaday Tells You You’re A Terrible Pilot”

Tricked-out Arduino-controlled Time-Lapse Is More Than Just A Timer

arduinoPhotoRig

[Hlesliebole] wanted a finer degree of remote control over his time-lapse shots, so he decided to build an Arduino-driven infrared shutter. He ended up creating this killer Arduino-controlled photography rig that does a whole lot more.

This hack was built for [Hlesliebole]’s Nikon D3100, but he says it should work with any DSLR and remote shutter. This initial build uses an LED as a stand-in for the remote shutter that he ordered.  He intends to update the post once it arrives and he integrates it.

[Hlesliebole] wired a 7-segment display to show the current time delay between photos. This can be set on the fly with a potentiometer, so there’s no need to stop and reprogram the Arduino. And while you’re grabbing a beer and watching the sun slowly sink, the rig can better capture that sunset because of a photoresistor. It detects the ambient light level and minimizes the number of throwaway dark shots.

If that weren’t enough, he’s built servo functionality into the code to support remote control over the camera’s physical position, allowing for panning or rotation over a scene. [Hlesliebole] doesn’t go into detail, but he assures us that there are many tutorials out there.  If you think you’re man enough, you could always work in this outstanding versatile motion dolly hack.

Continue reading “Tricked-out Arduino-controlled Time-Lapse Is More Than Just A Timer”

A 555-Based, Two-Channel Remote Control Circuit

NE555N

[fahadshihab], a young tinkerer, shared his circuit design for a simple remote control using 555 timers.  Using a 555 calculator, he designed a clock circuit that would run at 11.99 Hz. Two transistors are connected to inputs (presumably button switches). One sends the plain clock signal, and one sends the inverted clock signal. A matching circuit at the other end will separate the channels. All it requires is connecting the two circuits in order to synchronize them. It would be easy enough to interface this with an oscillator, an IR LED, or a laser for long-range control.

The great thing about this circuit is its simplicity. It’s often so easy to throw a microcontroller into the mix, that we forget how effective a setup like this can be. It could also be a great starter circuit for a kid’s workshop, demonstrating basic circuits, timers, and even a NOT gate. Of course, it would be a good refresher for those without a lot of circuit knowledge too. Once you’ve mastered this, perhaps an AM transmitter is next?

Primer Tutorials For Arduino IR Remote Cloning And Keyboard Simulation

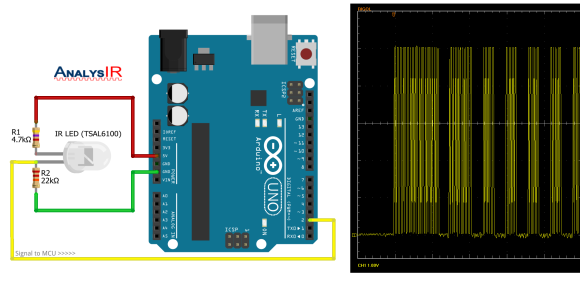
We’ve featured loads of IR Arduino projects and they are all exciting and unique. The projects spring from a specific need or problem where a custom infrared remote control is the solution. [Rick’s] double feature we’re sharing in this article is no exception, but what is interesting and different about [Rick’s] projects is his careful and deliberate tutorial delivery on how to copy infrared remote codes, store the codes with a flavor of Arduino and then either transmit or receive the codes to control devices.

In the case of his space heater an Arduino was used to record and later retransmit the “power on” IR code to the heater before he awakes on a cold morning. This way his room is toasty warm before he has to climb out from under the covers, which has the added benefit of saving the cost of running the heater all night. Brilliant idea if you don’t have a programmable heating system. Maybe he will add a temperature sensor someday so it doesn’t have to run on strictly time.

A more complicated problem was controlling DVD playback software on his computer remotely. [Rick] says he sits at a distance when watching DVDs on his computer but his computer doesn’t have a remote control like a normal TV. Arduino to the rescue again! But this time he pulls out a Teensyduino because of its added feature of being able to emulate a keyboard and of course the computer DVD playback software accepts keyboard commands. Once again he used the “IRremote.h” library to record certain button codes from an old remote control before adding the retrieved codes to a Teensyduino setup and programmed to receive and decode the remote’s IR signals. The Teensyduino then maps the IR codes to known keyboard shortcuts and transmits the simulated keyboard shortcut commands to the computer via its USB cable where the DVD playback software recognizes the key commands.

As always [Rick] shares all his libraries and sketches on his blog so follow the above links to download the files. You will not miss a single step if you follow his excellent videos below. Plus, here are some other ways and other tools for using an IR remote with your Arduino and cloning an infrared remote.

Continue reading “Primer Tutorials For Arduino IR Remote Cloning And Keyboard Simulation”