Dishwasher Repair Nightmare: Chasing Down 3 Faults

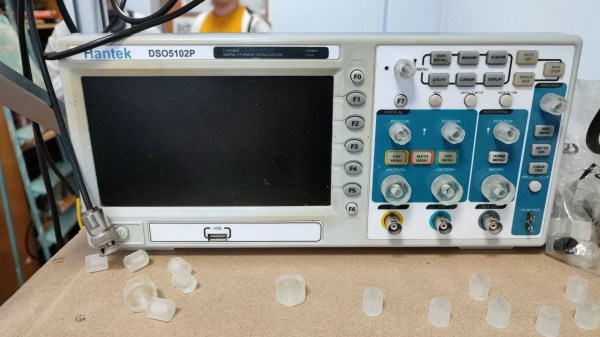
It all started with a vague error code (shown in the image above) on [nophead]’s Bosch SMS88TW01G/01 dishwasher, and it touched off a months-long repair nightmare that even involved a logic analyzer. [nophead] is normally able to handily diagnose and repair electronic appliances, but this time he had no idea what he was in for.

Not many dishwashers require breaking out a logic analyzer and 3D-printed custom adapters, but this one did.

Not only were three separate and unrelated faults at play (one of them misrepresented as a communications error that caused a lot of head-scratching) but to top it all off, the machine is just not very repair-friendly. The Bosch device utilized components which are not easily accessible. In the end [nophead] prevailed, but it truly was a nightmare repair of the highest order. So what went wrong?

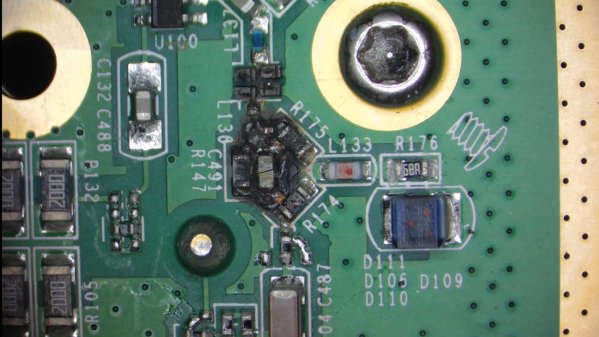
One error appears to have been due to a manufacturing problem. While reverse-engineering the electronics in the appliance, [nophead] noticed a surface-mounted transistor that looked crooked. It was loose to the touch and fell into pieces when he attempted to desolder it. This part was responsible for switching an optical sensor, so that was one problem solved.

Another issue was a “communications error”. This actually came down to ground leakage due to a corroded and faulty heater, and to say that it was a pain to access is an understatement. Accessing this part requires the machine to be turned upside down, because the only way to get to it is by removing the base of the dishwasher, which itself requires a bizarre series of awkward and unintuitive steps to remove. Oh, and prior to turning the machine upside down, one has to purge the sump pump, which required a 3D-printed adapter… and the list goes on.

And the E02 error code, the thing that started it all? This was solved early in troubleshooting by changing a resistor value by a tiny amount. [nophead] is perfectly aware that this fix makes no sense, but perhaps it was in fact related to the ground leakage problem caused by the corroded heater. It may return to haunt the future, but in the meantime, the machine seems happy.

It goes to show that even though every fault has a cause and a reason, sometimes they are far from clear or accessible, and the road to repair is just a long slog. Heck, even phones these days can be bricked by accidentally swapping a 1.3 mm screw for a 1.2 mm screw.

Surgery On An LED To Preserve Vintage Aesthetics

[Chris Jones] recently found himself in a pickle. An indicator LED off an old piece of stereo equipment had failed. It was a strange rectangular type for which he could source no modern substitute. Using a different LED would ruin the aesthetic. Thus, what else was [Chris] to do, but attempt surgery on an LED!

The first attempt was the simplest. [Chris] tried soldering a small SMD LED between the legs of the existing part, which was open circuit. It worked, but the light didn’t really propagate to the top of the LED’s plastic. It was too dim to do the job.

Unperturbed, [Chris] instead elected to cut the LED apart. he soldered the SMD LED to the original LED’s leads, inside its body this time. The top part of the plastic lens was then notched to fit snugly over the new SMD part. A bit of superglue then joined everything back together. The finished product looks a touch messy on the PCB. However, installed back inside the stereo, it’s a perfectly stealth fix that looks great.

Some will consider this fix frivolous and a waste of time. Others will appreciate the way it preserved the attractive retro look of a piece of vintage audio gear. In any case, we can all agree that modern LEDs are often a great replacement for older parts in many cases. If you’ve pulled off your own weird, oddball repair hacks, don’t hesitate to share us with them on the tipsline!

Dead Washer Lives Again With ATTiny

We aren’t saying that appliances are a scam, but we have noticed that when your appliances fail, there’s a good chance it will be some part you can no longer get from the appliance maker. Or in some cases, it’s a garden-variety part that should cost $2, but has been marked up to $40. When [Balakrishnan] had a failure of the timer control board for a Whirlpool washing machine, it was time to reverse engineer the board and replace it with a small microcontroller.

Of course, this kind of hack is one of those that won’t help you unless you need exactly that timer board. However, the process is generally applicable. Luckily, the motherboard chip was documented and the timer control board used a simple ATmega88, so it was easy to see that the devices were communicating via I2C.

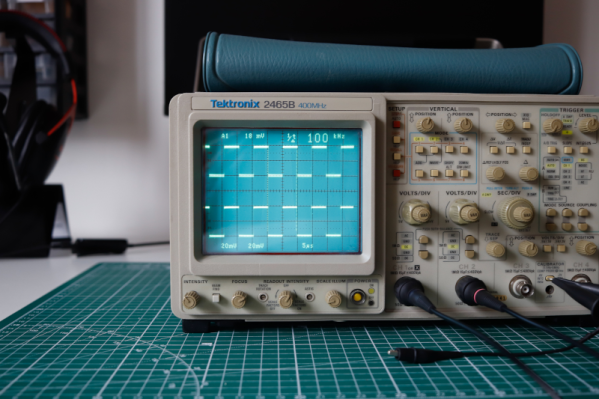
Reading the I2C  bus is easy with a logic analyzer, and this revealed the faulty device’s I2C address. The board that failed was only for display, so a simple program that does nothing other than accept I2C data put the washer in working order. Once it was working with an Arduino, an ATTiny45 did the work with a lot less space and cost.

If you don’t want to reverse engineer the washing machine, you could just replace all the controls. That even works if the old washer wasn’t electronic to start.

Ask Hackaday: What’s Your Worst Repair Win?

Like many of you, I’ve become the designated “fix-it” person for my family and friends. While it can be a lot of work — I just finished an oil change that required me to lay in a cold, wet driveway and I can’t mention in polite company the substances I was bathed in while fixing a clogged pipe last week  — I generally relish my role. I enjoy solving problems, I love working with my hands and my head, and who doesn’t like saving money and time?

But for me, the best part of being the fix-it guy is the satisfaction that comes from doing something others can’t do. I find this especially true with automotive repairs, which conventional wisdom says is strictly the province of factory-trained experts. A little bit of a hero complex, perhaps? Absolutely! After all, I don’t get paid for my repairs, so I’ve got to get a little something for the effort.

This is why a recent pair of unrelated fixes left me feeling thoroughly unsatisfied. Neither of these jobs was a clear win, at least in terms of getting the rush of being able to do something that nobody else could. At best, these were qualified wins, which both still left me feeling a little defeated. And that got me thinking that I’m probably not the only one who has had marginal repair wins like these.

Continue reading “Ask Hackaday: What’s Your Worst Repair Win?”

Rescue That Dead Xbox With An External PSU

There is nothing worse than that sinking feeling as a computer or other device fails just after its warranty has expired. [Robotanv] had it with his Xbox Series S whose power supply failed, and was faced with either an online sourced PSU of uncertain provenance, or a hefty bill from Microsoft for a repair. He chose to do neither, opening up his console and replacing the broken PSU with a generic external model. See the video below the break.

The Xbox appears surprisingly well designed as a modular unit, so accessing and unplugging its PSU was quite easy. To his surprise he found that the connections were simply two wires, positive and negative lines for 12 V. The solution was to find a suitably beefy 12 V supply and wire it up, before continuing gaming.

Beyond that simple description lies a bit more. The original was a 160 W unit so he’s taken a gamble with a 120 W external brick. He’s monitoring its temperature carefully to make sure, but with his gaming it has not been a problem. Then there’s the board wiring, which he appears to have soldered to pads on the PCB. We might have tried to find something that fit the original spade connectors instead, but yet again it hasn’t caused him any problems. We’d be curious to see what has failed in the original PSU. Meanwhile we’re glad to see this Xbox ride again, it’s more than can be said for one belonging to a Hackaday colleague.

Continue reading “Rescue That Dead Xbox With An External PSU”

How To Repair? The Death Of Schematics

There was a time when, if you were handy with a soldering iron, you could pretty easily open up a radio or TV repair business. You might not get rich, but you could make a good living. And if you had enough business savvy to do sales too, you could do well. These days there aren’t many repair shops and it isn’t any wonder. The price of labor is up and the price of things like TVs drops every day. What’s worse is today’s TV is not only cheaper than last year’s model, but probably also better. Besides that, TVs are full of custom parts you can’t get and jam-packed into smaller and smaller cases.

Case in point, I saw a “black Friday” ad for a 40-inch 1080p flatscreen with a streaming controller for $98. Granted, that’s not huge by today’s standards and I’m sure it isn’t a perfect picture. But for $98? Even a giant high-quality TV these days might cost a bit more than $1,000 and you can get something pretty great for well under $500.

Looking back, a Sears ad showed a great deal on a 19″ color TV in 1980. The price? $399. That doesn’t sound too bad until you realize that today that would be about $1,400. So with a ratio of about 3.5 to 1, a $30/hour service call would be, today, $105. So for an hour’s service call with no parts, I could just buy that 40″ TV. Add even one simple part or another hour and I’m getting close to the big league TVs.

Did you ever wonder how TV repair technicians knew what to do? Well, for one thing, most of the time you didn’t have to. A surprising number of calls would be something simple like a frayed line cord or a dirty tuner. Antenna wires destroyed by critters was common enough. In the tube days, you could pretty easily swap tubes to fix the bulk of actual problems.

Continue reading “How To Repair? The Death Of Schematics”

A home-made wireless game controller

ColecoVision Barn Find Gets Wireless Makeover

Few things are more satisfying than finding an old, forgotten piece of technology somewhere and bringing it back to life. And while it’s great to see a rare sports car or an Apollo Flight Computer being restored, even not-very-successful game consoles from the 1980s can make for some great repair stories. Just look at how [Discreet Mayor] describes his restoration and modification efforts on a ColecoVision that he literally found in a barn.

Given that the ColecoVision was on the market between 1982 and 1985, we can assume that [Discreet Mayor]’s console had been sitting on a shelf for at least three decades, and the machine was definitely showing its age. Several components had failed due to corrosion, including the clock crystal, a 7400 series logic chip and a capacitor in the power supply, but since these are all standard components it was rather straightforward to replace them.

The controllers however were sadly beyond repair. Replacing them with standard joysticks wasn’t really an option because the ColecoVision controllers included a numeric keypad, which was mainly used to select game options. Making something completely new was the way to go, and [Discreet Mayor] decided to go for a wireless system while he was at it. After all, he had already developed a modular wireless IoT system based on the IEEE 802.15.4 standard, which turned out to be a perfect fit for this system.

The splash screen of ColecoVision's Venture[Discreet Mayor] built a simple joystick-plus-fire-button setup on a piece of MDF and equipped it with his IoT transmitter. Instead of adding a replacement numeric keypad he decided to use the joystick to simulate the most commonly-used buttons: “right” for “1”, “down” for “2” and so on. The receiver module uses digital switches to mimic keypresses to the console’s input port. The end result might look a bit hacky, but the console is fully functional again and runs its games just like it did over thirty years ago.

We’ve seen several projects that add wireless controllers to a variety of classic consoles. If you’ve got a ColecoVision that turns out to be beyond salvaging, you can always just build your own from scratch.