Makerbot Shows Off 3D Scanner

scan

We’ve said our piece over Makerbot and their interpretation of what Open Source means, but the fact remains if you’re sourcing a 3D printer for a high school shop class or a hackerspace, you really can’t do much better than a Makerbot Replicator. Apparently Makerbot is looking to expand their 3D design and fabrication portfolio; they just announced an upcoming 3D scanner at SXSW. It’s called the Makerbot Digitizer, and it takes real, 3D objects and turns them into CAD files.

Since Makerbot and [Bre Pettis] didn’t give out much information about the 3D scanner they’re working on, the best information comes from Techcrunch. The Makerbot Digitizer uses two lasers to scan real objects and turns them into 3D CAD files. The hardware isn’t finalized, and the prototype is made of a few pieces of laser cut plywood. No details are available on how much the Digitizer will cost, when it will be available, or what its resolution is.

Of course 3D scanning of real objects to translate them into CAD files is nothing new for Hackaday readers. We’ve seen our fair share of desktop 3D scanners, including one that was built in a day out of junk. Even the Kickstarter crew has gotten into the action with a few desktop 3D scanners, some of which scan in full color.

One-button Scan To Email Using Raspberry Pi

one-button-scan-to-email-raspberry-pi

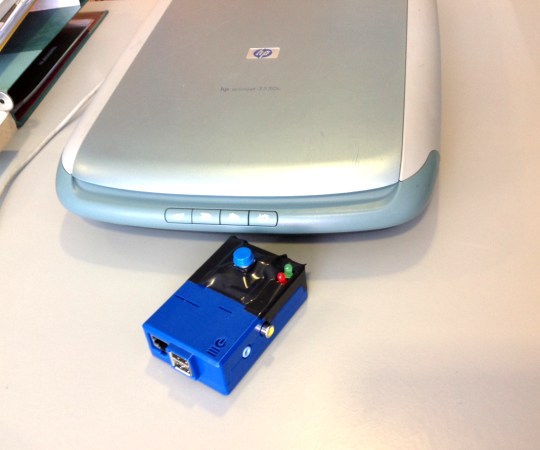
We’ve come across extremely expensive photocopiers that also fax, scan to email, and generally have too many features to list. [Eduardo Luis] figured out how to implement some of this type office magic using very inexpensive components. Specifically, he can press one button to scan a document and send it to an email address.

The user controls patch into the RPi GPIO header. There’s the button we already mentioned, a red LED for “System Busy”, and a green one for “System Status”. A set of scripts montor the button and drive the LEDs. When it’s time to scan, the RPi uses the scanimage package to capture a .PNM file, then converts it to .JPG before sending it via email using the mutt package.

We’d love to see a character LCD and a few more buttons added to the setup. This way you could select between different recipients (or even send via fax). And there’s always the possibility of connecting a printer to the other USB port on the RPi to make it work as a photocopier too.

You can catch a demo video after the jump.

Continue reading “One-button Scan To Email Using Raspberry Pi”

Camera Dollies Hacked Together By Stop Motion Filmmakers

A little bit of technology goes a long way when it comes to stop motion animation. In this case it’s a trio of simple camera dollies built during production of a short film called The Maker.

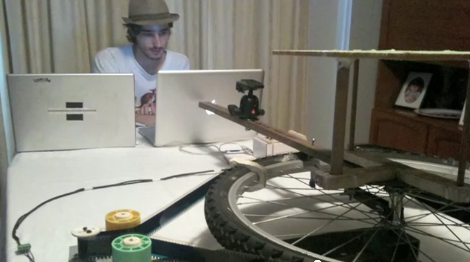
A Dolly is a method of mounting the camera so that it can be moved smoothly during a shot. Of course with stop motion the movement actually happens between the shots so it’s even more important that the camera be moved accurately. The video after the break shows off how they added CNC control for the camera. The first dolly was built from a pair of PVC pipes with a sled that moves along them. A motor moves a loop of 35mm film which is attached to the dolly. This is a great choice of materials since it doesn’t stretch and it’s free (one of the filmmakers is a projectionist). The next dolly is made from a flatbed scanner, and the final offering is seen above. Built from a bicycle wheel it provides a stationary platform above the hub for the models, while the camera rotates on an arm attached to the wheel. You can watch the complete film here.

If you’re looking for more inspiration check out this dual-axis PVC dolly project.

Continue reading “Camera Dollies Hacked Together By Stop Motion Filmmakers”

Scanning Turntable Digitizes Objects As 3D Models

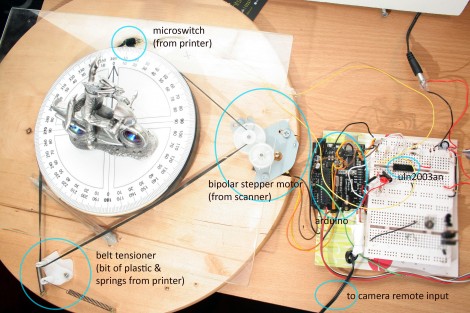
This turntable can automatically digitize objects for use in 3D rendering software like Blender3D. [James Dalby] built it using a high-quality DSLR, and some bits and pieces out of his junk box. The turntable itself is a Lazy Susan turned on its head. The base for the spinning model is normally what sits on the table, but this way it gives him an area to rest the model, and the larger portion acts as a mounting surface for the drive mechanism.

He used the stepper motor from a scanner, as well as the belt and tension hardware from a printer to motorize the platform. This is driven by a transistor array (a ULN2003 chip) connected to an Arduino. The microcontroller also controls the shutter of the camera. We’ve included his code after the break; you’ll find his demo video embedded there as well.

The concept is the same as other turntable builds we’ve seen, But [James] takes the post-processing one step further. Rather than just make a rotating gif he is using Autodesk 123D to create a digital model from the set of images.

Continue reading “Scanning Turntable Digitizes Objects As 3D Models”

Separating A Working Scanner From Its Broken Printer

The laser printer portion of this all-in-one machine gave up the ghost and [Entropia] couldn’t get it working again. But the scanner was still functioning so he decided to separate the scanner from its dead printer module.

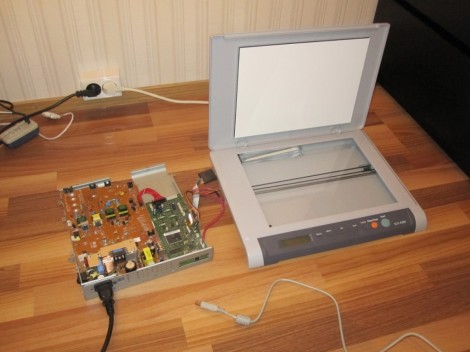
The model in question is a Samsung SCX-4200. The design is actually perfect for separation because the scanner sits on top of the out feed tray of the printer. It can even be lifted to allow more room for printed pages to pile up. All he has to do is separate the hinged connector and reroute the flat cables. But the real question in [Entropia’s] mind was whether or not the control board would work without the laser printer components connected to it.

He carefully disassembled the unit, spilling toner here and there which is left over from a catastrophic knock-off toner cartridge incident. A quick test showed him that although the drivers complain that the paper tray is open, the scanner does still work. He glued the controller board seen on the left to the bottom of the scanner enclosure, and added some felt feet. Now his scanner is closer to the size you’d expect. And on the plus side he gained a geared stepper motor, laser scanning unit, exhaust fan, and a couple of solenoids to use in future projects.

Getting A Home Built Scanner From ’92 Up And Running Again

In 1992, [Arpi] didn’t have much time for Ninja Turtles, Nintendos, and other wonderful wastes of time his fellow geeks were raised on. He was busy building a scanner for his Commodore 64. Although this very impressive build could have been lost to the sands of time, he pulled his project out of the attic for a “Try to use it again” party. Although this party is not a formal competition, we’re going to say that [Arpi] walked home that night with the most geek cred.

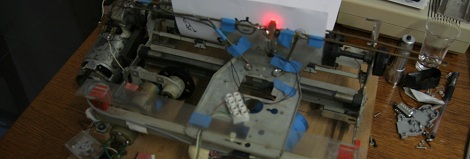
While there are no build details, there is a bunch of info to be gleaned from the gallery about how this machine was built. We’re pretty sure a good majority of the build was a typewriter at one point, and it looks like there’s a windshield wiper motor in there somewhere. Like this completely unrelated but similar build, [Arpi]’s scanner uses a photoresistor and a few LEDs to transfer image data to the custom software. In case you were wondering, yes, the ancient 5 1/4 floppy disk was still readable – one of the few advantages of the huge sectors on these disks.

Check out the videos of this scanner in action after the break, and if you’ve got a decades-old hack sitting in your attic (remember that acoustic modem you built?), send it in on the tip line.

Continue reading “Getting A Home Built Scanner From ’92 Up And Running Again”

Playing Classic 60s Tunes With An All Electronic Band

house-of-the-rising-sun

If you are considering repurposing some old computer equipment to create music, be aware that the bar has been raised just a tad. YouTube user [BD594] spent some time sifting through his bin of used electronics and put together a 5-piece band that plays a pretty awesome rendition of The Animals’ “House of the Rising Sun”.

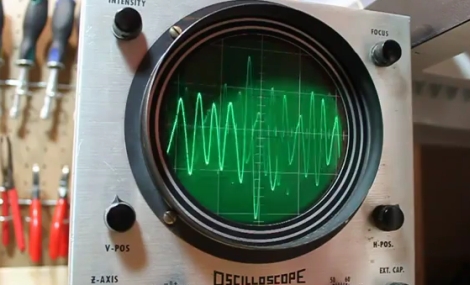
Last week, we saw a pretty impressive hack with a floppy drive that could bang out music using a calculator, but this takes things to a whole new level. [BD594] used an old HP ScanJet to simulate the song’s vocals, while an Atari 800XL combined with an oscilloscope is used as an organ. A Ti-99/4a is used in conjunction with another scope to play guitar notes, while a PIC-controlled hard drive does double duty, playing both the bass drum and cymbals.

We dare you to watch the video below and NOT be thoroughly impressed with his work.

[BD594] says that once he has a bit of free time, he’ll be putting out another video – something we’ll be anxiously waiting to see.

Continue reading “Playing Classic 60s Tunes With An All Electronic Band”