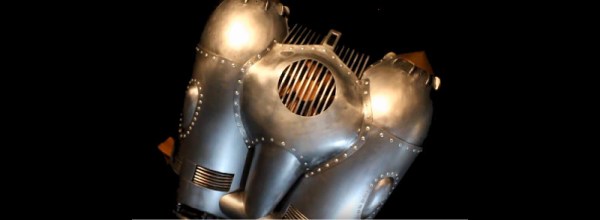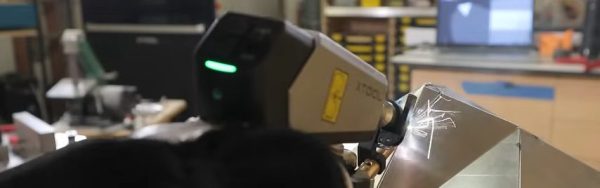
Laser Welding is apparently the new hotness, in part because these sci-fi rayguns masquerading as tools are really cool. They cut! They weld! They Julienne Fry! Well, maybe not that last one. In any case, perhaps feeling the need to cancel out that coolness as quickly as he possibly could, YouTuber [Wesley Treat] decided to make a giant version of his own head.
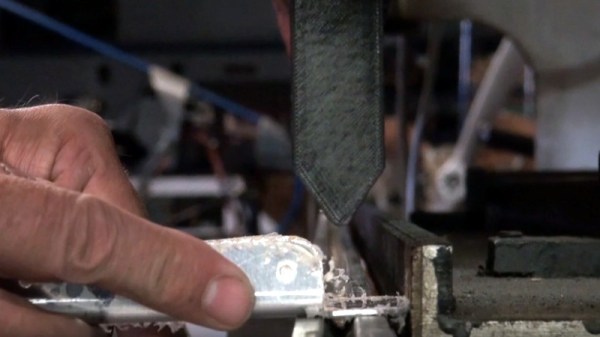
[Wesely] had previously been 3D scanned as part of the maker scans project, which you can find over on Printables. Those of you who really hate YouTubers, take note: finally you have something to take your frustrations out on. [Wesely] takes that model into Blender to decimate and decapitate– fans of the band Tyr may wonder if the model questioned his sword–before feeding that head through an online papercraft tool called PaperMaker to generate cut files for his CNC. There are also a lot of welding montages interspersed there as he practices with the new tool. [Wesely] did first try out his new raygun on steel in a previous video, but even knowing that, he makes the learning curve on these lasers look quite scalable.
While we’re not likely to follow in [Wesely]’s footsteps and create our own low-poly Zardoz– Zardozes? Zardii?– using a papercraft toolchain and CNC equipment with sheet aluminum is absolutely a great idea worth stealing. It’s very similar to what another hacker did with PCBs— though that project was perhaps more reasonable in scale and ego.
We are no strangers to papercrafts that use actual paper here, either, having featured everything from model retrocomputers to fully-mobile strandbeasts.
Continue reading “Laser Welding Helps YouTuber Get Ahead With Aluminum Sheet”