Building IoT Devices The Easy Way

Do you have a Raspberry Pi? What is it being used for right now? If you’re like the majority of people who replied to [Michael Hall’s] poll on Twitter, it’s likely yours is sitting on a shelf doing nothing too. So why not just turn it into an IoT device for your home?

[Michael] wrote an easy-to-follow guide focusing on getting the EdgeX Foundry IoT platform running on the Raspberry Pi. It is designed to be a unified multi-platform base for IoT devices hosted by the Linux Foundation, making it easy to control and integrate them into other systems. The framework for this consists of two parts, a Device Service running on your Pi, and the rest of the services running on a desktop or laptop where you’ll be monitoring it.

His guide goes into detail on how to get both parts working on your computer and your Pi using Docker for ease of installation. As for the IoT device, he uses the built-in PIR sensor example to show how to configure it without having to write any programming. You can then monitor the device’s sensors, which you can just connect straight to the Pi’s GPIO pins, from your desktop. Since the EdgeX software is designed to run on any flavor of Linux, this should make it easy to repurpose any forgotten single-board computer into the beginnings of a home automation system.

However, if you are confident in your programming skills, you’re probably looking for something slimmer such as the ESP8266 family of microcontrollers to do your bidding. Why not try an energy monitor or a smoke detector project with them?

Teardown: Quirky Egg Minder

Many of the biggest stars are hesitant to do sequels, believing that the magic captured the first time around is hard to reproduce in subsequent productions. As I’m known (at least around the former closet that now serves as my home office) as the “Meryl Streep of Teardowns”, I try to follow her example when it comes to repeat performances. But if they could get her to come back for another Mamma Mia film, I suppose I can take a look at a second Quirky product.

An elderly egg calls to inquire about euthanasia services.

This time around we’ll be looking at the Quirky Egg Minder, a smart device advertised as being able to tell you when your eggs are getting old. Apparently, this is a problem some people have. A problem that of course is best solved via the Internet of Things, because who wouldn’t pay $80 USD for a battery-powered WiFi device that lives in their refrigerator and communicates vital egg statistics to an online service?

As it turns out, the answer to that question is “most people”. The Egg Minder, like most of its Quirky peers, quickly became a seemingly permanent fixture of retailer’s clearance shelves. This particular unit, which I was able to pick up new from Amazon, only cost me $9.99. This is still more than I would have paid under normal circumstances, but such sacrifices are part and parcel with making sure the readers of Hackaday get their regular dose of unusual gadgetry.

You may recall that our last Quirky device, the “Refuel” propane tank monitor, ended up being a fantastically engineered and built piece of hardware. The actual utility of the product was far from certain, but nobody could deny that the money had been spent in all the right places.

What will the internals of the Egg Minder reveal? Will it have the same level of glorious over-engineering that took us by surprise with the Refuel? Will that zest for form over function ultimately become the legacy of these Quirky devices, or was it just a fluke? Let’s crack this egg and find out.

Continue reading “Teardown: Quirky Egg Minder”

Teardown: Refuel Propane Tank Monitor

Regular Hackaday readers will know that the clearance section of your local big box retailer is a great place to pick up oddball gadgets and gizmos for dirt cheap. In an era where manufacturers are rushing to make their products “smart” whether they need to be or not, the occasional ideas which fail to gain traction are just the cost of doing business. If you keep an eye out, you’re almost guaranteed to see one of these Internet of Things rejects collecting dust on a back aisle, often selling for pennies on the dollar.

Case in point, the “Refuel” propane tank monitor from Wink. Though there’s also logos for Quirky and GE on the package as well, and even a picture of the guy who came up with the idea. Essentially what we have here is a digital scale that reports the current weight of your grill’s propane tank to your phone via the Internet. A trick we might consider a fairly simple hack with a load cell and an ESP8266 under normal circumstances, but as this is a commercial product with an MSRP of $49.99 USD, its naturally been over-complicated to the point of absurdity.

Of course, one could simply lift the propane tank and get a decent estimate of its contents; a trick mastered by weekend grill masters since time immemorial. But then you wouldn’t have to make an account with Wink, or go through the very strange process of attempting to configure the device by using the flashing light of your smartphone’s screen (seriously). All so you can check how much propane is left in your grill while you’re away from home. You know, as one does.

Frankly, it’s hard for me to imagine who would actually have purchased such a thing at full retail. But of course, that’s likely why I was able to pick it up for the princely sum of $5. At that price, we can’t afford not to take a peek into this gizmo from Wink, Quirky, GE, and Anthony from Boston.

Continue reading “Teardown: Refuel Propane Tank Monitor”

Hack My House: UL Certification And Turning The Lights On With An ESP8266

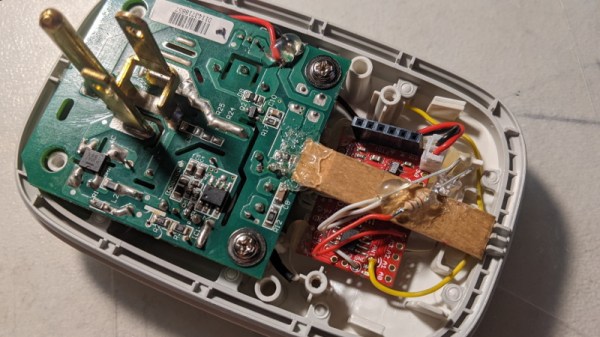
It’s hard to imagine a smart house without smart lighting. Maybe it’s laziness, but the ability to turn a light on or off without walking over to the switch is a must-have, particularly once the lap is occupied by a sleeping infant. It’s tempting to just stuff a relay in the electrical boxes and control them with a Raspberry Pi or micro-controller GPIO. While tempting, get it wrong and you have a real fire hazard. A better option is one of the integrated WiFi switches. Sonoff is probably the most well known brand, producing a whole line of devices based on the ESP8266. These devices are powered from mains power and connect to your network via WiFi. One disadvantage of Sonoff devices is they only work when connected to Sonoff’s cloud.

Light switches locked in to a cloud provider are simply not acceptable. Enter Tasmota, which we’ve covered before. Tasmota is an open source firmware, designed specifically for Sonoff switches, but supporting a wide range of ESP8266 based devices. Tasmota doesn’t connect to any cloud providers unless you tell it to, and can be completely controlled from within a local network.

Certifications, Liability, and More

We’re well acquainted with some of the pitfalls of imported electronics, but one of the lesser known problems is the lack of certification. In the United States, there are several nationally recognized testing laboratories: Underwriters Laboratories (UL) and Intertek (ETL) are the most prominent. Many  imported electronic devices, including Sonoff devices, do not have either of these certifications. The problem with this is liability, should the worst ever happen and an electrical fire break out. The Internet abounds with various opinions on the importance of the certification — a missing certification mark is somewhere between meaningless and a total hazard. The most common claim is that a house fire combined with non-certified equipment installed would result in an insurance company refusing to pay.

Rather than just repeat this surely sage advice from the Internet, I asked my insurance agent about uncertified equipment in the case of a fire. I discovered that insurance agencies avoid giving definite answers about claim payments. The response that came back was “it depends”: homeowner’s insurance covers events that are accidental and sudden. If a homeowner was aware that they were using uncertified equipment, then it could be categorized as “not an accident”. So far, the myth seems plausible. The final answer from the insurance agency: it’s possible that a non UL-certified device could result in denial of payment on a claim, but it depends on the policy and other details– why take the risk? Certification marks make insurance companies happier.

I also talked to my city’s electrical inspector about the issue. He commented that non-certified equipment is a violation of electrical code when it is hard-wired into a house. He echoed the warning that an insurance company could refuse to pay, but added that in the case of injury, there could be even further liability issues. I’ve opted to use certified equipment in my house. You’ll have to make your own decision about what equipment you’re willing to use.

There are some devices on Amazon that claim to have certification, but searching the certification database leads me to believe that not all of those claims are valid. If in doubt, there is a searchable UL database, as well as a searchable Intertek database.
Continue reading “Hack My House: UL Certification And Turning The Lights On With An ESP8266”

Yell At Your Desk To Get Up In The Morning

Standing desks are great conversation starters in the office – whether you like it or not. How do you know someone’s got a standing desk? Don’t worry, they’ll tell you. Standing desks have their benefits, but for maximum flexibility, many people choose a desk that can raise and lower depending on their needs. [Wassim] had just such a desk, but found pushing the buttons too 20th century for his tastes. Naturally, Google Assistant integration was the key here.

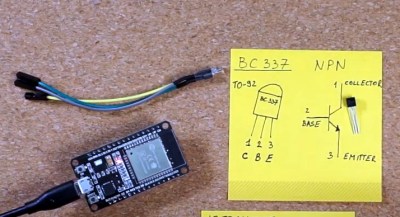
[Wassim] started out intending to capture and then spoof the desk controller’s signals to the motors, before realising it was likely easier to simply spoof button presses instead. This was achieved through a handful of NPN transistors and an Onion Omega2+ microcontroller board. Then it was a simple case of coding the controller to press the various buttons in response to HTTP requests received over WiFi. Google Assistant integration was then handled with IFTTT, though [Wassim] also discusses the possibility of implementing the full Smart Home API.

It’s entertaining to watch [Wassim] issue commands and have the desk slowly rise in response. Of course, there are other approaches, like this sneaky use of PVC to hack the office furniture.

https://medium.com/@wassimchegham/hey-google-set-my-desk-to-standing-mode-b21dcc40d4b5

ESP8266 AC Controller Shows Whats Possible

People often get the impression that home built hardware is destined to have a certain amateurish look or feel to it. It’s as though just because you didn’t buy it in a store, it will look cheap or thrown together. While it’s true a hacked together device could look like it was built from the parts bin (and to be fair, sometimes it is), there are plenty of examples of DIY hardware that could give commercial offerings a run for their money.

A case in point is this fantastic ESP8266 air conditioner controller created by [Sitinut Waisara] (Google Translate). Between the simple yet elegant 3D printed enclosure to the very slick user interface on its OLED screen, this project could easily pass as a commercial device. In fact, we’ve seen commercial offerings that didn’t look half this good, let alone offer the same features for what this cost in components and printer filament. It’s a perfect example of what the modern hacker or maker is capable of with the wide array of tools and components currently available to us.

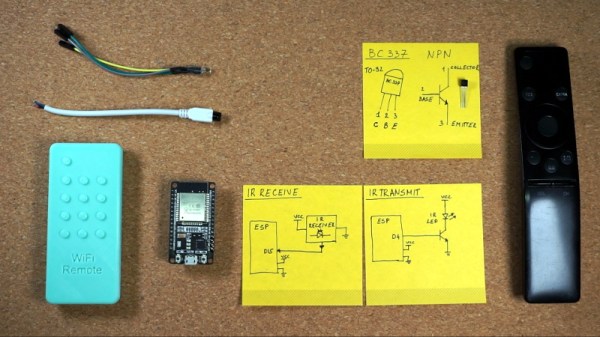
What’s perhaps the most impressive about this project, especially given how good it looks on the outside, is how little there really is on the inside. Beyond the NodeMCU board and SSD1332 OLED display, the only components inside the device are the three tactile buttons, a photoresistor so it can dim the display’s brightness based on ambient light level, an IR LED so it can send commands to the AC unit, and a handful of passives. The hardware side of this design is so simple that [Sitinut] was able to put the whole thing together on a scrap of perfboard. Not that you’d be able to tell when it gets installed into the 3D printed wall-mount enclosure, complete with printed button caps.

While the hardware side of the project might be rather light, the software is anything but. [Sitinut] really went all-in writing his code for the ESP, adding in the little features like the automatic screen dimming and pulling the current time from NTP that often get overlooked in our rush to get a project out the door. He even included a whole collection of icons to display on the OLED screen, which goes a long way towards selling that professional look. But his effort wasn’t limited to cosmetics or clever features, there was also plenty of work put into decoding the IR signals used to control the AC unit and getting all the features and functions plugged into MQTT.

We’ve seen a number of projects that aimed at dragging an existing HVAC system kicking and screaming onto the “Internet of Things”, some considerably less complex than others. But few have had the level of polish that [Sitinut] has put into his controller, so we take our hats off to him.

Continue reading “ESP8266 AC Controller Shows Whats Possible”

Controlling Non-Googley Devices With Google Assistant

In the near future of the Smart Home, you will be able to control anything with your voice. Assuming that everything supports the Smart Home standard you chose, that is. If you have a device that supports one of the other standards, you’ll end up uselessly yelling at it. Unless you use gBridge. As the name suggests, gBridge is a bridge between Google Assistant devices and the rest of the smart home universe. It’s an open source project that is available as a Docker image can be run on a low power device in the home, or on a hosted service.

Fundamentally, gBridge is a Google Assistant to MQTT translator. Message Queuing Telemetry Transport (MQTT) is the messaging protocol that many smart home devices use, as it runs over TCP and doesn’t take much power to implement. We’ve covered how to bash around in MQTT and do much of this yourself here, but gBridge looks to be somewhat easier to use. It’s just come out of beta test, and it looks like it might be a good way to get into Smart Home hacking.

There are, of course, plenty of other ways of doing this, such as IFFFT, but [Peter Kappelt], the brains behind gBridge, claims that it is more flexible, as it offers support for the whole Google Assistant vocabulary, so you can do things like put devices into groups or do more conditional control (such as if the light level in the hallway rises above a certain amount, start recording with a camera) with non-Google devices. [Peter] is also looking to run gBridge as a hosted service, where he does the behind the scenes stuff to update servers, etc, in return for a small fee.

Continue reading “Controlling Non-Googley Devices With Google Assistant”