3D Printing Transmission Line Speakers

Anyone who has played with speakers on the workbench knows the huge difference enclosure design makes to the frequency response of an audio system. Speakerheads spend hours tinkering with designs and calculations, aiming to get the best out of a given set of drivers. [HexiBase] decided to try some experiments of his own, running into some hurdles along the way.

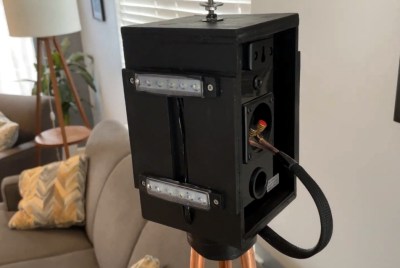
[Hexibase] aimed to 3D print a compact transmission line design, to suit a pair of 1 1/8″ full-range drivers. Being aware of the benefits of high-resolution resin 3D printing, he set out to print a design taking full advantage of the build volume of his Longer 3D Orange 30 printer. Unfortunately, after much fiddling with slicer settings, the printer turned out to have a fundamental fault, leading to unusable prints.

Undeterred, [Hexibase] switched to using his Longer FDM model instead. Printing out the enclosures in PLA. he noted that the different material will have a slightly altered frequency response than originally intended. Regardless, the final result sounds great, and barring some higher-frequency anomalies, the output correlates well with the mathematical model of expected performance.

3D printers make great tools for budding speaker builders, as they make constructing advanced geometries a cinch. Of course, you can even try and 3D print the drivers themselves if you’re so inclined. Video after the break.

Continue reading “3D Printing Transmission Line Speakers”

Swap Your Microwave For A High Voltage Stereo

When building a new project, common wisdom suggests to avoid “reinventing the wheel”, or doing something simple from scratch that’s easily available already. However, if you can build a high-voltage wheel, so to speak, it might be fun just to see what happens. [Dan] decided to reinvent not the wheel, but the speaker, and instead of any conventional build he decided to make one with parts from a microwave and over 6,000 volts.

The circuit he constructed works essentially like a Tesla coil with a modulated audio signal as an input. The build uses the high voltage transformer from the microwave too, which steps the 240 V input up to around 6 kV. To modulate that kind of voltage, [Dan] sends the audio signal through a GU81M vacuum tube with the support of a fleet of high voltage capacitors. The antenna connected to the magnetron does tend to catch on fire somewhere in the middle of each song, so it’s not the safest device around even if the high voltage can be handled properly, but it does work better than expected as a speaker.

If you want a high-voltage speaker that (probably) won’t burn your house down, though, it might be best to stick to a typical Tesla coil. No promises though, since working with high voltages typically doesn’t come with safety guarantees.

Continue reading “Swap Your Microwave For A High Voltage Stereo”

Cheap Speakers Sound Good With Easy Open Baffle Design

If you’ve spent any time around audio gear at all, you’ll know that enclosure design is as critical as the speaker drivers themselves. [Frank Olson] demonstrates this ably, with his open baffle design for some cheap off-the-shelf speakers.

[Frank]’s aim was to do a comparison between using no enclosure, and an open baffle design, with a pair of 2″ full-range speakers. These drivers are nothing special; just a low-cost part that you’d find in any cheap set of computer speakers. [Frank] screws the drivers into a thin, flat wooden board, and then adds a supporting strut to allow the speakers to stand on their own.

The comparison makes it clear that even this basic baffle design makes a big difference to perceived sound quality. Bass is fuller, and the sound is far improved thanks to the baffle blocking out of phase sounds from the rear of the speaker.

It’s a technique that could prove useful to anyone quickly trying to rig up an audio setup for the workshop or makerspace out of leftover parts. We’ve featured similar projects before that espouse the benefit of enclosure design when using even very affordable speakers. Video after the break.

Continue reading “Cheap Speakers Sound Good With Easy Open Baffle Design”

Brass And Nickel Work Together In This Magnetostrictive Earphone

When you go by a handle like [Simplifier], you’ve made a mission statement about your projects: that you’ll take complex processes and boil them down to their essence. So tackling the rebuilding of the humble speaker, a device he himself admits is “both simplified and optimized already,” would seem a bit off-topic. But as it turns out, the principle of magnetostriction can make the lowly speaker even simpler.

Most of us are familiar with the operation of a speaker. A powerful magnet sits at the center of a coil of wire, which is attached to a thin diaphragm. Current passing through the coil builds a magnetic field that moves the diaphragm, creating sound waves. Magnetostriction, on the other hand, is the phenomenon whereby ferromagnetic materials change shape in a magnetic field. To take advantage of this, [Simplifier] wound a coil of fine copper wire around a paper form, through which a nickel TIG electrode welding filler rod is passed. The nickel rod is anchored on one end and fixed to a thin brass disc on the other. Passing a current through the coil causes the rod to change length, vibrating the disc to make sound. Give it a listen in the video below; it sounds pretty good, and we love the old-time look of the turned oak handpiece and brass accouterments.

You may recall [Simplifier]’s recent attempt at a carbon rod microphone; while that worked well enough, it was unable to drive this earphone directly. If you need to understand a little more about magnetostriction, [Ben Krasnow] explained its use in anti-theft tags a couple of years back.

Continue reading “Brass And Nickel Work Together In This Magnetostrictive Earphone”

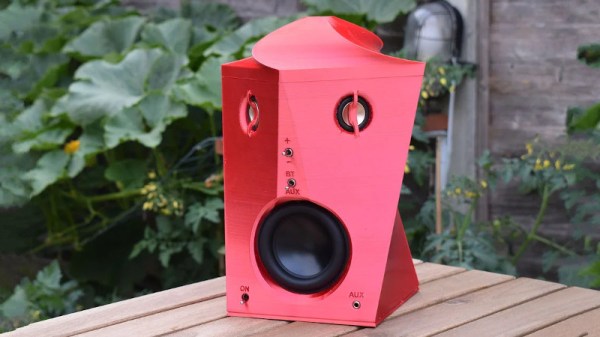
A Transmission Line Speaker With The Design Work To Back It Up

We love the world of audiophiles here at Hackaday, mostly for the rich vein of outrageous claims over dubious audio products that it generates. We’ve made hay with audiophile silliness in the past, but what we really like above that is a high quality audio project done properly. It’s one thing to poke fun at directional oxygen free gold plated USB cables, but it’s another thing entirely to see a high quality audio project that’s backed up by sound design and theory to deliver the best possible listening. [Davide Ercolano]’s transmission line speakers are a good example, because he’s laid out in detail his design choices and methods in their creation.

Starting with the Thiele-Small parameters of his chosen driver, he simulated the  enclosure using the Hornresp software. As a 3D-printed design he was able to give it paraboloid curves to the convoluted waveguide, making it a much closer approximation to an ideal waveguide than a more traditional rectangular design. In the base is a compartment for an amplifier module, with additional Bluetooth capability.

We’d be curious to know how well 3D printed plastic performs in this application when compared for example to something with more mass. However we like these speakers a lot; this is how a high quality audio project should be approached. We’ve delved into speakers more than once in the past, but if you’re looking for something really unusual then how about an electrostatic?

Patterned Plywood Makes For Attractive Speakers

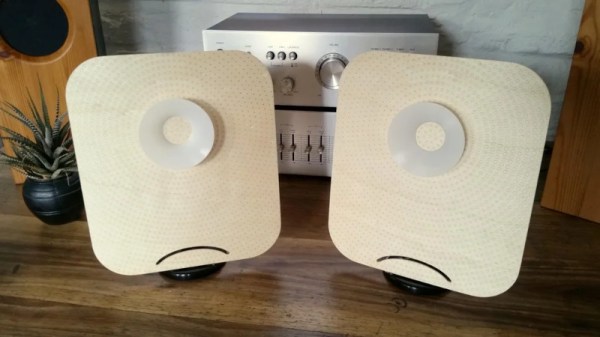
In the matter of audio, we’re well past the reign of the home hi-fi and the boombox. If you’re not listening on headphones or directly on your phone, you’ve got a brick-sized Bluetooth speaker pumping out the tunes. Still a fan of the old-school, [Amanda Ghassaei] built some bookshelf speakers with a hip aesthetic.

First, the speaker enclosures were designed in WinISD, a software package specifically made for the task. For given woofers and tweeters, it helps get the enclosure and port sizes in the correct range for good sound. Panels were then fabricated out of plywood to make the enclosures. The plywood was cut and reformed several times to make the panels, using the pattern from the multiple plies to create the zig-zag look. Audio wise, a class D amplifier takes in line-level signals, before pumping them out to a woofer and tweeter through a custom designed crossover network.

It’s a tidy build, and we’d love to experiment ourselves with the fancy patterned plywood technique. Getting your enclosure design right can make a big difference to sound quality, as we’ve seen before. Video after the break.

Continue reading “Patterned Plywood Makes For Attractive Speakers”

A Tin Can Phone, But With Magnets

The tin can phone is a staple of longitudinal wave demonstrations wherein a human voice vibrates the bottom of a soup can, and compression waves travel along a string to reproduce the speaker in another can at the other end. All the parts in this electrical demonstration are different, but the concept is the same.

Speakers are sound transducers that turn electrical impulses into air vibrations, but they generate electricity when their coil vibrates. Copper wires carry those impulses from one cup to another. We haven’t heard of anyone making a tin can phone amplifier, but the strictly passive route wasn’t working, so an op-amp does some messy boosting. The link and video demonstrate the parts and purposes inside these sound transducers in an approachable way. Each component is constructed in sequence so you can understand what is happening and make sense of the results.

Can someone make a tin can amplifier transformer? We’d like to see that. In another twist of dual-purpose electronics, did you know that LEDs can sense light?

Continue reading “A Tin Can Phone, But With Magnets”